Ever wanted to snap a photo of a whiteboard and then edit the text on a computer? In this week’s One Minute Wednesday, Yung Min will be discussing a great mobile app called Office Lens. Office Lens turns your phone into a mobile scanner that can take photos and then transfer them into editable documents and pictures in Microsoft Office applications. Tune in to learn more!
Capturing An Image With Office Lens
In today’s blog post, we’ll be giving you step by step instructions on the basic functionality of capturing and transferring images in the Office Lens app. The app allows you to capture images on your mobile device, then upload and edit it across Microsoft Office programs. In this example, we’ll work with a whiteboard.
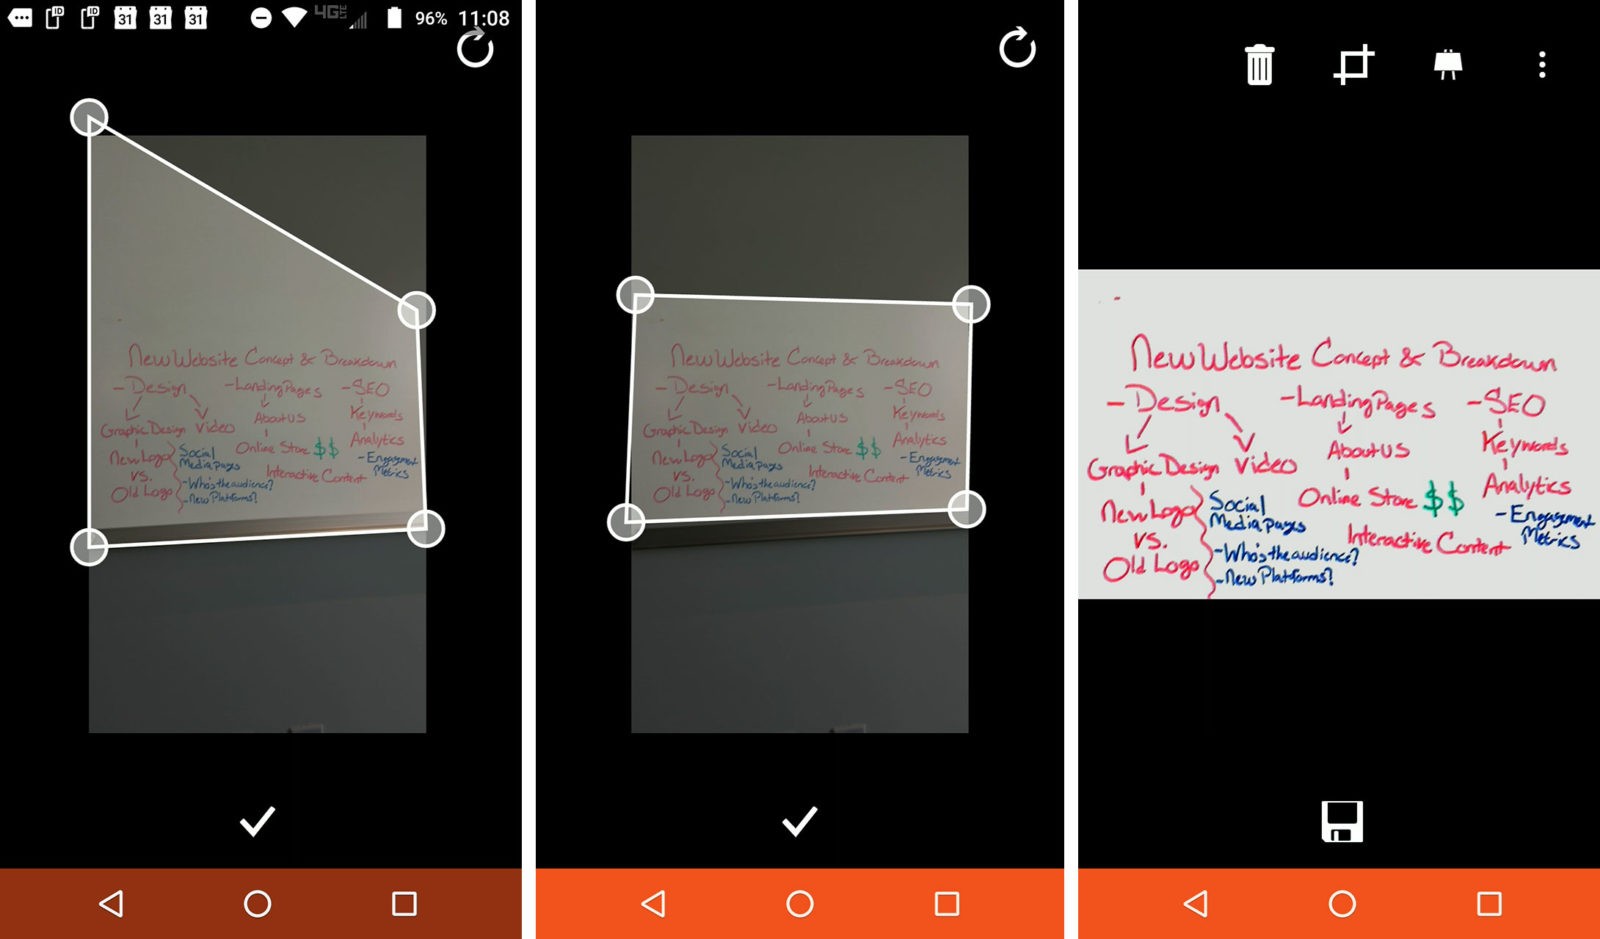
When the app is opened, a white border will wrap itself around the object you are capturing. When you are happy with the way it looks, click the camera icon at the bottom of the page and Office Lens will capture the image.

The four corners of the whiteboard picture are now adjustable and you can crop the picture to your liking. At the point that you finally have the picture cropped, click the save icon at the bottom of the page.
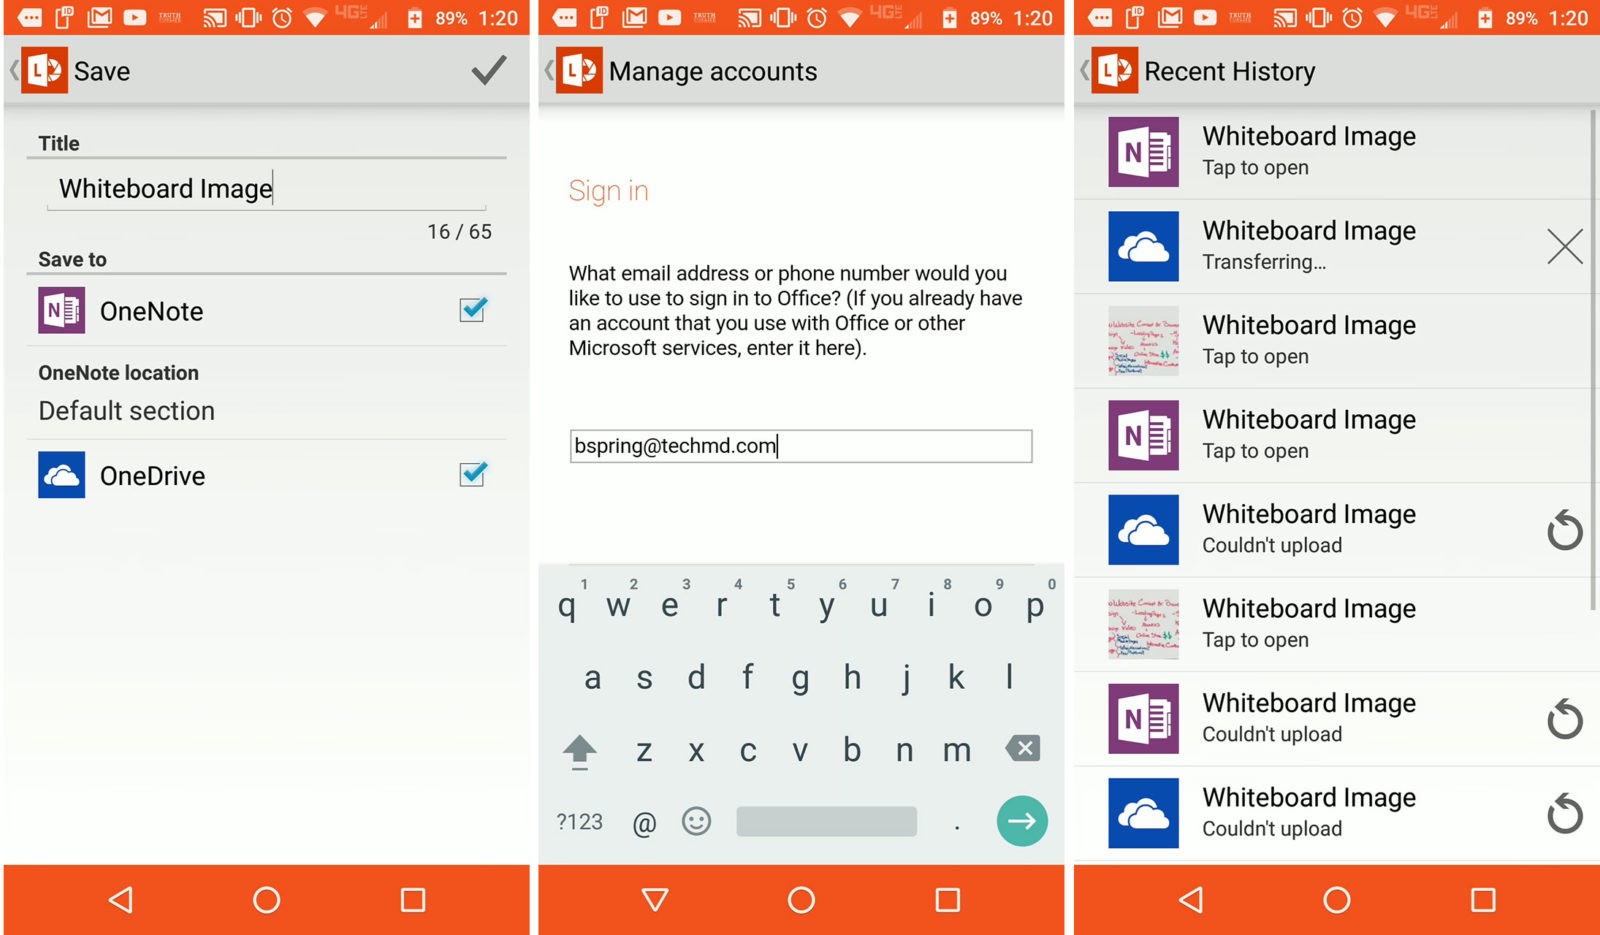
Office Lens will take you to the Save page, where you can rename the image and then choose which Microsoft Office Applications you want to save the image in. Simply hit the checkboxes on the right side of the screen next to each application. Finally, hit the checkbox icon.
The app will now take you to a sign in page where you will be prompted to enter into your Microsoft Office account. Sign in. Then, Office Lens will transfer your image into OneDrive and the respective Microsoft Office program.
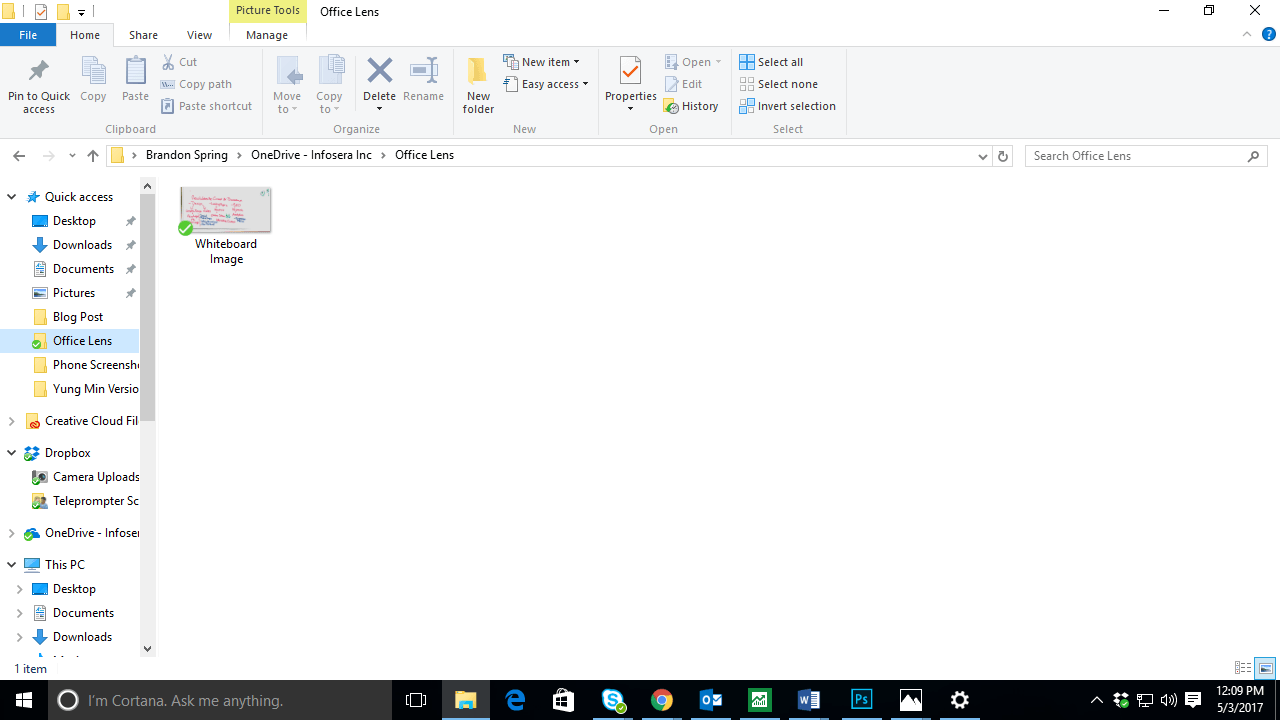
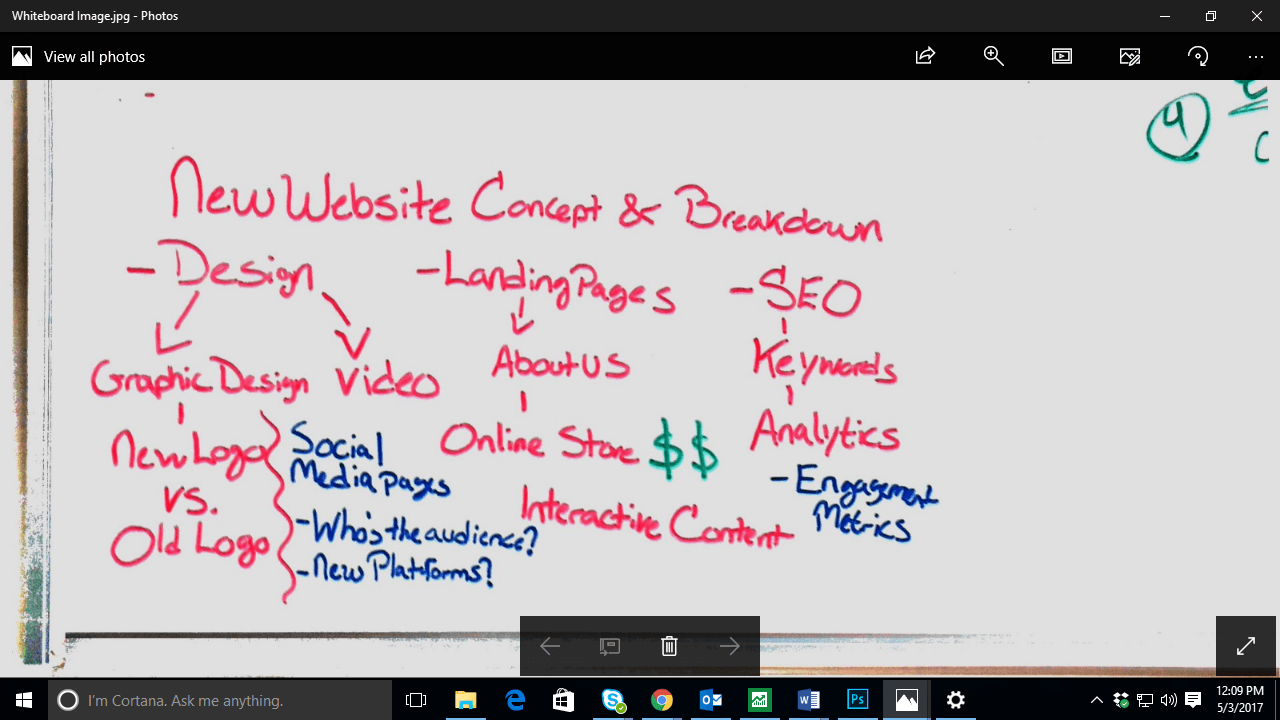
Finally, you can navigate to the OneDrive folder on your desktop and find the Office Lens folder. In that folder, you’ll find the image you saved and can successfully open it in the program it was saved in.