
Outlook offers users a great feature called “Rules”, which can automate certain actions with your emails with just a few steps. These rules can be used in a variety of ways to organize your inbox and manage your incoming emails in order to save you time, categorize important messages and get rid of junk.
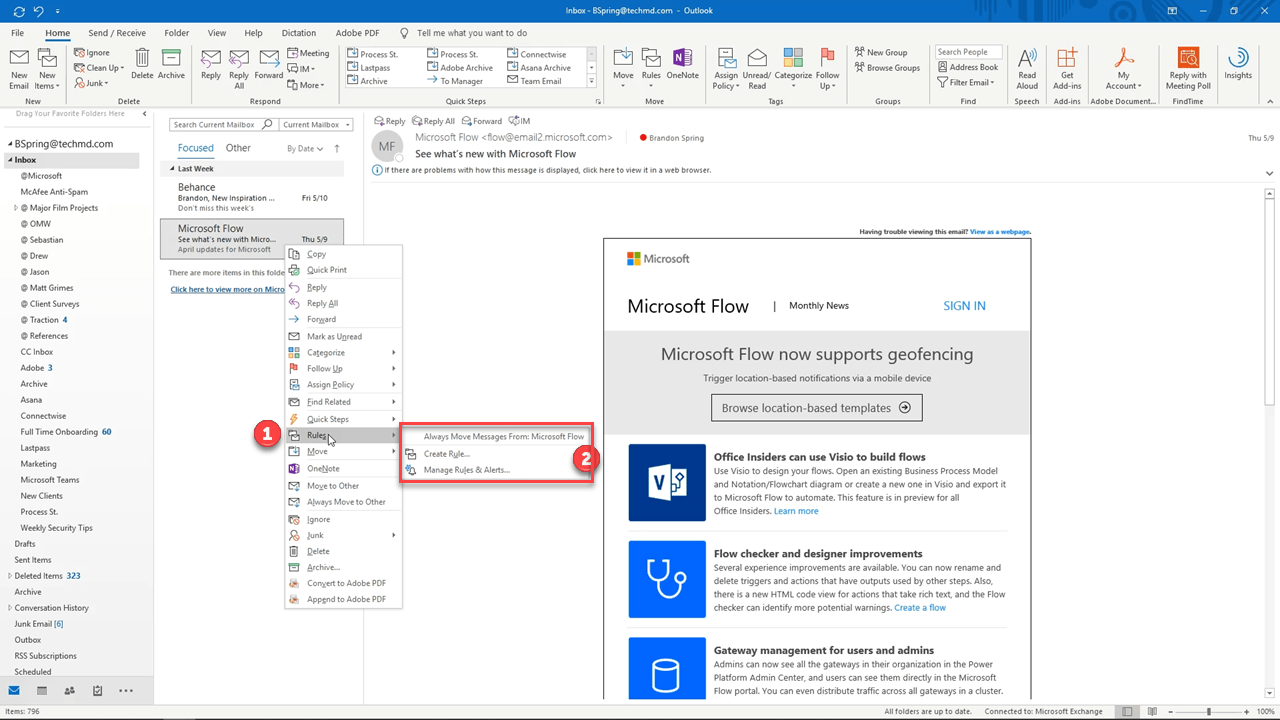
Today, we’ll look at how to build a rule that places messages from a particular contact or contains a certain subject into a designated folder. To start, you’ll need to create a new folder, simply by right clicking on your inbox and hitting “New Folder”. When created, right click your chosen email and hit rules in the menu that appears. Then, click “Create Rule”.
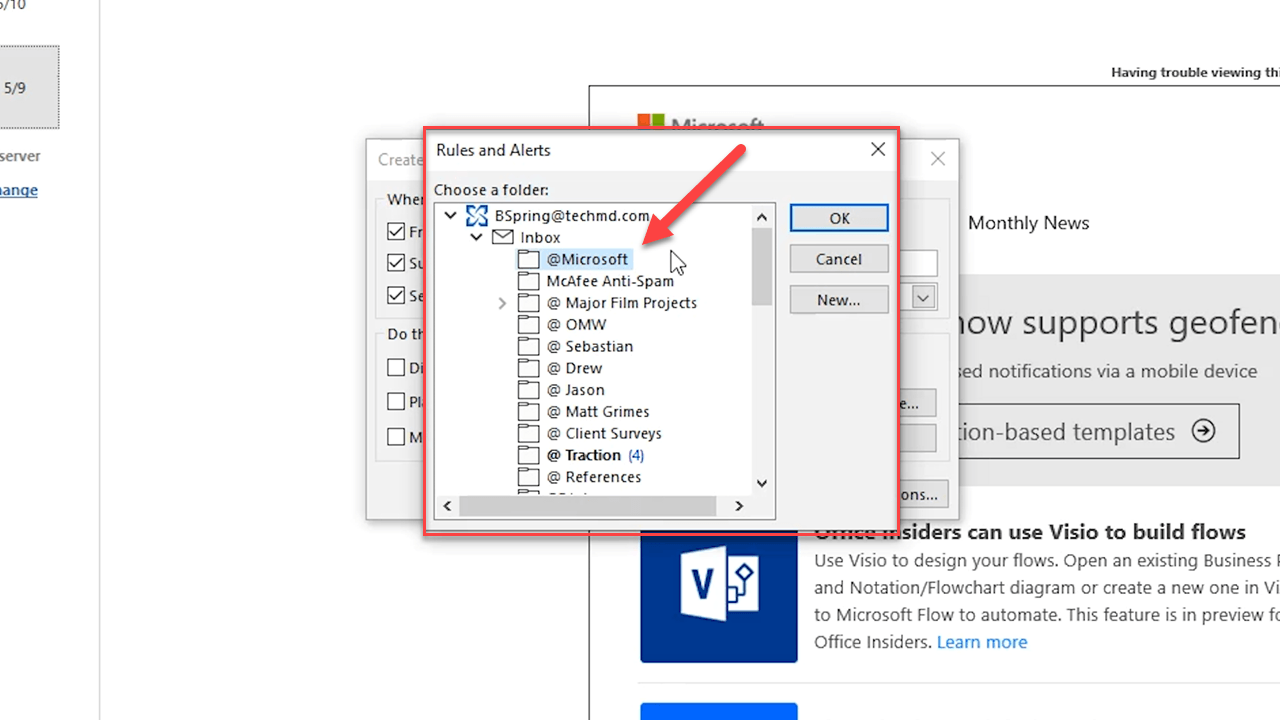
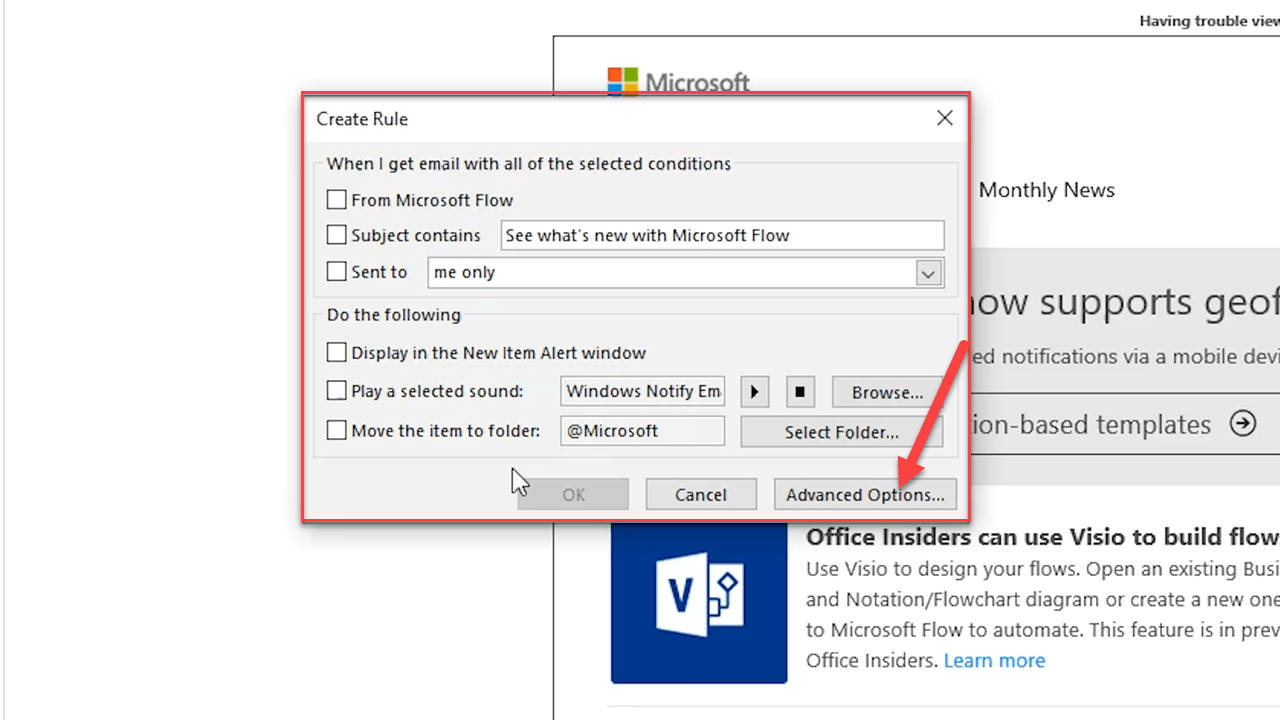
A new window appears where you can now customize the rule with the checkboxes that appear on the side. These will set the parameters for which messages will be moved. Then, hit the Select Folder button to choose where the emails will be housed; let’s pick the new folder we created.
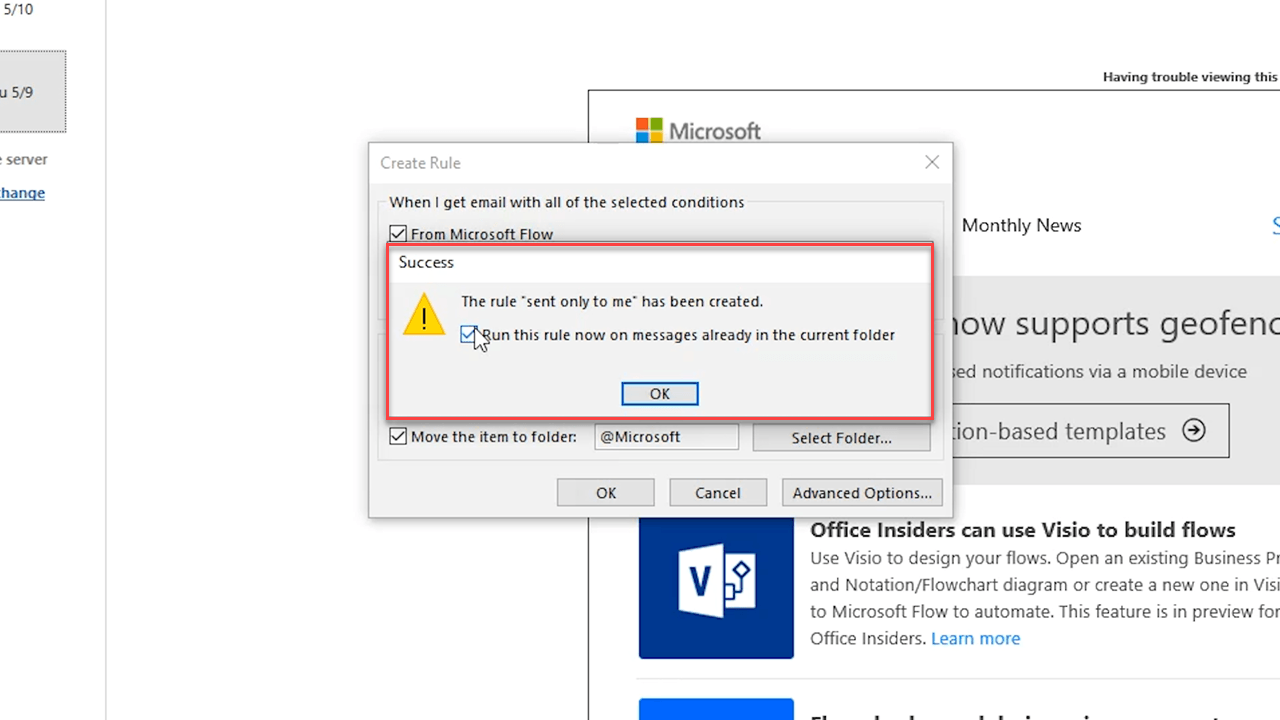
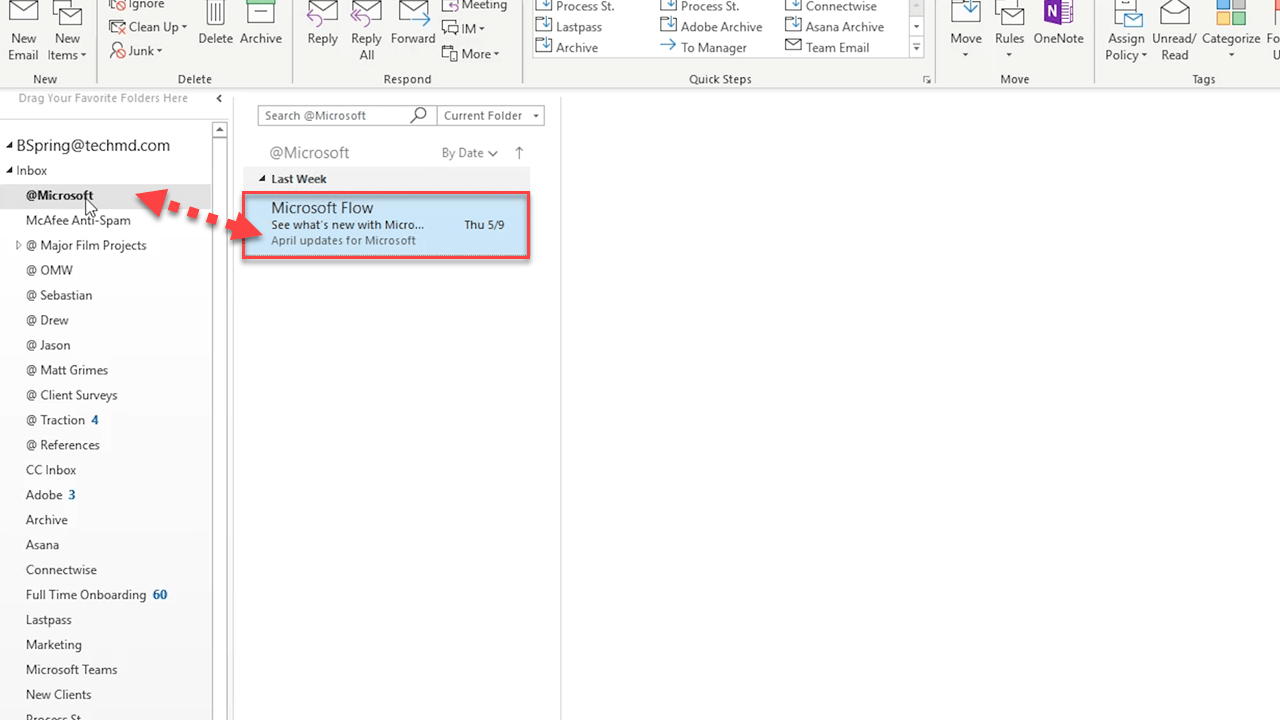
Hit OK and the rule will go into effect, moving the message from your main inbox to the newly made folder. The neat thing about this feature is that any future messages that contain the conditions we set (contact, subject, etc.) will automatically land here when they are sent.
Another cool feature is the Advanced Options menu, which allows us to further customize the rule to take certain actions, such as being assigned to a category, be labeled as a task and more.
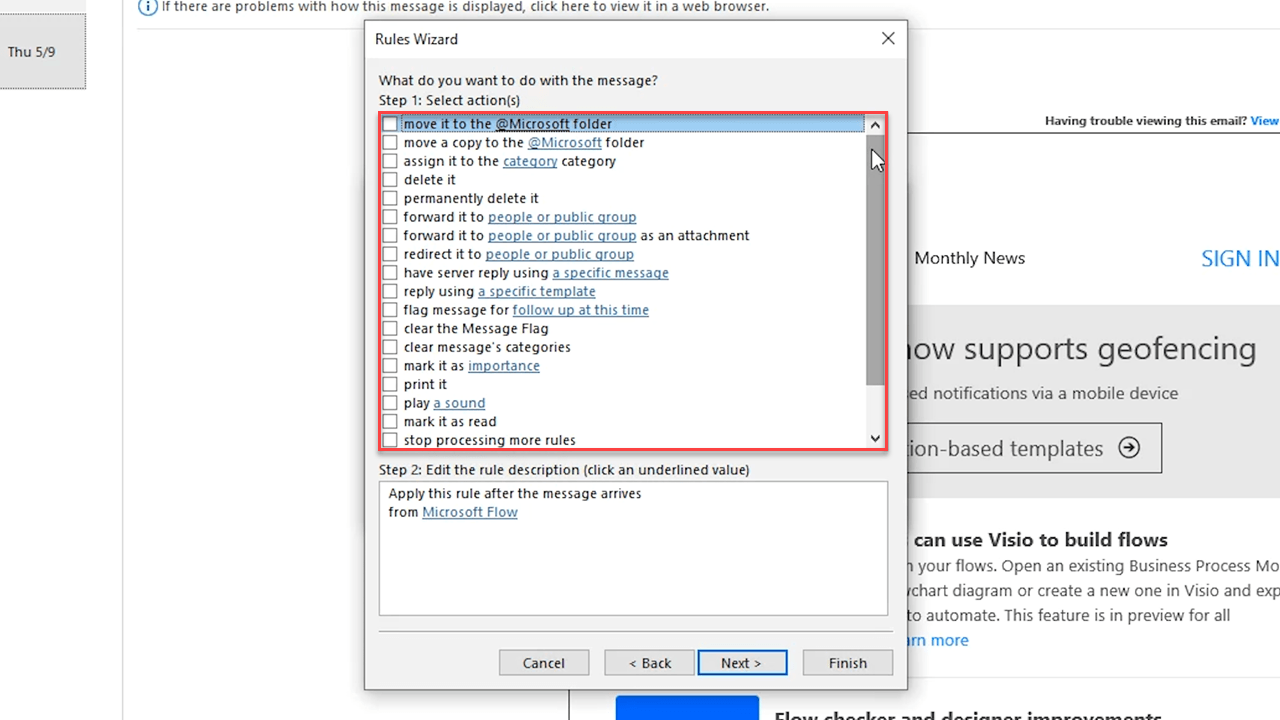
Review the list to see which action in the Advanced Options can provide the best solution for what you need to happen within your inbox.
So that’s an overview of how to quickly use Outlook rules to organize the messages in your inbox. Tune in next week for more!


