Last week on One-Minute Wednesday, we discussed using search folders to pull up emails that fit a predefined search criteria. This week, Jackson Roberts will be showing you how to customize those Outlook search folders, allowing you to organize your inbox with highly-targeted search terms. The possibilities here are endless, so if you’re looking to take control of your inbox, don’t miss this episode!
Creating A Custom Search Folder in Outlook
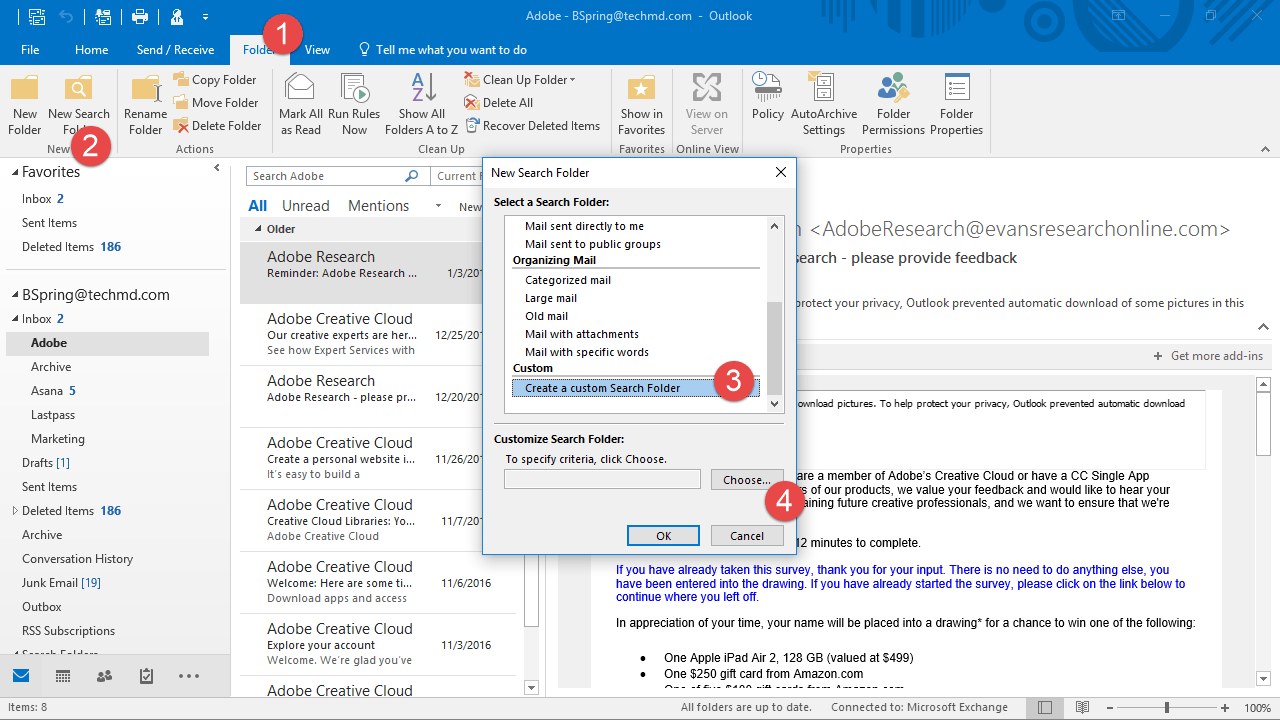
First, navigate to the “Folder” tab, click “New Search Folder” and a new window will appear. Scroll down to “Create a custom Search Folder”, then click the button that reads “Choose”.
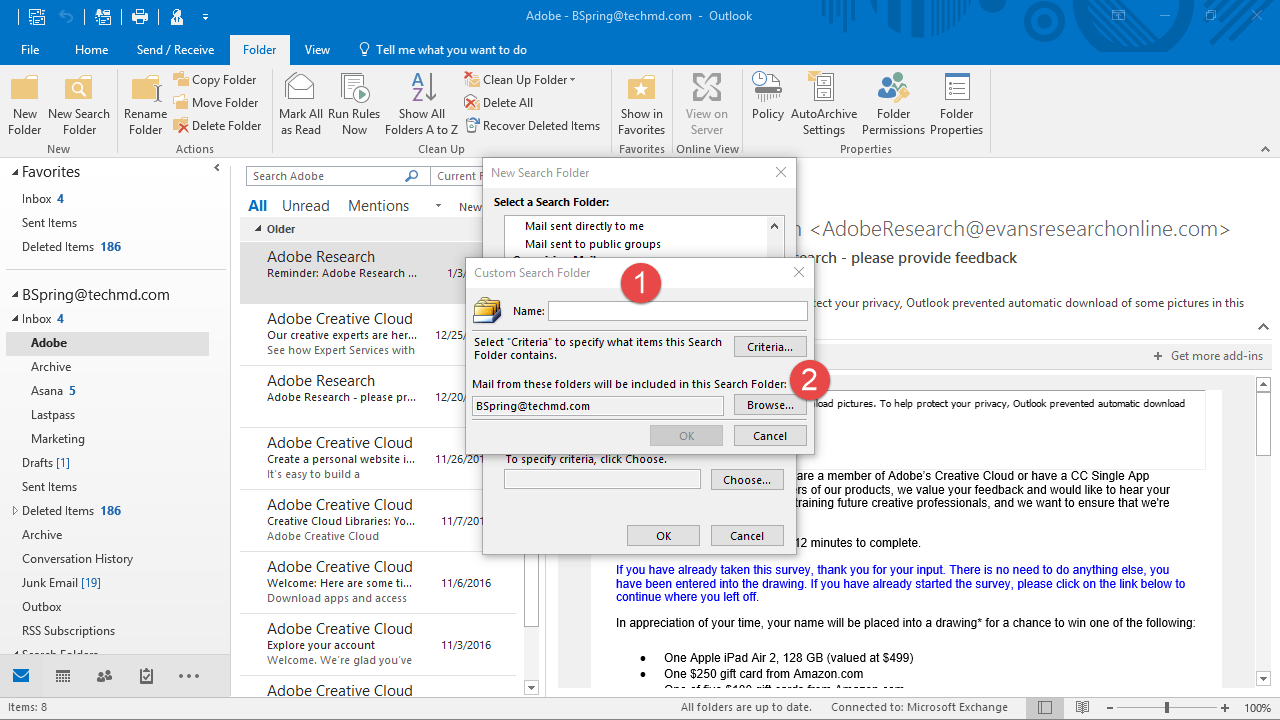
Another window will popup. Type in the name of your designated folder. Then click “Criteria”.
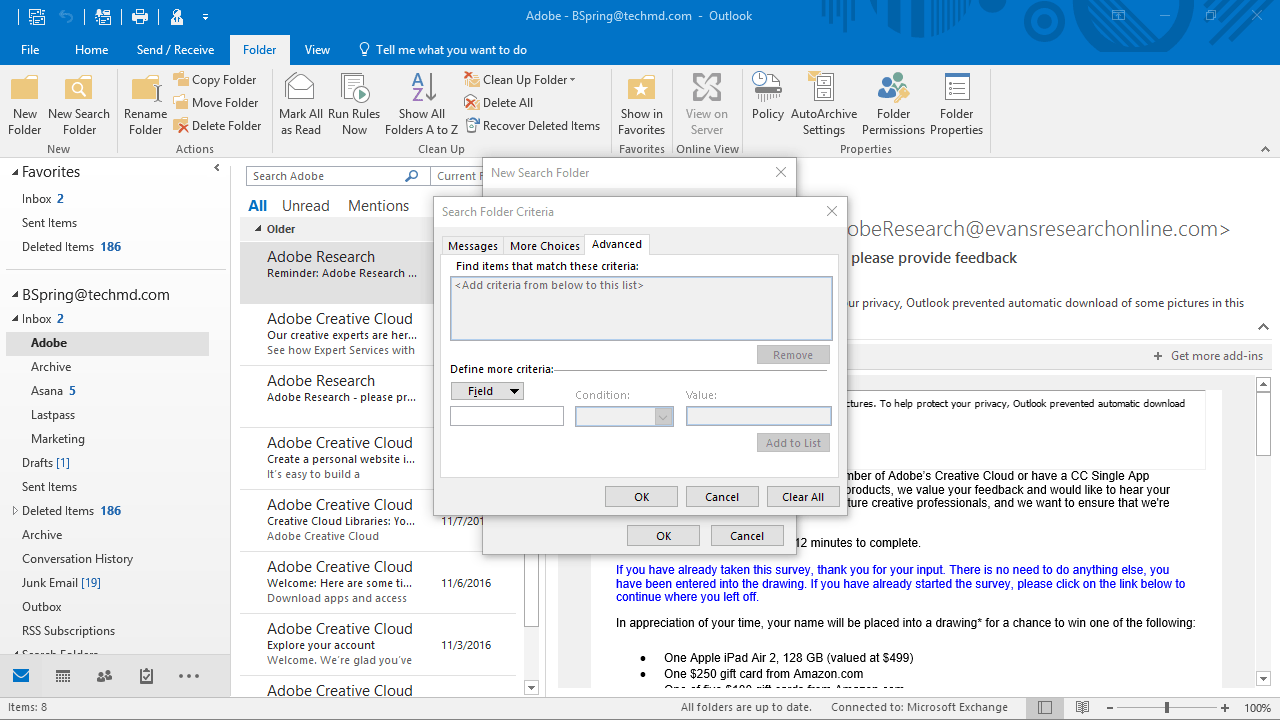
When the “Criteria” window opens, click the Advanced Tab. Go to the drop-down menu that reads “Field”, and in it you will find a list of options go to “Frequently used fields”. There will then be a sub menu with another long list; simply click “Subject”.
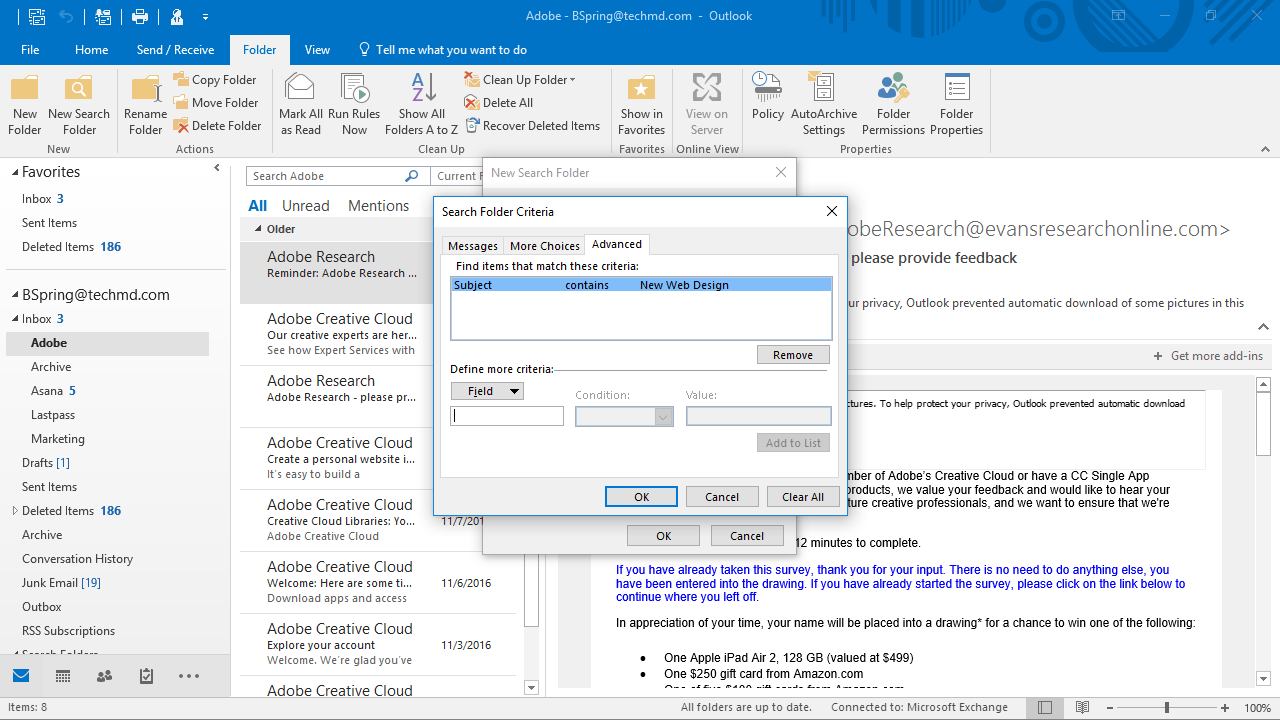
Now, in the field that reads “Value”, type in the name of what you’d like the folder to contain. Again, we’ll use “New Wed Design”. Then, click “Add to List”. More values and search terms can be added as well if you’d like. Then hit “OK” until these windows close and you return to your inbox.
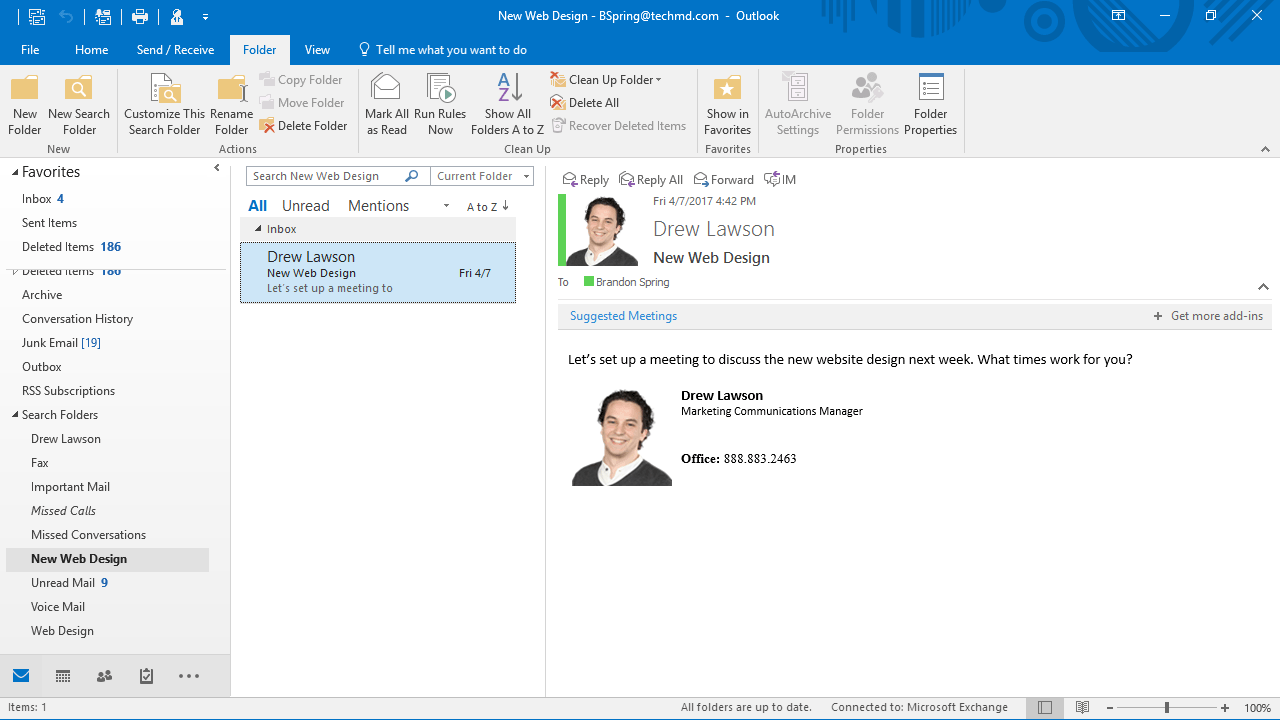
Once you’ve hit “OK” and all the windows disappear, Outlook will show your newly created folder and its contents. All the emails you’ve received that have the value you input will appear here, and in this case, we used the term “New Web Design”.
Now you can stay productive and efficient as Outlook organizes your emails in your custom folder based on your needs!


