This week on One-Minute Wednesday, Isaac McIntosh will be showing you how to create a few examples of Outlook search folders. These folders allow you to instantly pull up any emails in your inbox that fit your search parameters, like unread emails, emails marked as important, or emails from a specific person.
Creating a Search Folder for Unread Mail
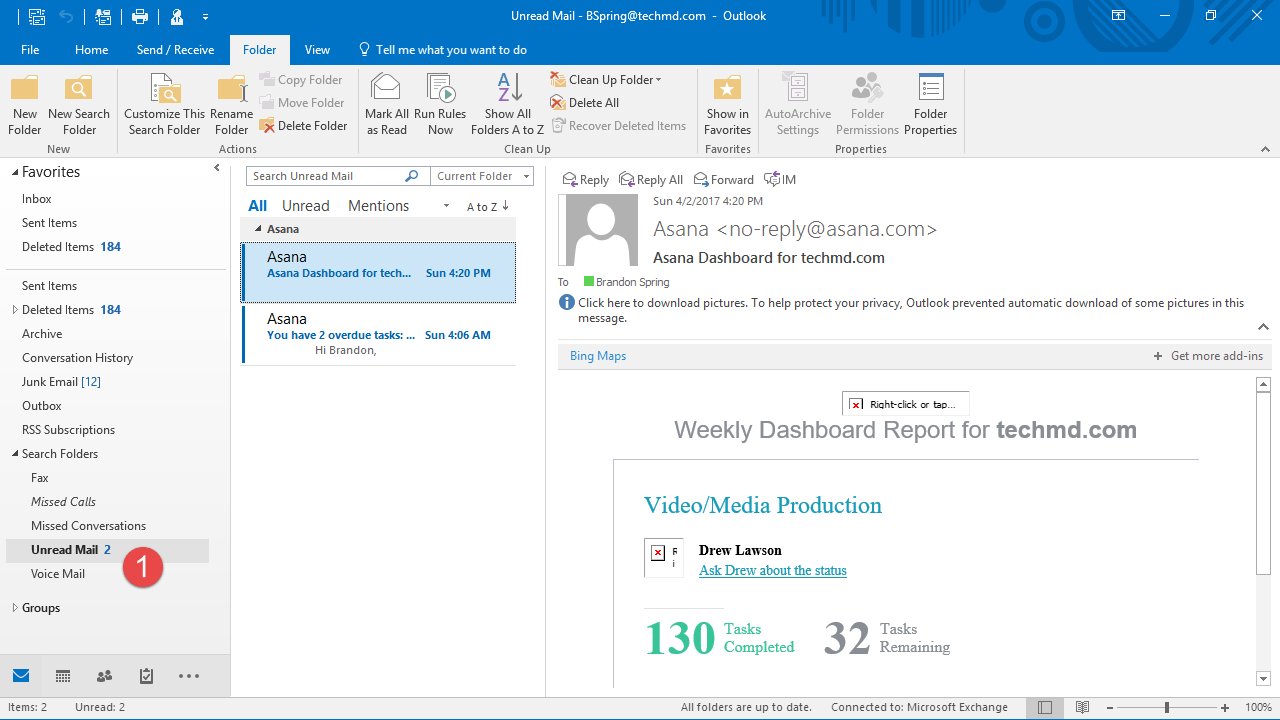
Search Folders are powerful tools for organizing your inbox, allowing you to filter email by specific predefined criteria. Let’s take a look at how to create one for unread emails.
First, when you open Outlook, navigate to the “Folder” tab and then click “New Search Folder”. A new window will appear with a list of folders to select. Click the one that reads “Unread mail” and then hit “Ok”.

Now, the new search folder for unread mail is created. It will be found in the dropdown menu to the left.
Creating a Search Folder for Important Mail
The next search folder we’ll talk about is the “Important mail” folder. This folder will contain emails that are designated by a red exclamation mark to the right of the sender’s name. Once again, click the “New Search Folder” button in the “Folder” tab and a window will appear. Click “Important Mail”, and then press “Ok”.

Again, you’ll find this new folder in the “Search Folders” menu with all your emails marked as important designated here.

Creating a Search Folder for Specific People
Lastly, we have the folder called “Mail from and to specific people”. This folder separates mail into itself from specific people of your choice, giving you direct access to the messages you want to see. To do this, return to the “New Search Folder” menu, hit “Mail from and to specific people”. Then click “Choose”

A second window appears with a box to input the name of your chosen sender. Once you type it in, click “From or Sent to” at the bottom of the window and then hit “Ok”.

The previous window will disappear and you’ll return to the main search folder window. Hit “Ok”.

Just as before, this new folder is located on the left-hand side of the screen. It will be titled with the name of your sender and will house all the emails you’ve received from that sender.


