
Microsoft Teams is a convenient place for holding chats, but you also have the capability to share your desktop with others to host engaging and interactive meetings. So today we’ll show you the steps you need to share your desktop with others!
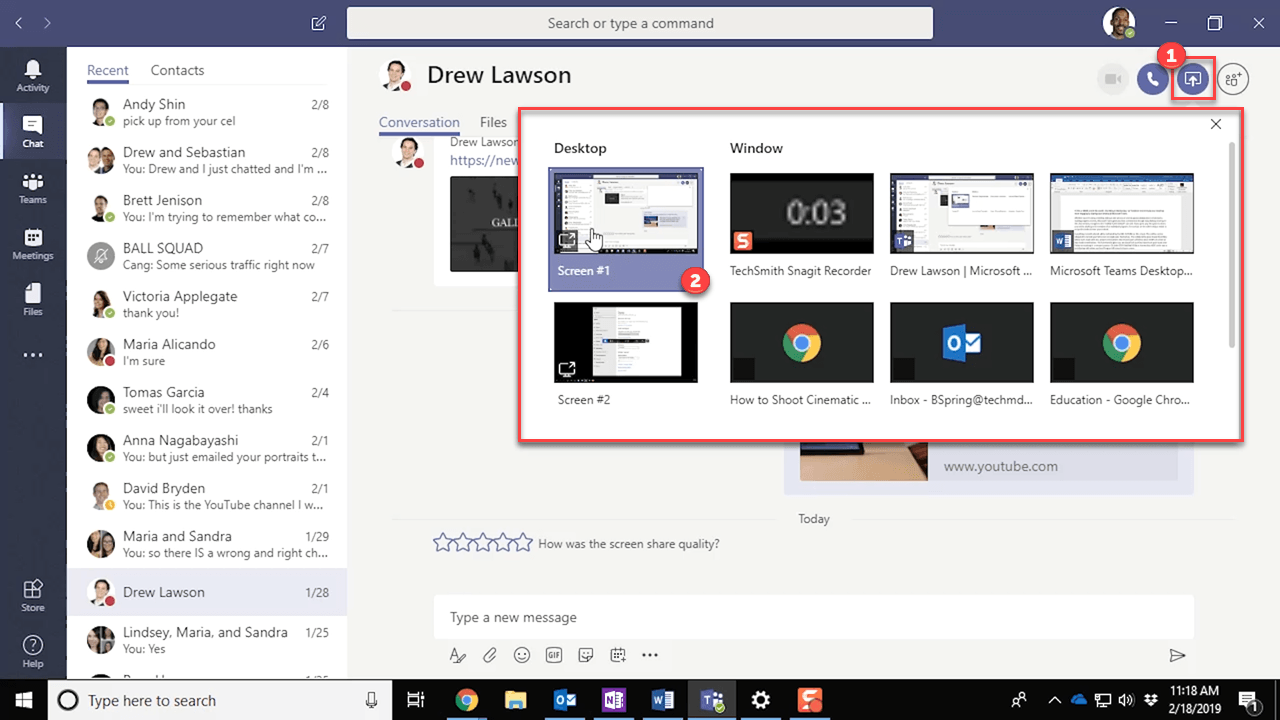
The first step to sharing your desktop in Teams is to start or continue a chat with a contact. Then, click the Share screen icon in the top right. You have the option to share your entire desktop or just the window of an individual program. The contact on the other end will need to accept your sharing invite.
*Be sure to share an entire screen, not just a window, in order to give control to the contact.
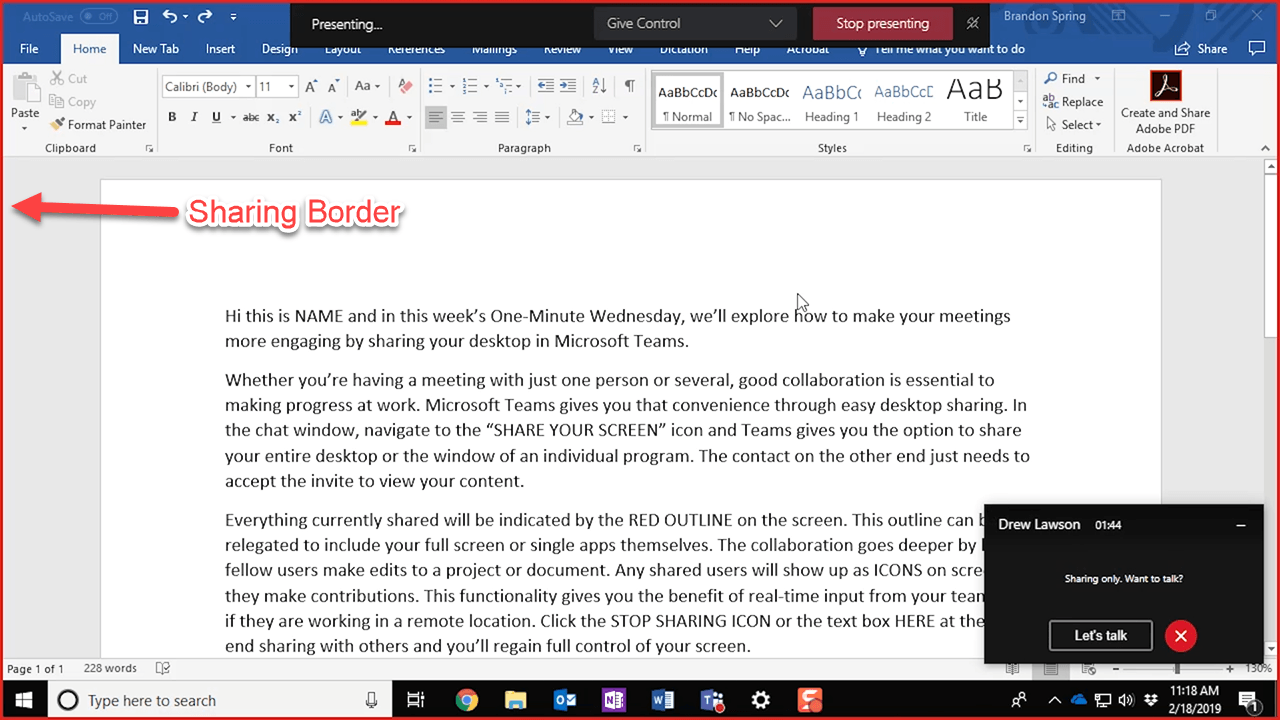
Once the invite is accepted, everything that is currently being shared will be indicated by a red border. As you can see, the border surrounds the entire screen, not just a program window.
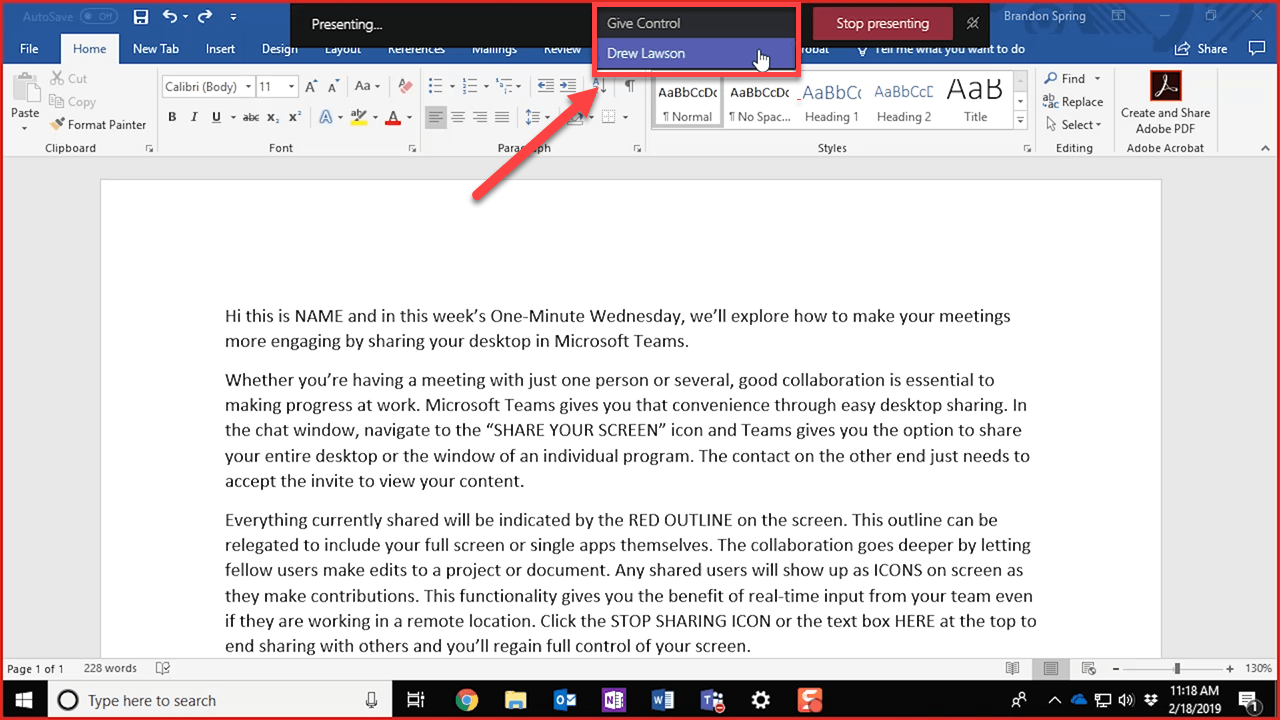
Users can also make edits to projects and documents, pushing your collaboration ability even further. Hit the “Give Control” panel at the top to provide your contact with access. This means that remote contacts will have the ability to contribute from wherever they are! Shared users will appear as icons as they make edits.

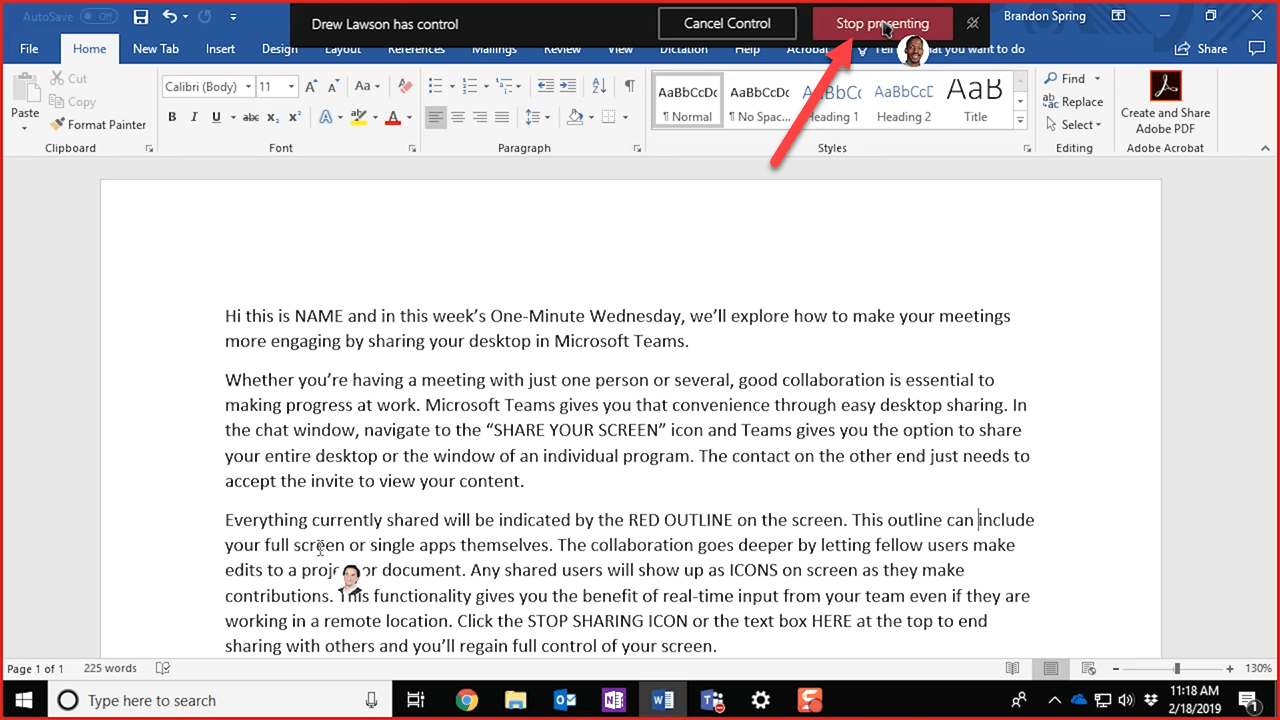
Finally, to end the sharing feature, click the stop sharing icon or hit the Stop Presenting text box at the top to end case sharing. Once clicked, you’ll have full control of your screen again.
Now you’re equipped with a great way to increase your teamwork and collaborative efforts on any project with Microsoft Teams. Thanks for watching and come back for more!


