
Keep your email organized and stay ahead of important emails with this simple tool! On this week’s One-Minute Wednesday, John McCormack will be talking about how you can use Categories to highlight VIP emails and keep track of important notifications. When you’re buried under a flood of emails, this can really help critical messages stand out in your inbox.
Using the Microsoft Outlook tool can be categories is a great way to keep your inbox organized and find emails from certain contacts when you need them. Let’s take a look at how this works.
Categorizing your Email
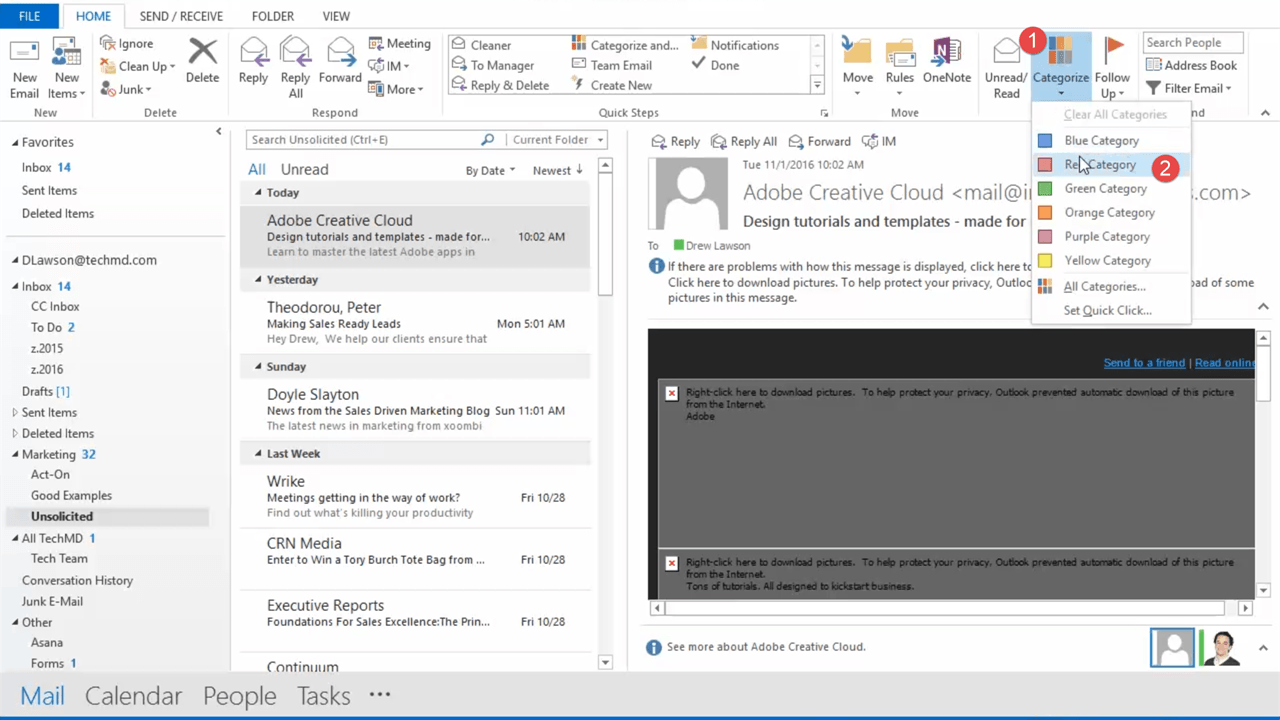
Outlook uses a color coding system that allows you to mark certain emails as important and then find those messages that are marked with that particular color. To see this in action, select a message from a contact, click on the “Categorize” button in the top bar and choose a color. There are a variety of colors to choose from for your personal preference.
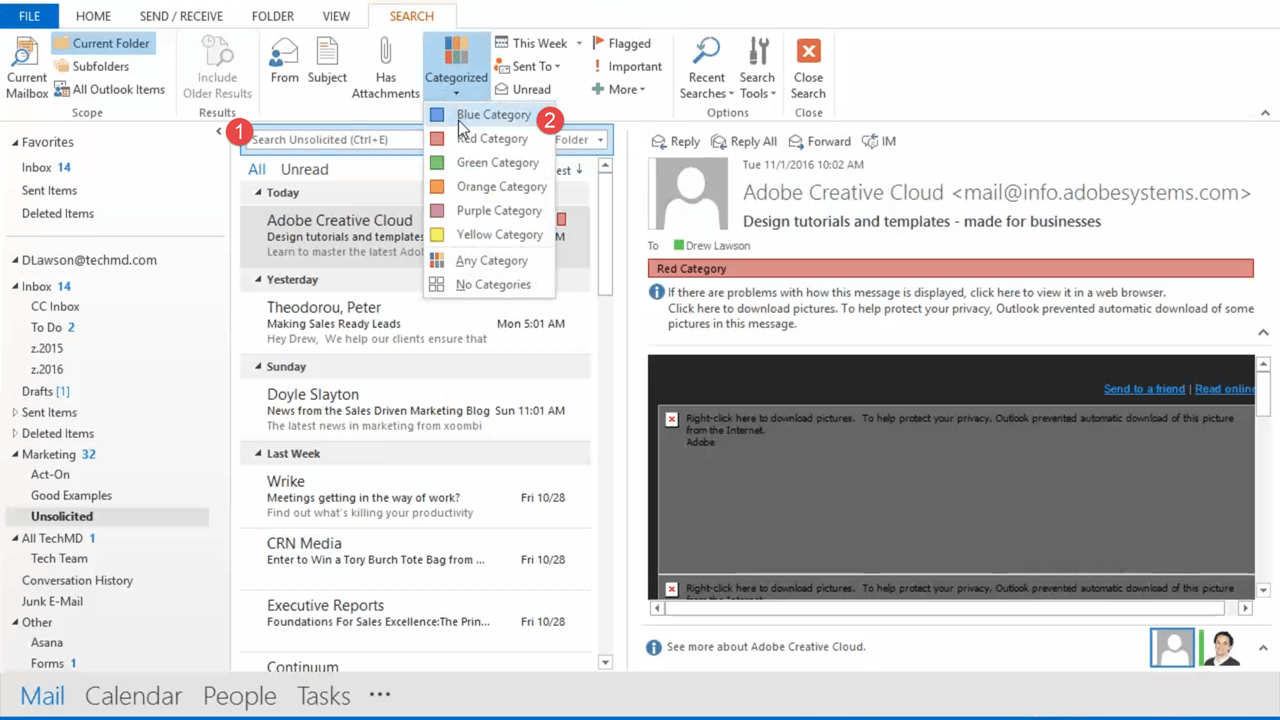
Now, you can use the search function to find emails that you’ve marked as important. Hit the search bear, click the “Categorized” button and find the color for the category to pull up all the messages marked with that particular color.
Color Code for Important Contacts
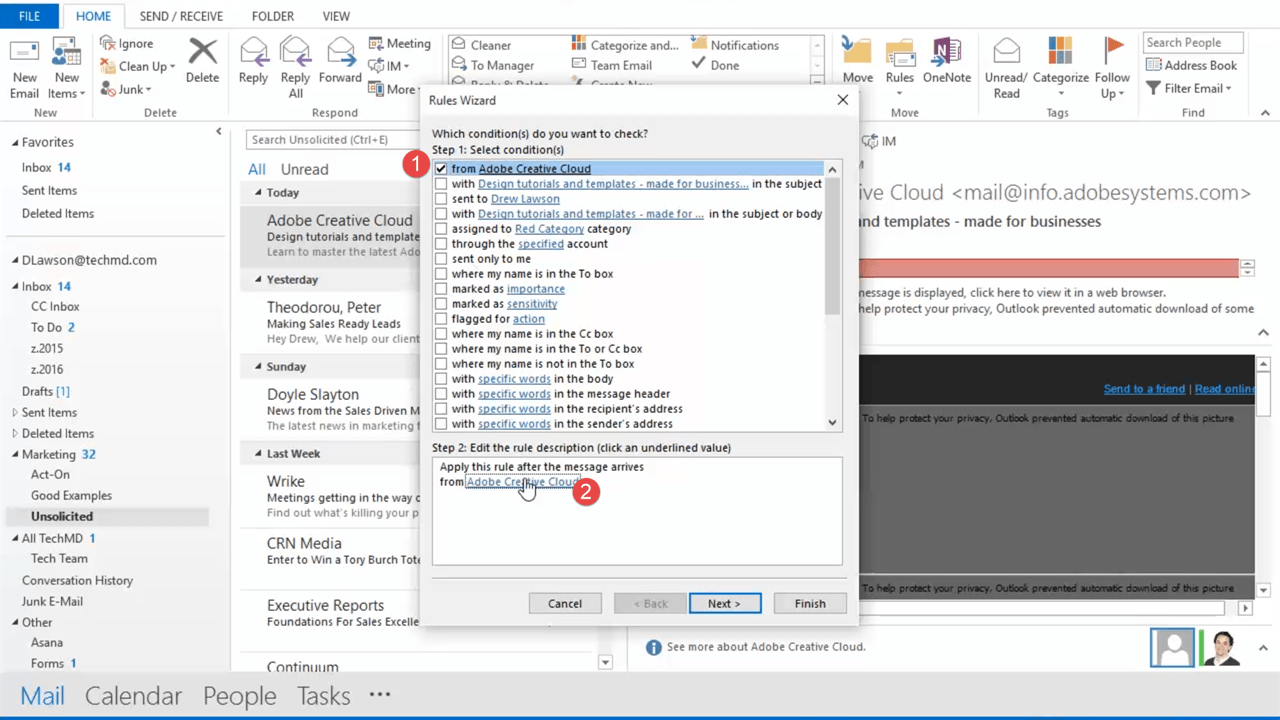
We can also create a rule where emails from important people are marked with a particular color. To do this, click “Rules” in the top bar, then select “Create Rule”.
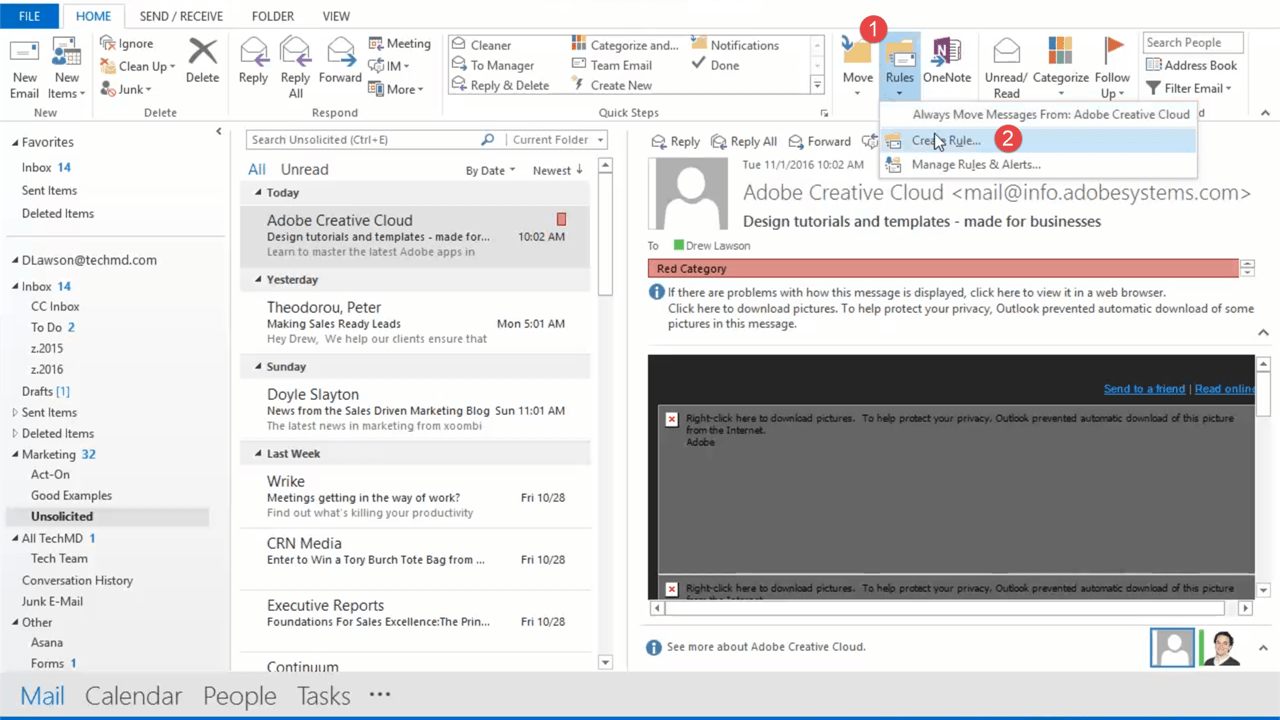
The Create Rule window will appear then click “Advanced Options”.
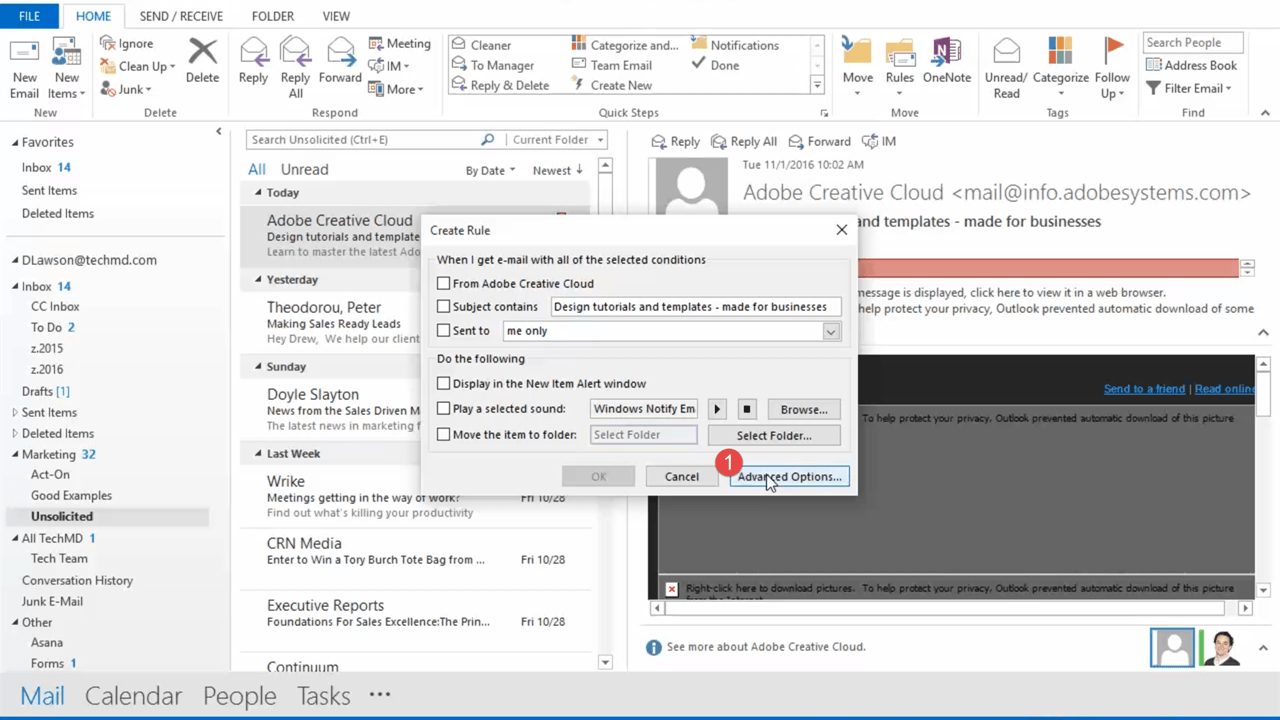
Check the top options in the Conditions checkbox. Then click the button in the Step 2 box.
Now, a Rule Address window will pop up and you’ll want to add any email addresses in your VIP category in the “From” box below. This will designate your contacts to show up in this category. Then click “Next”.

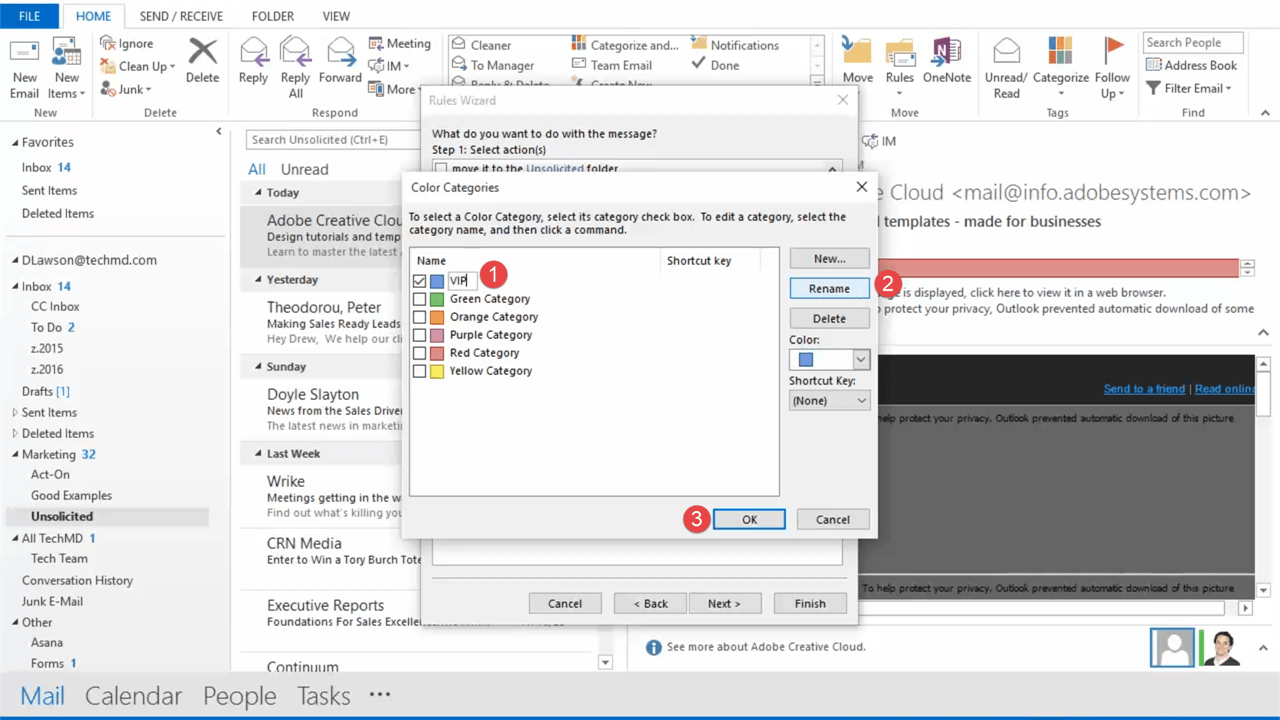
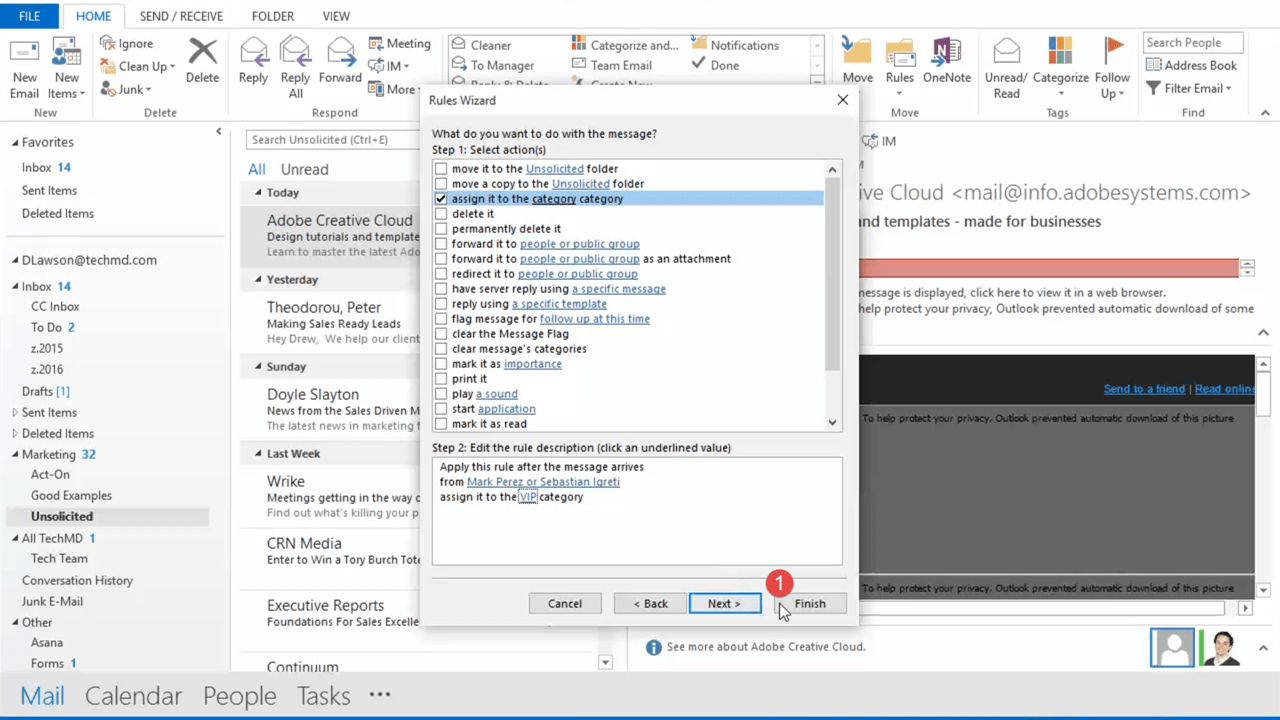
You’ll return to the Rules Wizard, so click the checkbox that reads “assign it to the category”. In the Step 2 box below, click the “assign” link.

Then, a Color Categories window shows up where you want to select the color you want to assign. You can rename the category, so let’s name this one VIP. Now click OK.
Finally, click “Finish” at the Rules wizard. Now any contacts in your VIP list will be marked with the color.
So you just learned a great tip for navigating Outlook by color coding important contacts and messages. Thanks for tuning in to this week’s One Minute Wednesday and join us next week for more!


