Need to send out a personalized letter or email to a large number of contacts? The Mail Merge feature in Microsoft Word lets you create, customize, and deliver messages to multiple contacts at once. Tune in to today’s One-Minute Wednesday, where Jonathan Schaumloeffel discusses how to use and customize the Mail Merge feature!
Setting Up A Mail Merge
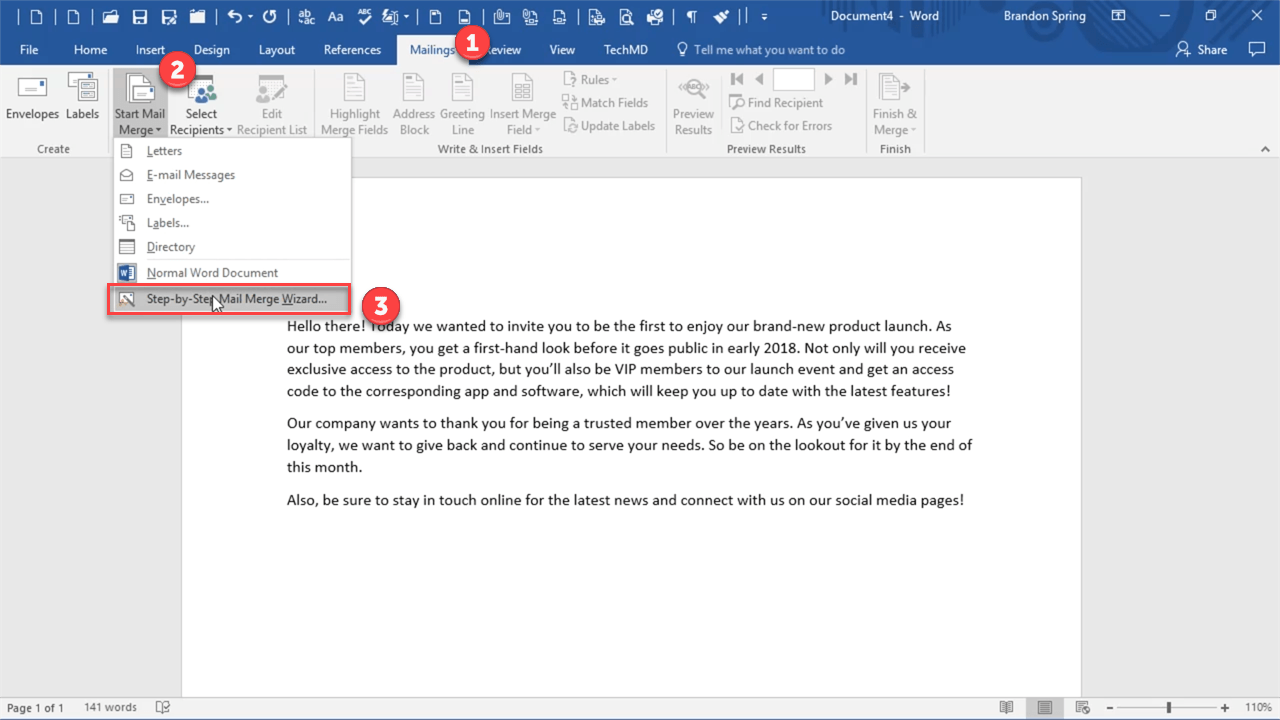
Mail Merge is a useful tool for editing and sending out customized communications for individual contacts. So here we have an email letter that we’d like to send out to a list of recipients. Just click the “Mailings Tab” and hit “Start Mail Merge”. Then in the menu, hit “Step-By-Step Mail Merge Wizard”.
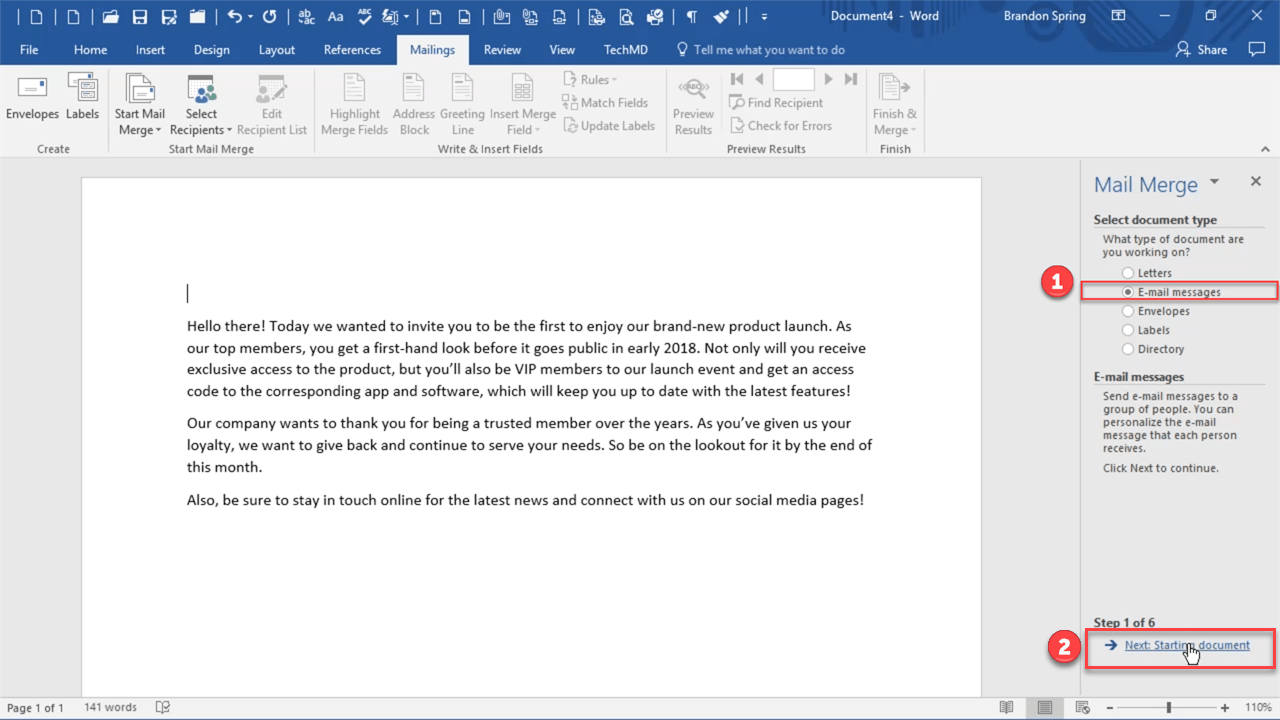
In the newly opened wizard on the right, choose “Email Message” as the type of document you want to use.
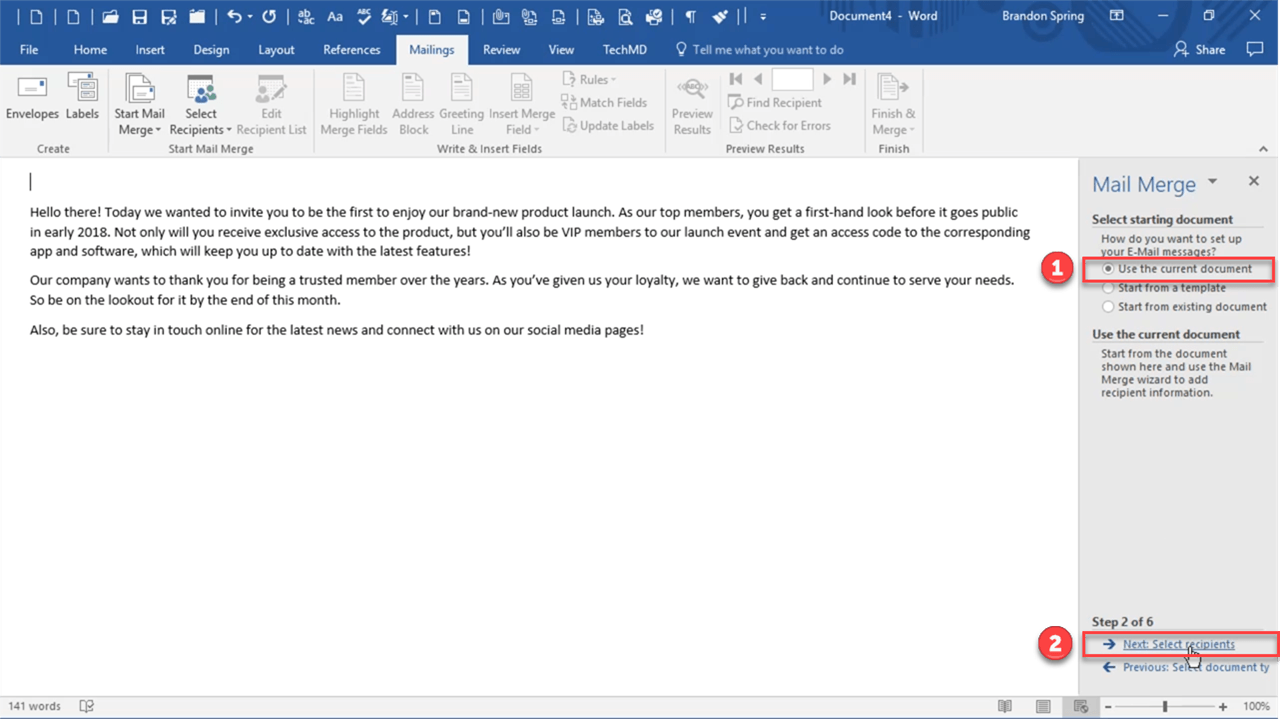
Then click next and select “use the current document” from the list.
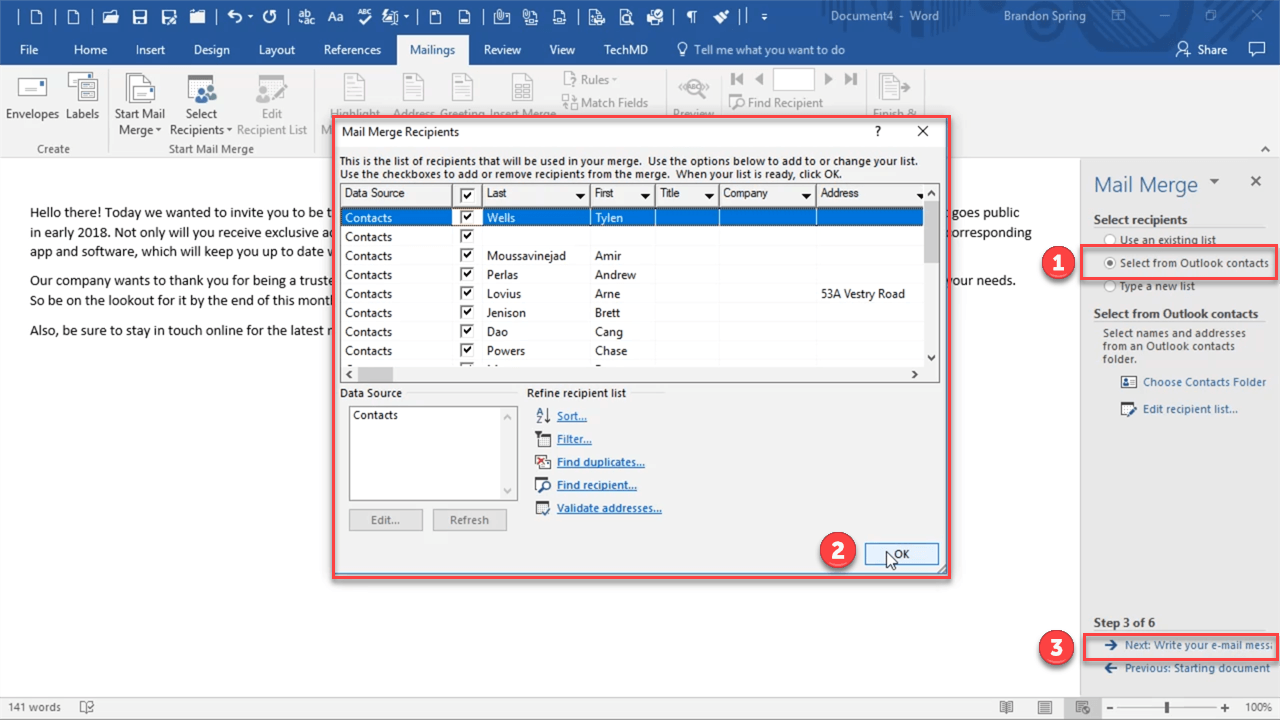
Click next again and now we’ll import contacts from Outlook by clicking the Outlook option. Be aware that this will not automatically import your own internal company address book. Hit Ok to proceed.
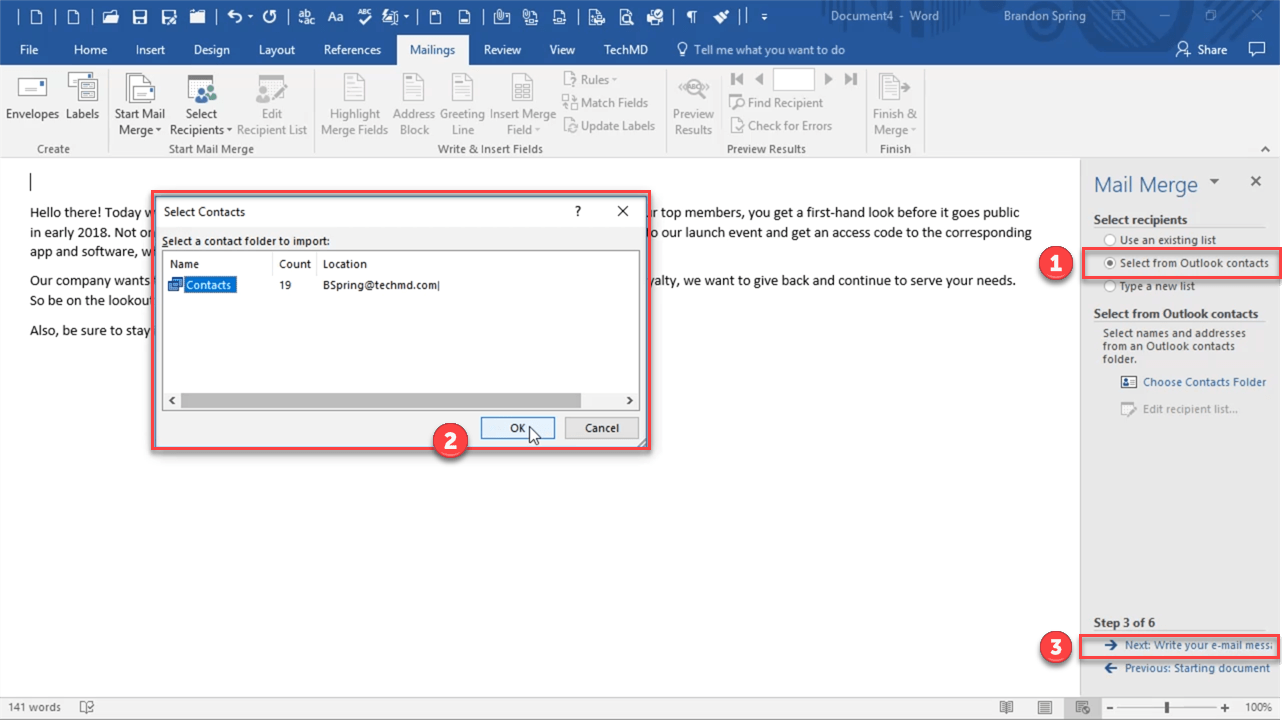
The list of imported recipients can then be modified in the next window. Once finished, hit Ok and click Next.
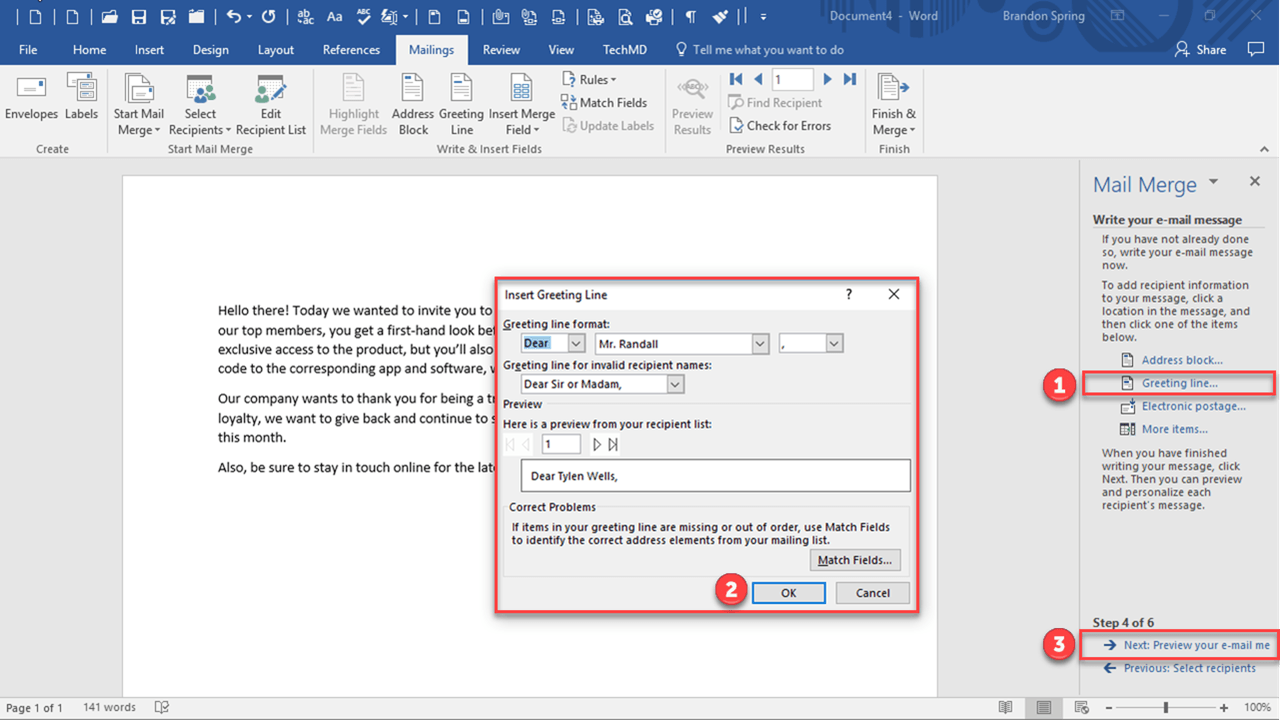
Now we’ll add a greeting line to the message. Click “Greeting Line” and a dialog box appears where we can edit the greeting here. Hit Ok when done and the merge field will be included.
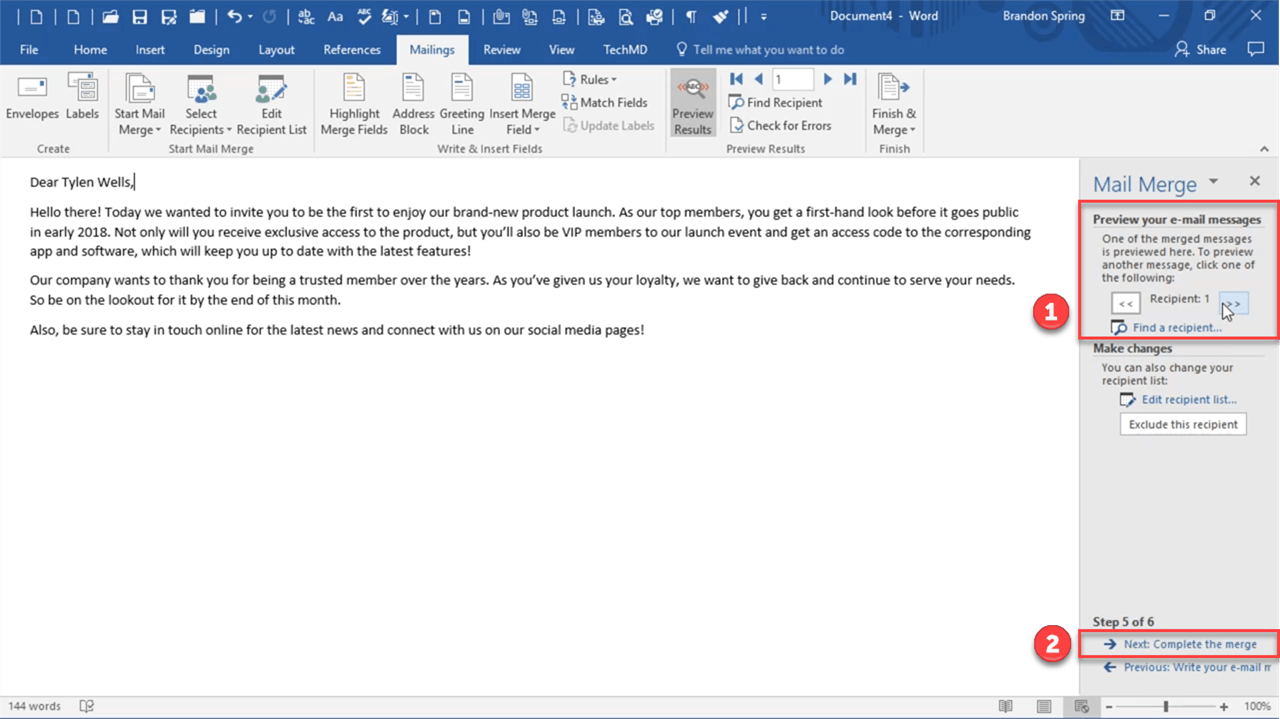
Mail Merge will allow us to also preview the merge field we inserted for each contact.
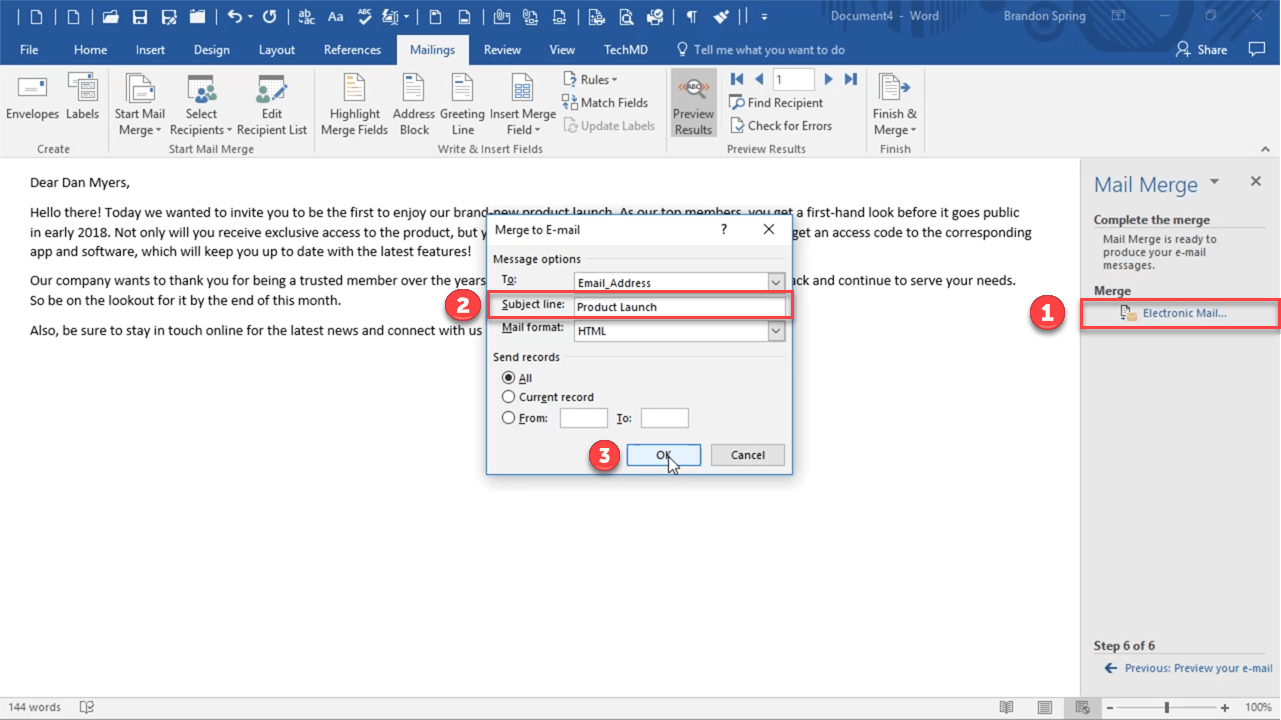
Finally, hit Next and click Electronic Mail. In the dialog box, add a subject line, leave the format as is and hit Ok. Now the email is sent to each recipient and you’re good to go.
So that’s how to create a letter in and easily send that email out as an email via Word. Thanks for joining us and be sure to check out next week’s One Minute Wednesday.


