On this episode of One-Minute Wednesday, Tylen Wells is going to cover a great app called Microsoft FindTime, which works to give you a convenient and collaborative experience when scheduling meetings with others.
Getting Started in FindTime
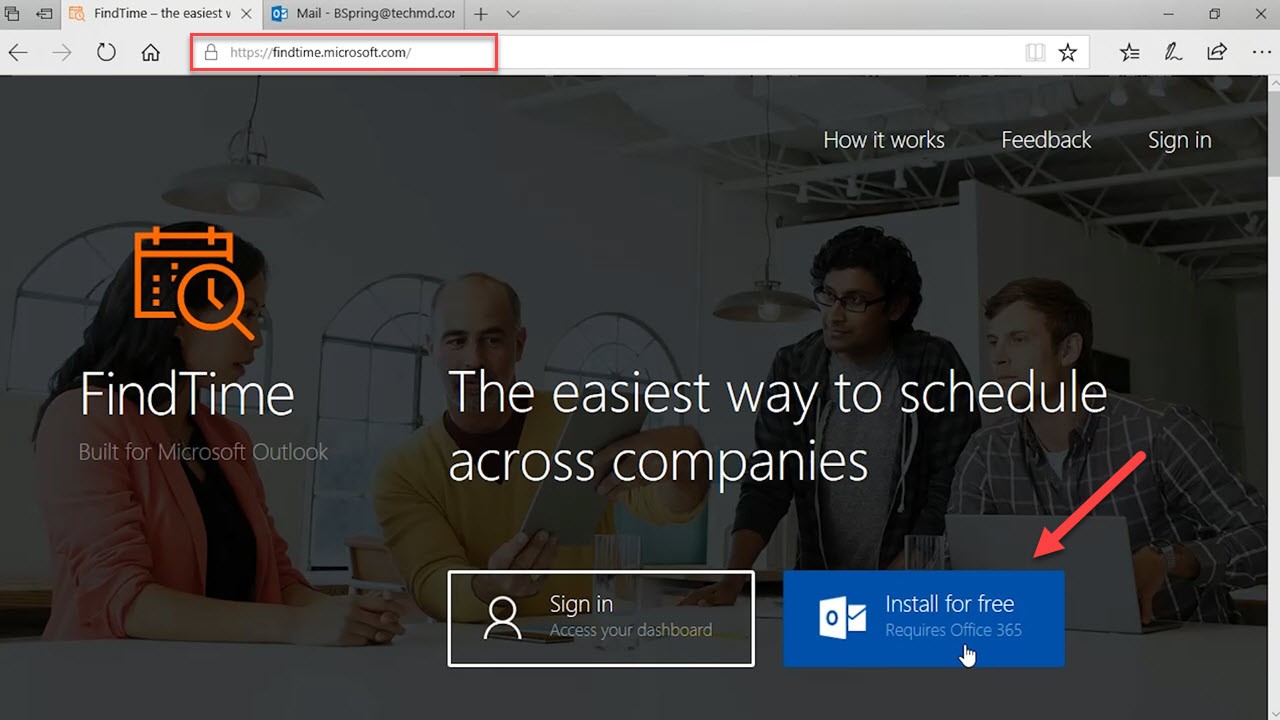
Microsoft FindTime does just what its title says: it automatically finds available times in you and your colleagues calendar’s so you don’t have to go through the hassle of sifting through schedules on your own. To get started, head to “findtime.microsoft.com” and click the “Install for free” button.
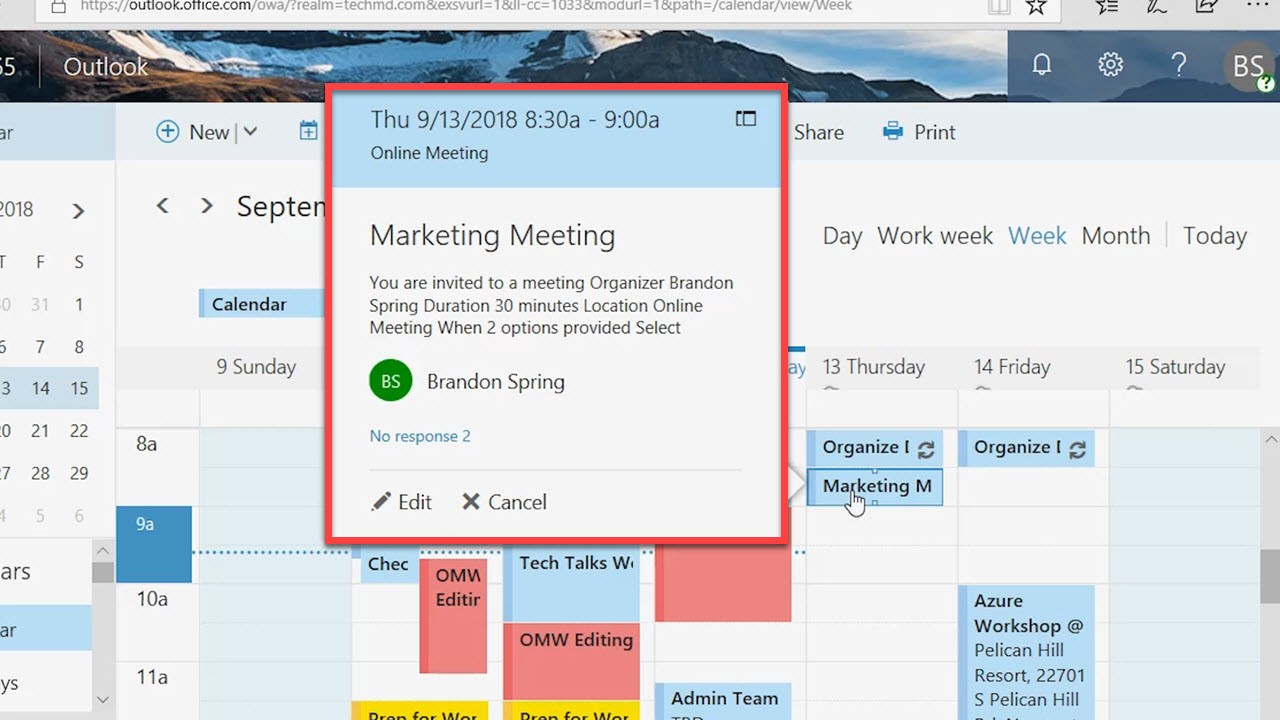
Then, inside Outlook in Office 365, go to your calendar and set up your new meeting or appointment.

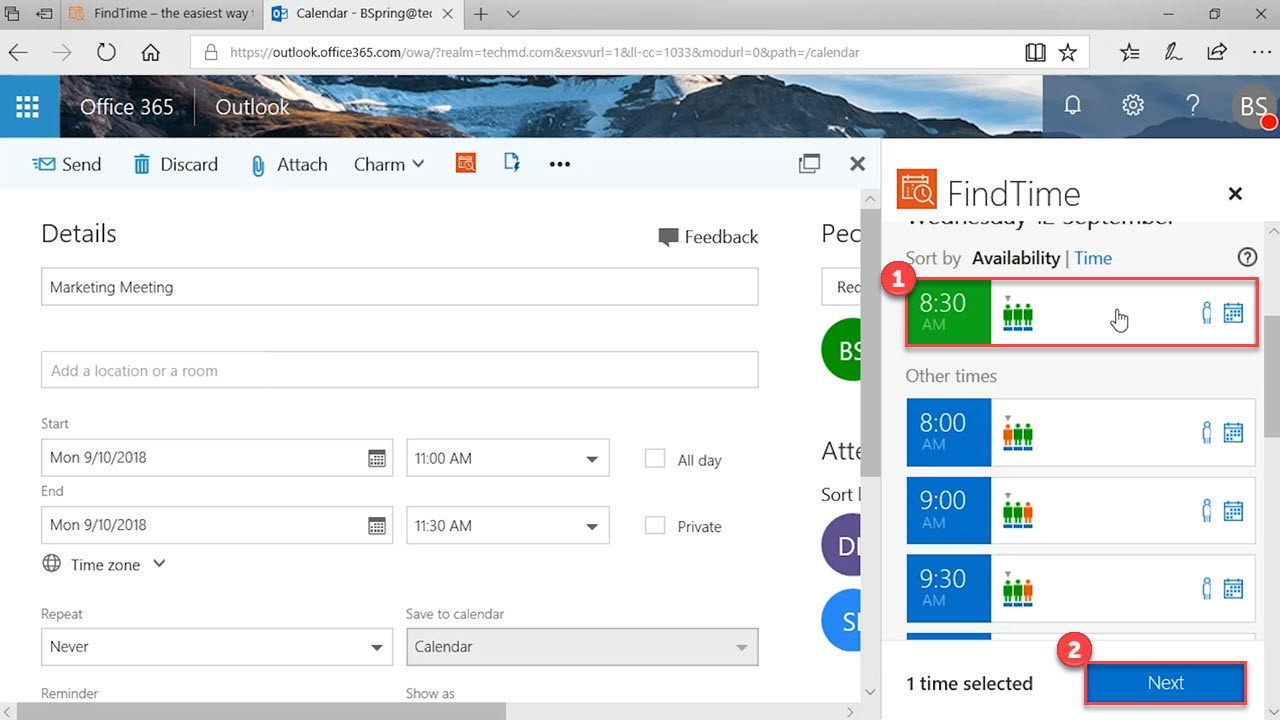
Add all the details and attendees you need to the meeting and then hit the FindTime Icon. A sidebar then opens up that gives you blocks of times that you can sort through.
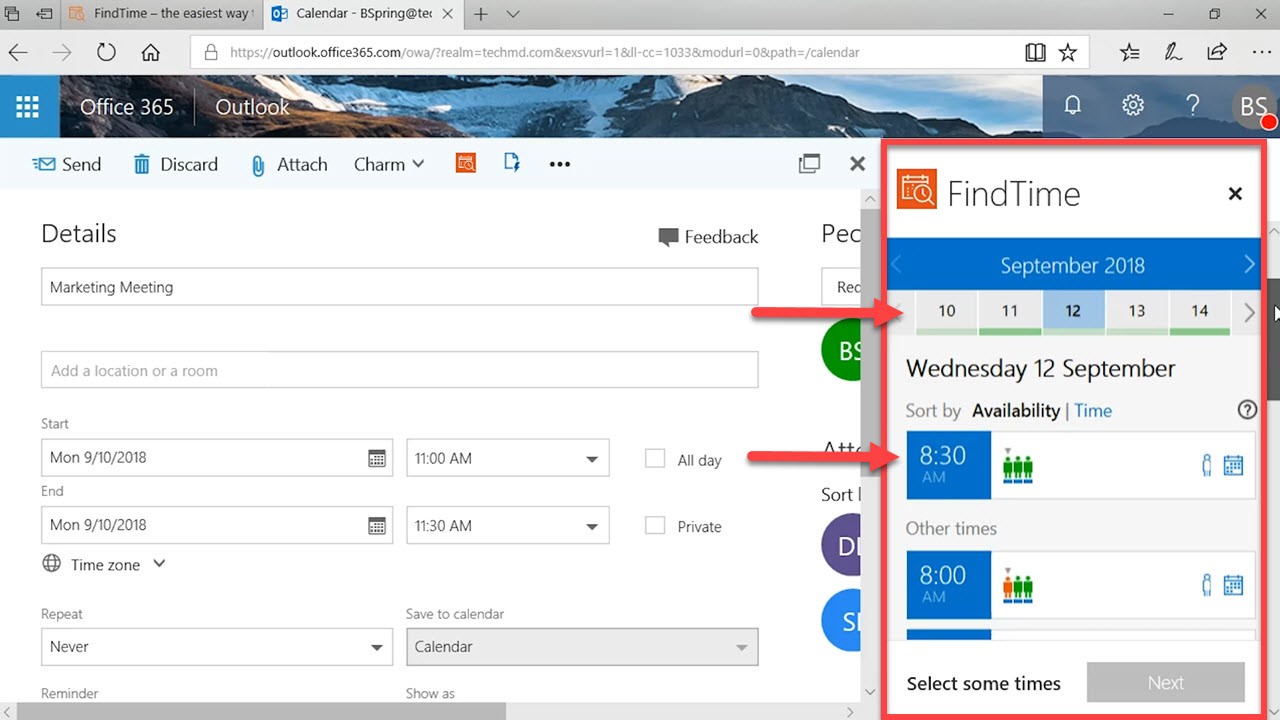
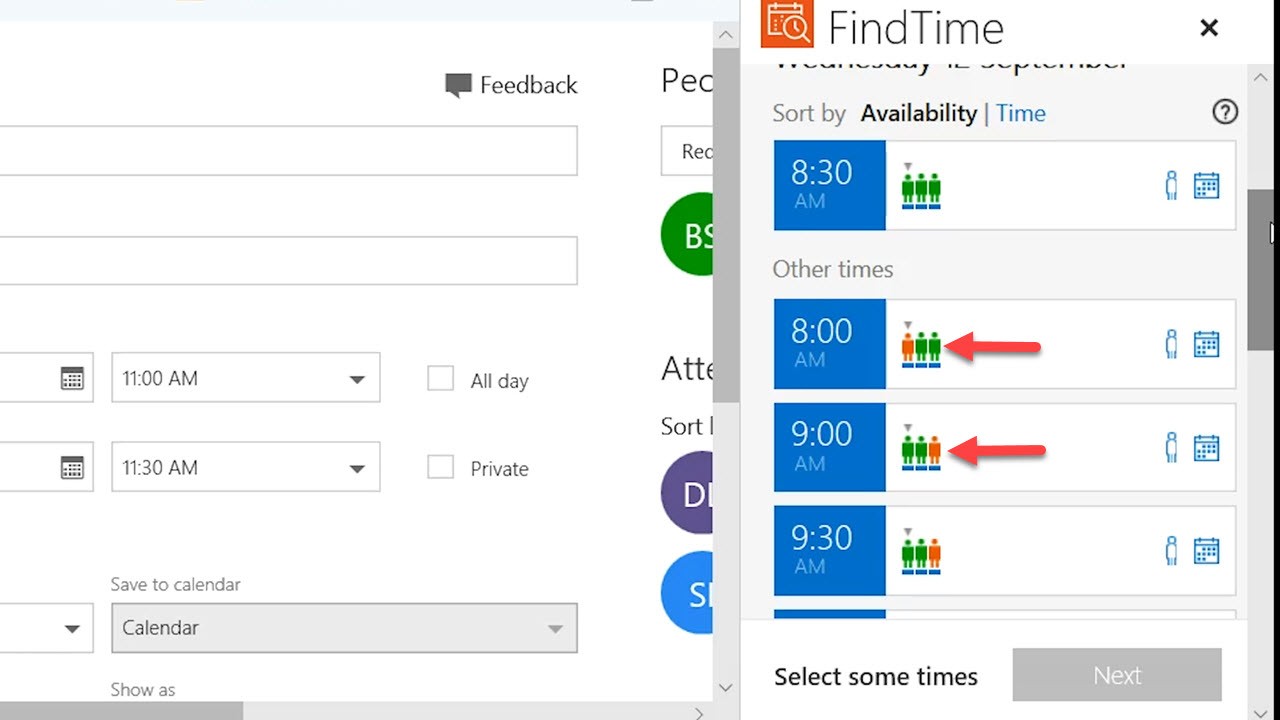
In the FindTime sidebar, you’ll see green and red people icons. The Green ones indicate individual availability while the icons in red indicate someone is unavailable for that selected time.
When you find a preferred time when everyone is free, choose that time. You can go through other days and times where people are free as well. Finally, hit “Next” and then click “Insert to Email”.
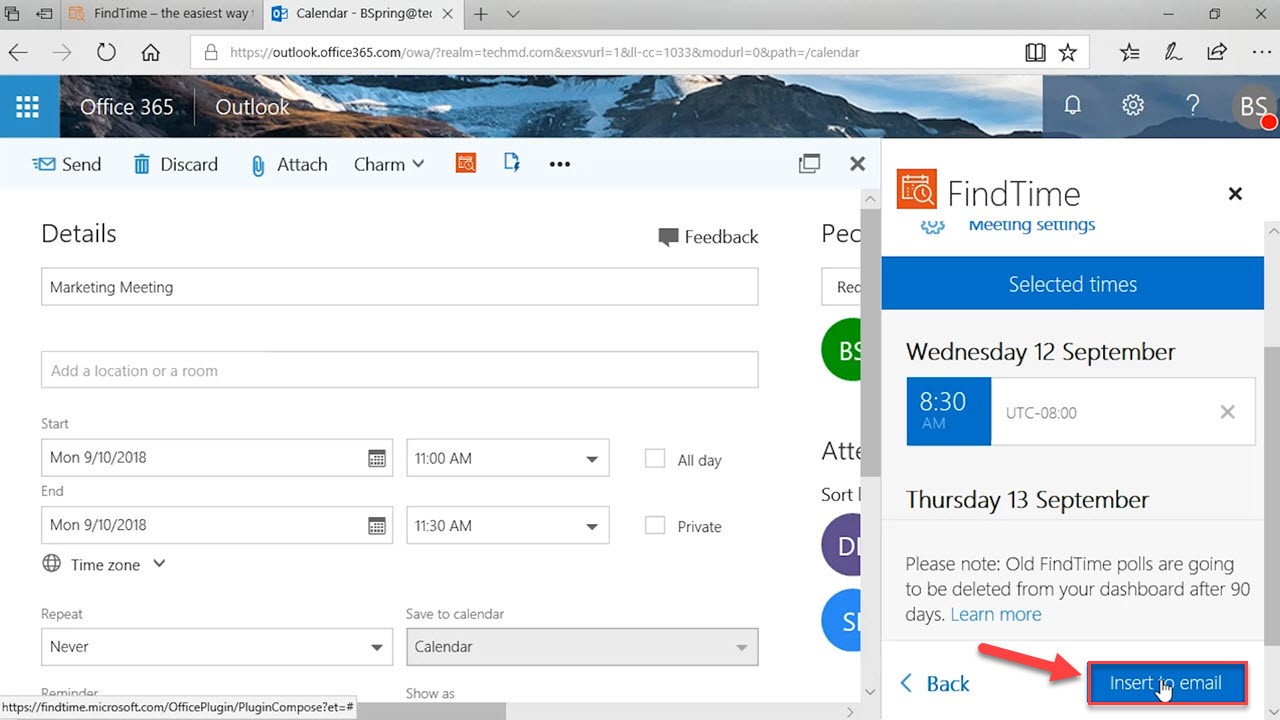
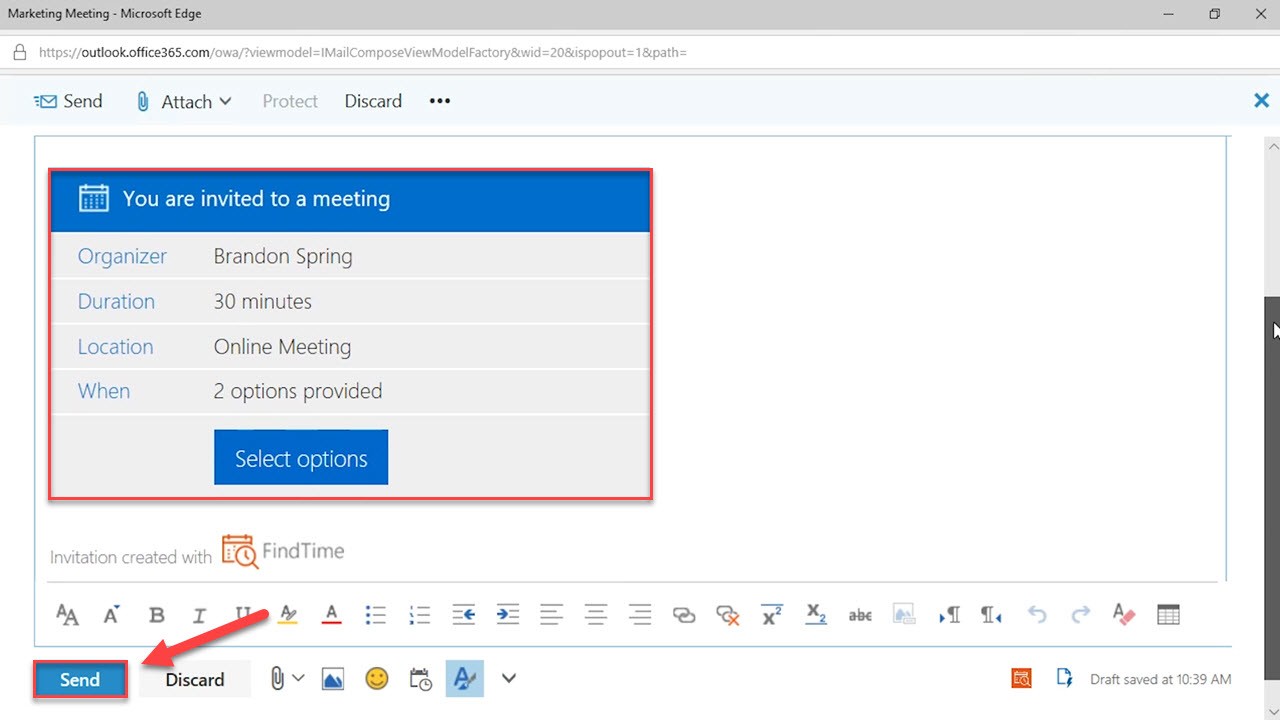
Then, a new email window that FindTime automatically created will appear, containing the meeting times and dates you chose. Hit “Send” and you recipients will be able to vote on the times you selected.
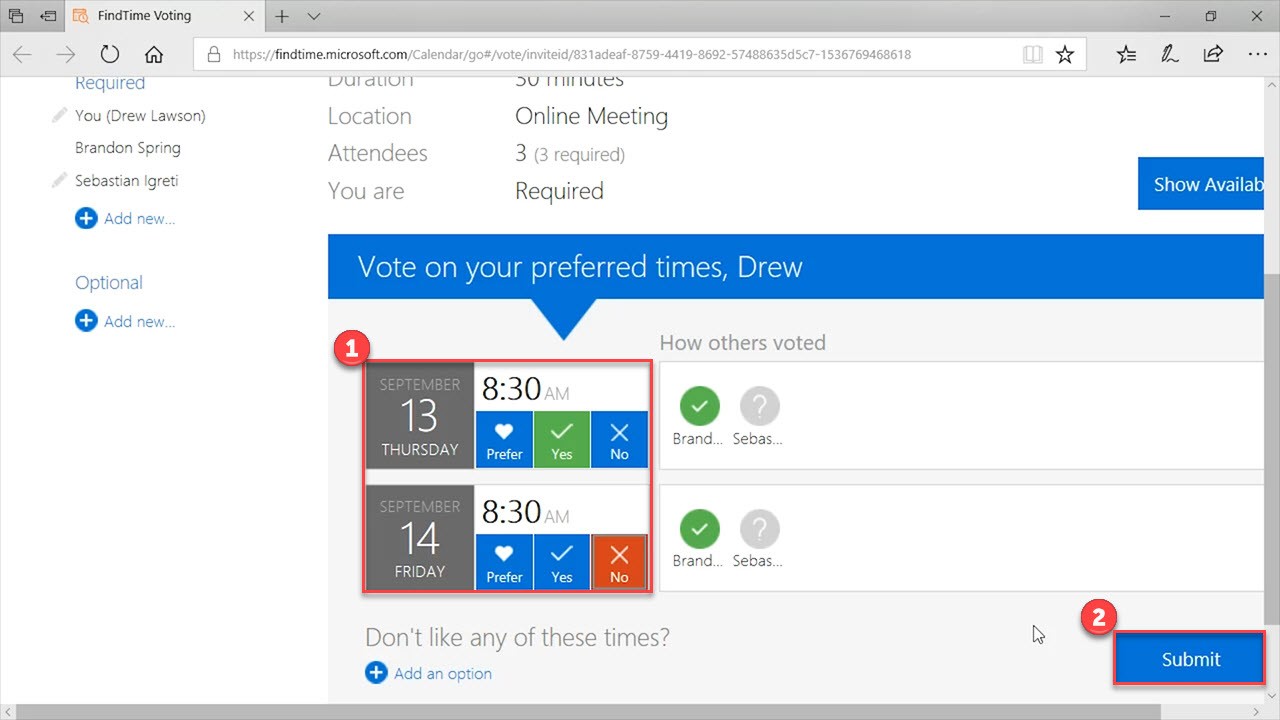
Once the email is received, contacts can vote on their preferred times.
The best part about FindTime is that, once a consensus is reached, the app will automatically set up the appointment on everyone’s calendar.