Save time with this handy Excel function! On this episode of One-Minute Wednesday, Amber Brito will be going over AutoSum functionality in Excel. This is a quick way to calculate the sum of a range of numbers in Excel.
How to Use AutoSum
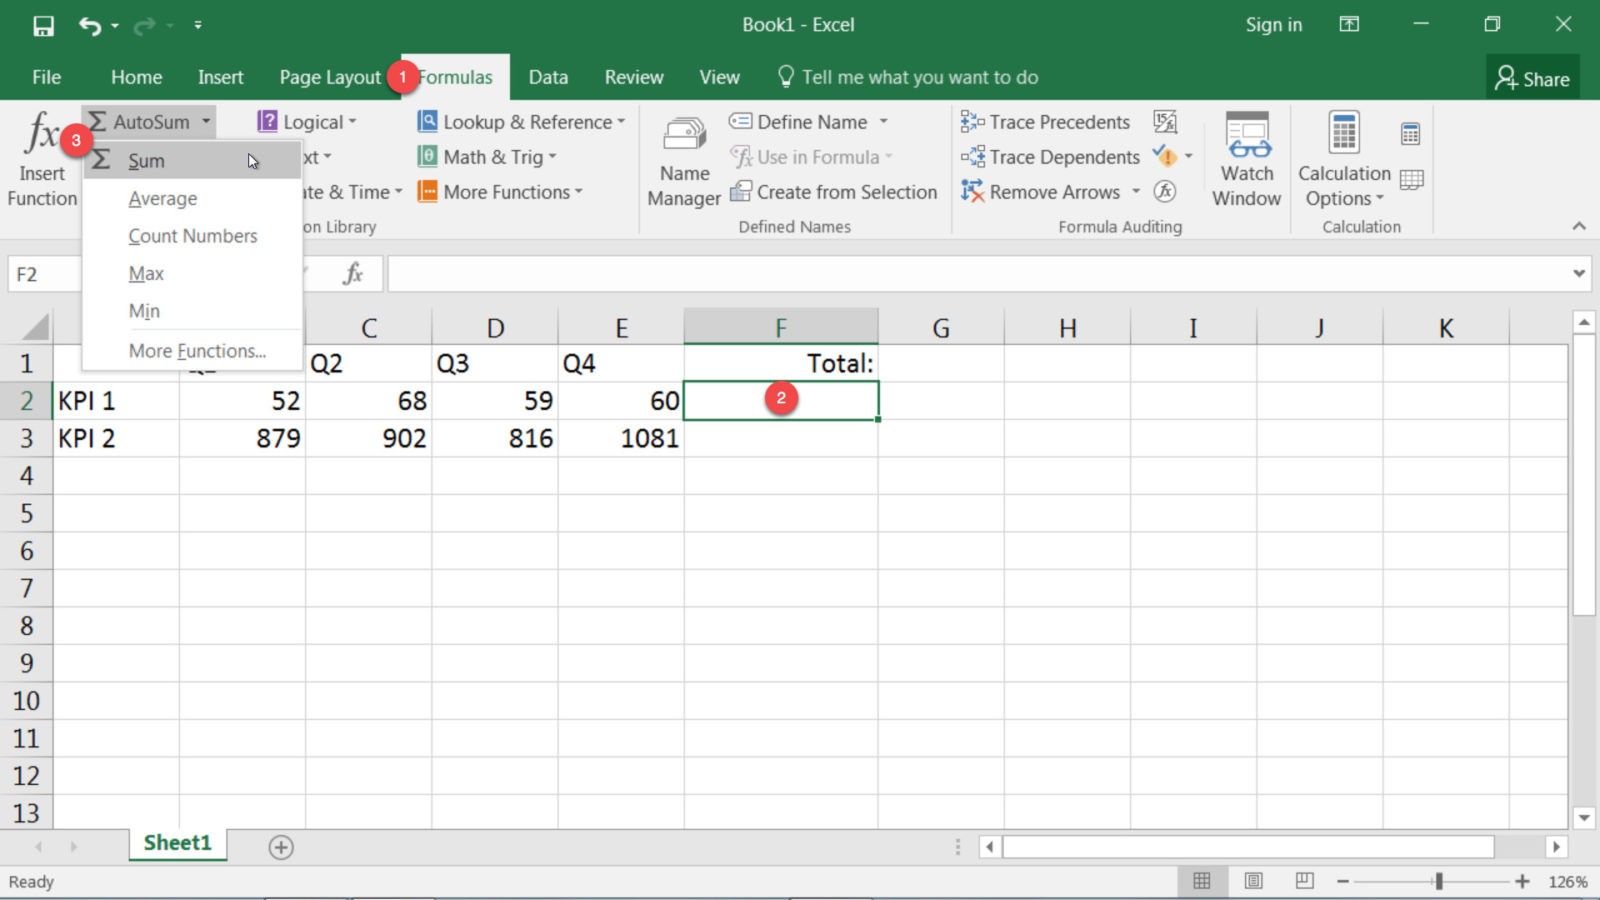
To calculate the sum of a range of data in Excel, select the Formulas tab in Excel and then select the cell where you’d like your SUM function. From there, head over to the Function Library group and click the drop down arrow next to AutoSum. Select SUM, and a new formula will appear in your selected cell.
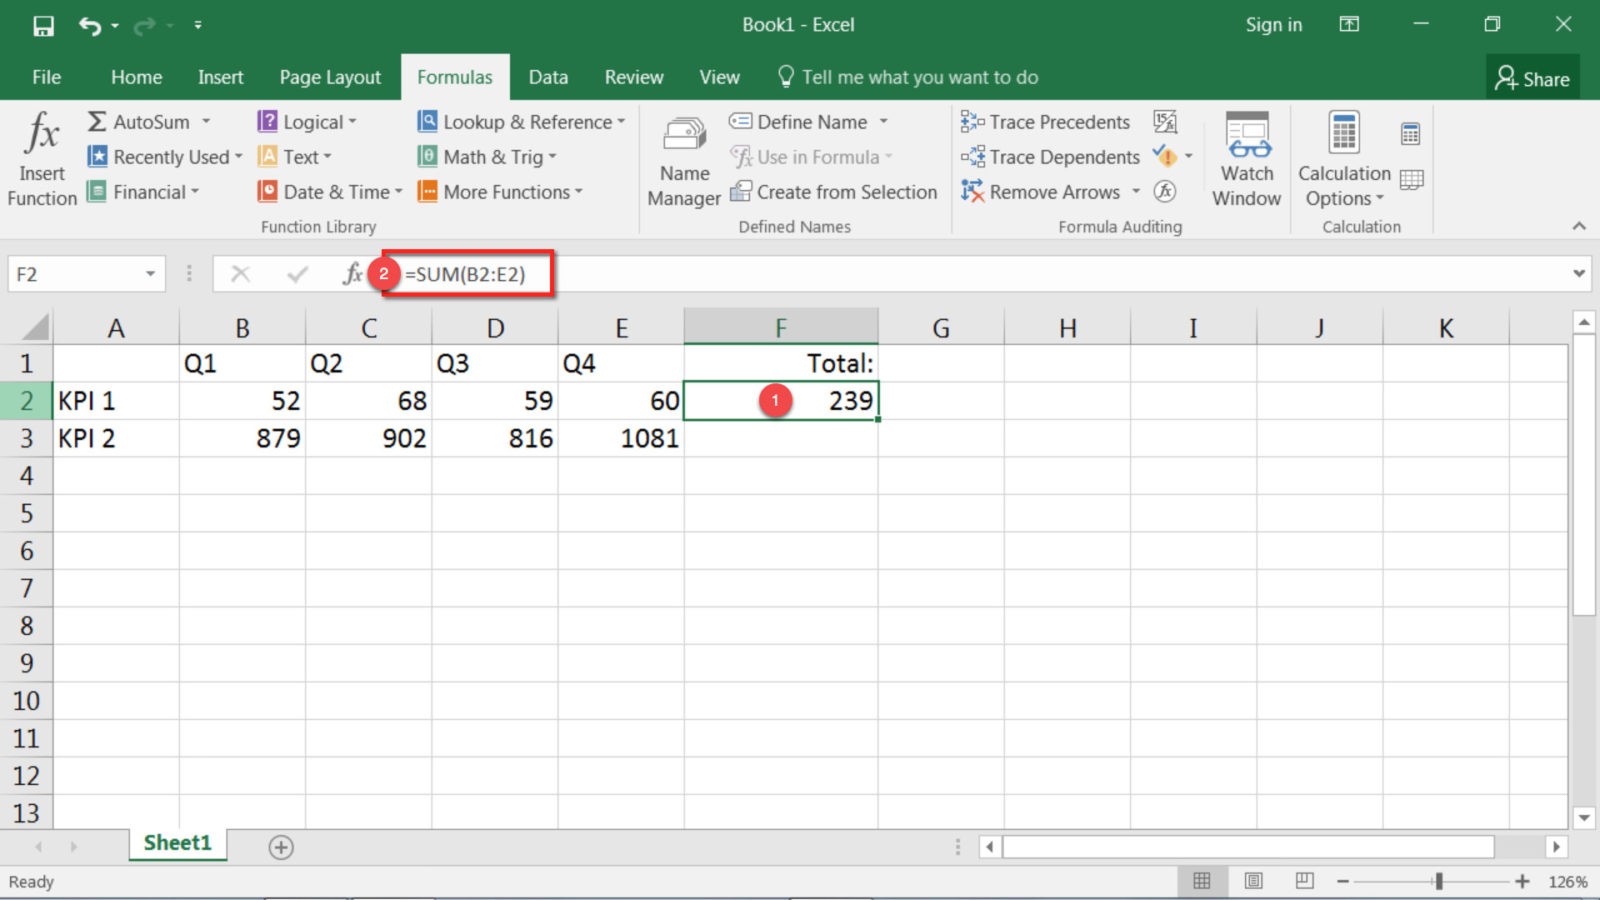
From here you’ll want to specify the cell range that you want the SUM formula to calculate. You can either type in the range (B2:E2 in this case) or you can click and drag across the desired cell range. Once you have the appropriate cells selected, simply hit Enter on the formula bar and your total will appear.

If you’d like to edit the function—when, for example, you add an extra column that you need to include in the formula—select the cell where the function is defined and then click on the formula bar. When you’re done editing the range, hit Enter again and your function will be updated.
And that’s it! You’re off to a great start with Excel functions. Take some time to poke around in the Function Library to see what else you can accomplish with these powerful tools.


