Learn how to efficiently organize data with Excel tables. On this One-Minute Wednesday, we’ll be showing you how to use tables in Microsoft Excel, which allow you to automate things like sorting, formulas, and more.
Creating A Table
Excel tables are a sophisticated tool and can be extremely helpful when organizing data. To create a table, simply highlight the data you want to include and then navigate to the Insert tab on the ribbon. From there you’ll want to go to the Tables group and click on Table.

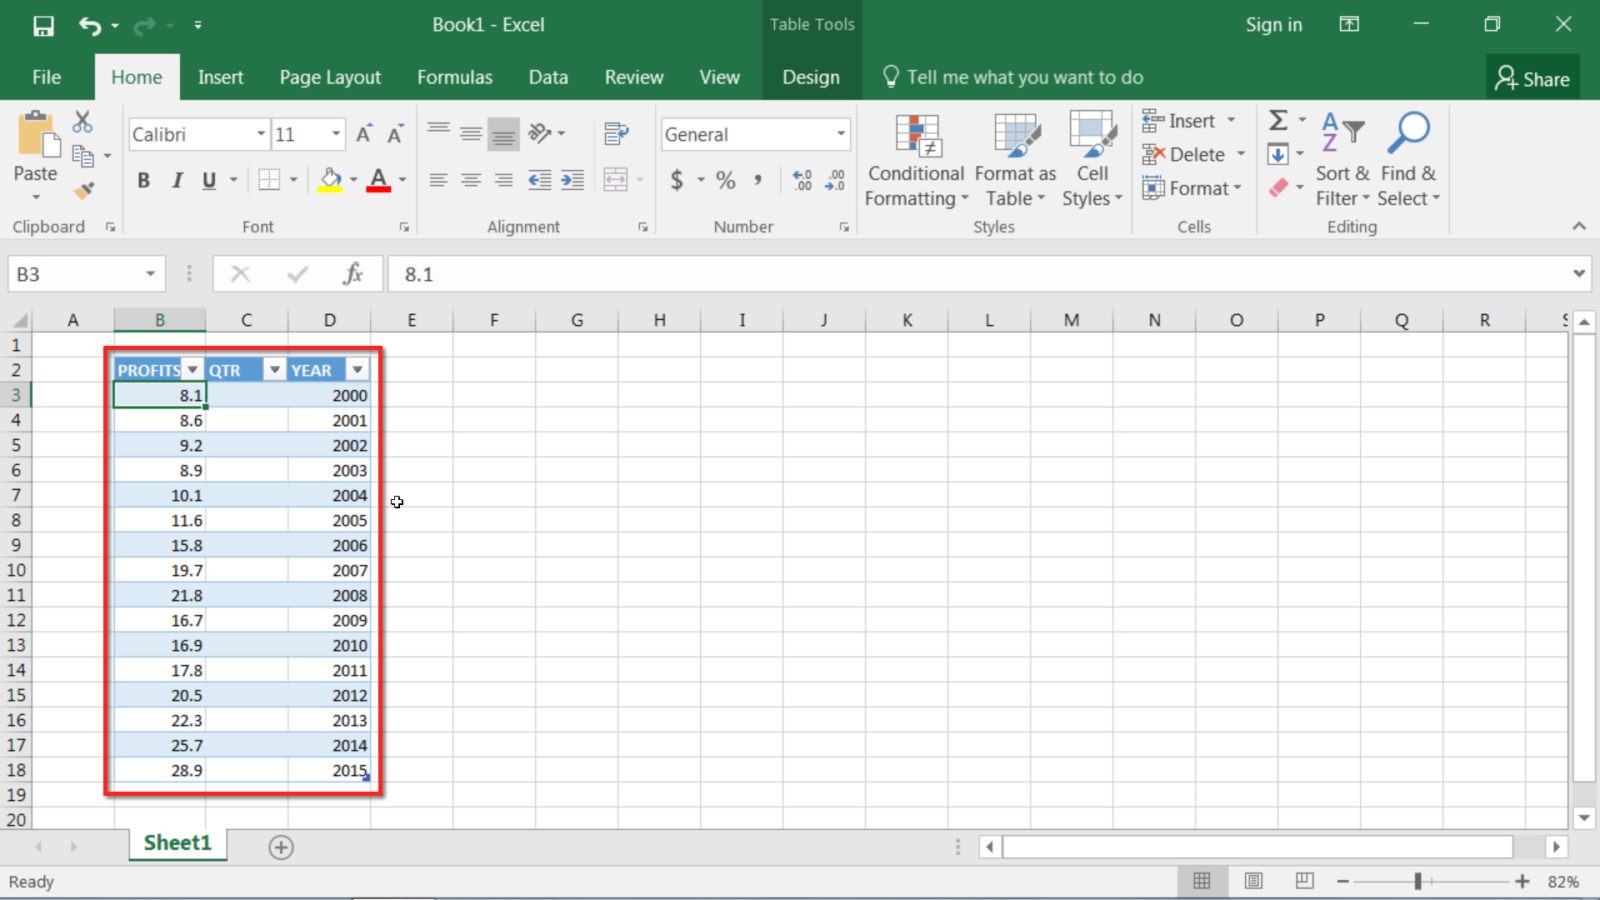
This will pull up the Create Table window, where you can adjust the parameters of the table by editing the columns and rows selected. If your table has headers—in this case “PROFITS”, “QTR”, etc.—then you’ll want to check the “My table has headers” box to ensure that Excel will recognize them properly.

Then click OK and Excel will create your table.
Using Your Table Effectively
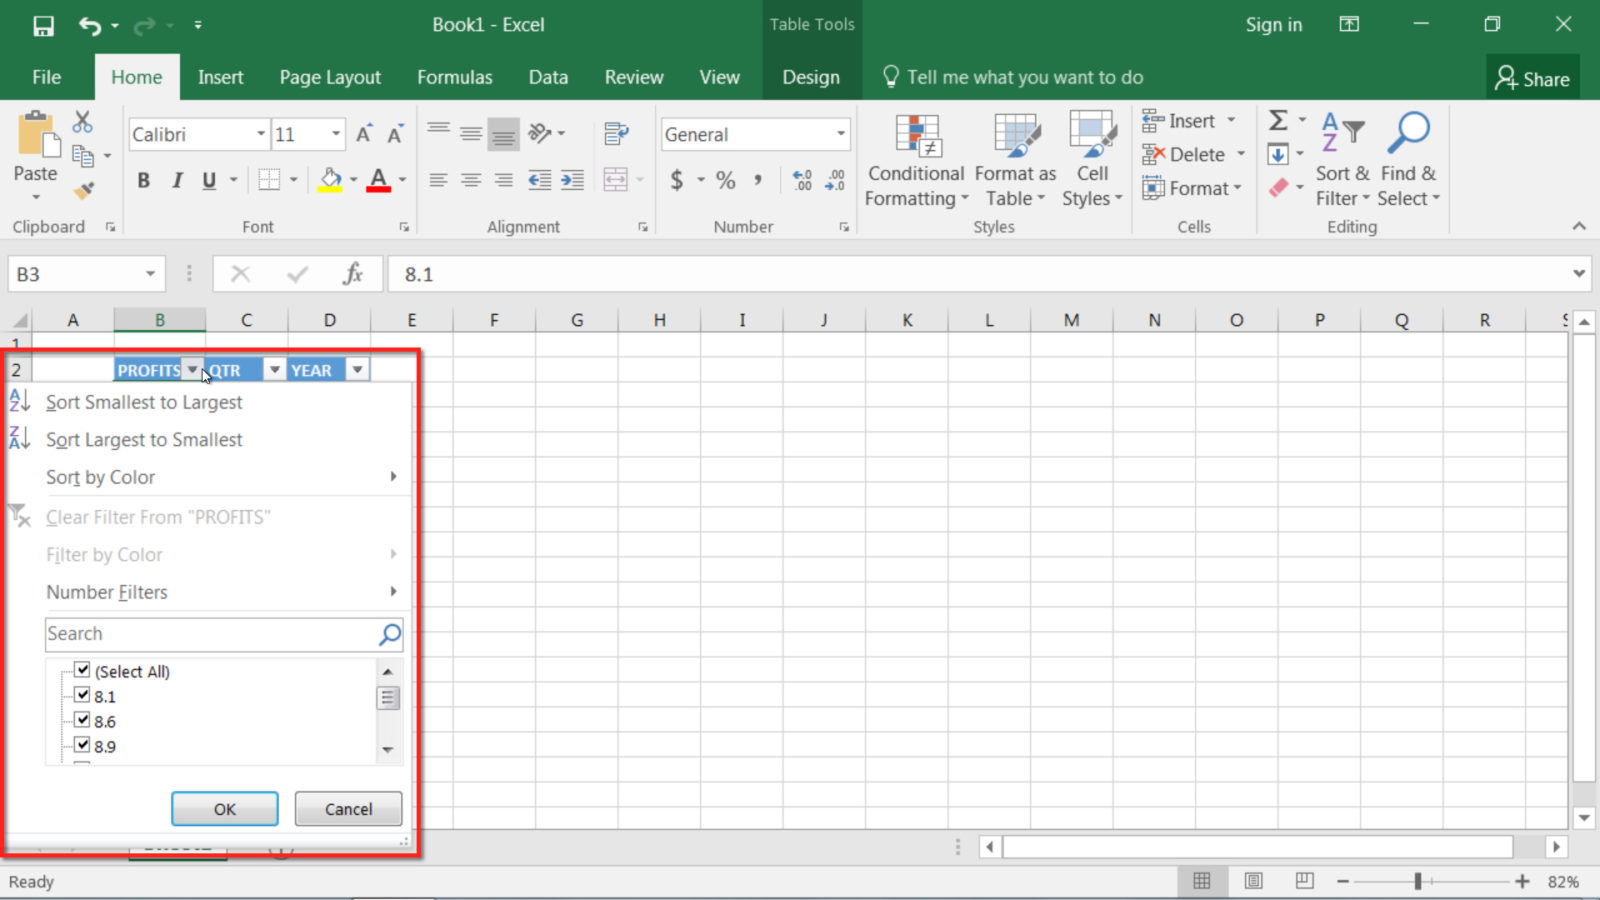
Now that your table has been created, let’s look at some of the functionality you can use to your advantage. First, you’ll notice that Excel has automatically added sorting and filtering drop downs at the top of each column, so you don’t need to insert those yourself.
Now that we have our table sorted out, we can begin to compile data. Let’s use a simple SUM function as an example. Normally when using the SUM function, you would need to use specific cell references to obscure the cell letters and numbers. However, with tables you can reference an entire column at once by name.
To do this, use the formula =SUM(“tablename”[“columnname”]), replacing the placeholders in quotations with the names in your spreadsheet. In our example, the formula would read =SUM(Table2[PROFITS]).
![An example formula referencing the table: =SUM(Table2[PROFITS])](https://www.techmd.com/wp-content/uploads/2016/09/Organize-Data-with-Excel-Tables-5.jpg)
This will take the data in that specified column and give you a total. This works with any function in Excel, so you are free to use whatever formulas you need while easily referencing your table and columns by name.
Another great thing about tables is that you can easily add data rows to your table simply by typing in the new information at the bottom of the table. Excel will automatically add a row, and it will auto-format to match the table specifications. In this example, we’ve added a row for 2016.
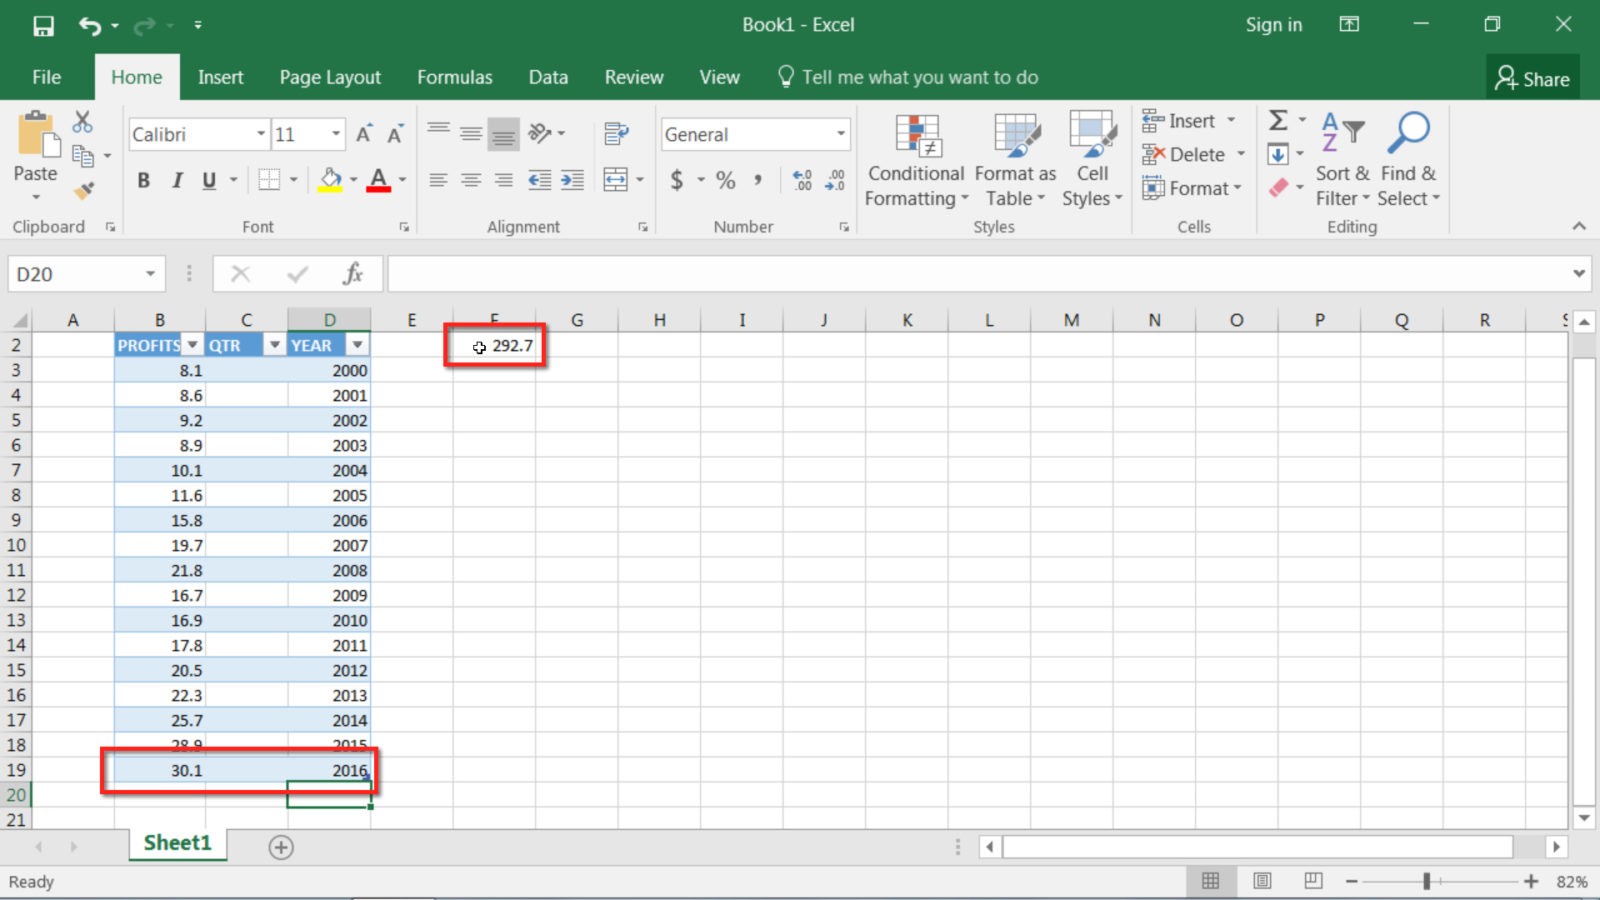
You’ll notice that our SUM function has automatically updated with the new data—we didn’t need to adjust the formula to include the new row.
About TechMD
TechMD is an award-winning IT services firm that specializes in managed IT services in Orange County and Los Angeles, managed cybersecurity, cloud solutions, and strategic IT consulting. We are passionate about bringing enterprise-level productivity, scalability, and security to small and medium businesses.


