
Make team collaboration and meeting organization a breeze by sharing your calendar. For this week’s One-Minute Wednesday, Cang Dao will show you how to share your calendar and manage user permissions in Microsoft Outlook. For anyone who regularly schedules meetings or works as a part of a collaborative team, this is a key feature in Outlook.
Sharing Calendars
We’ve all tried to organize a meeting via email at some point, sending messages back and forth hoping to nail down a time that works for everyone. But there’s a better way: in Microsoft Outlook, you can simply share your calendar to let you team know what your schedule looks like and when you’re available. Here’s how:
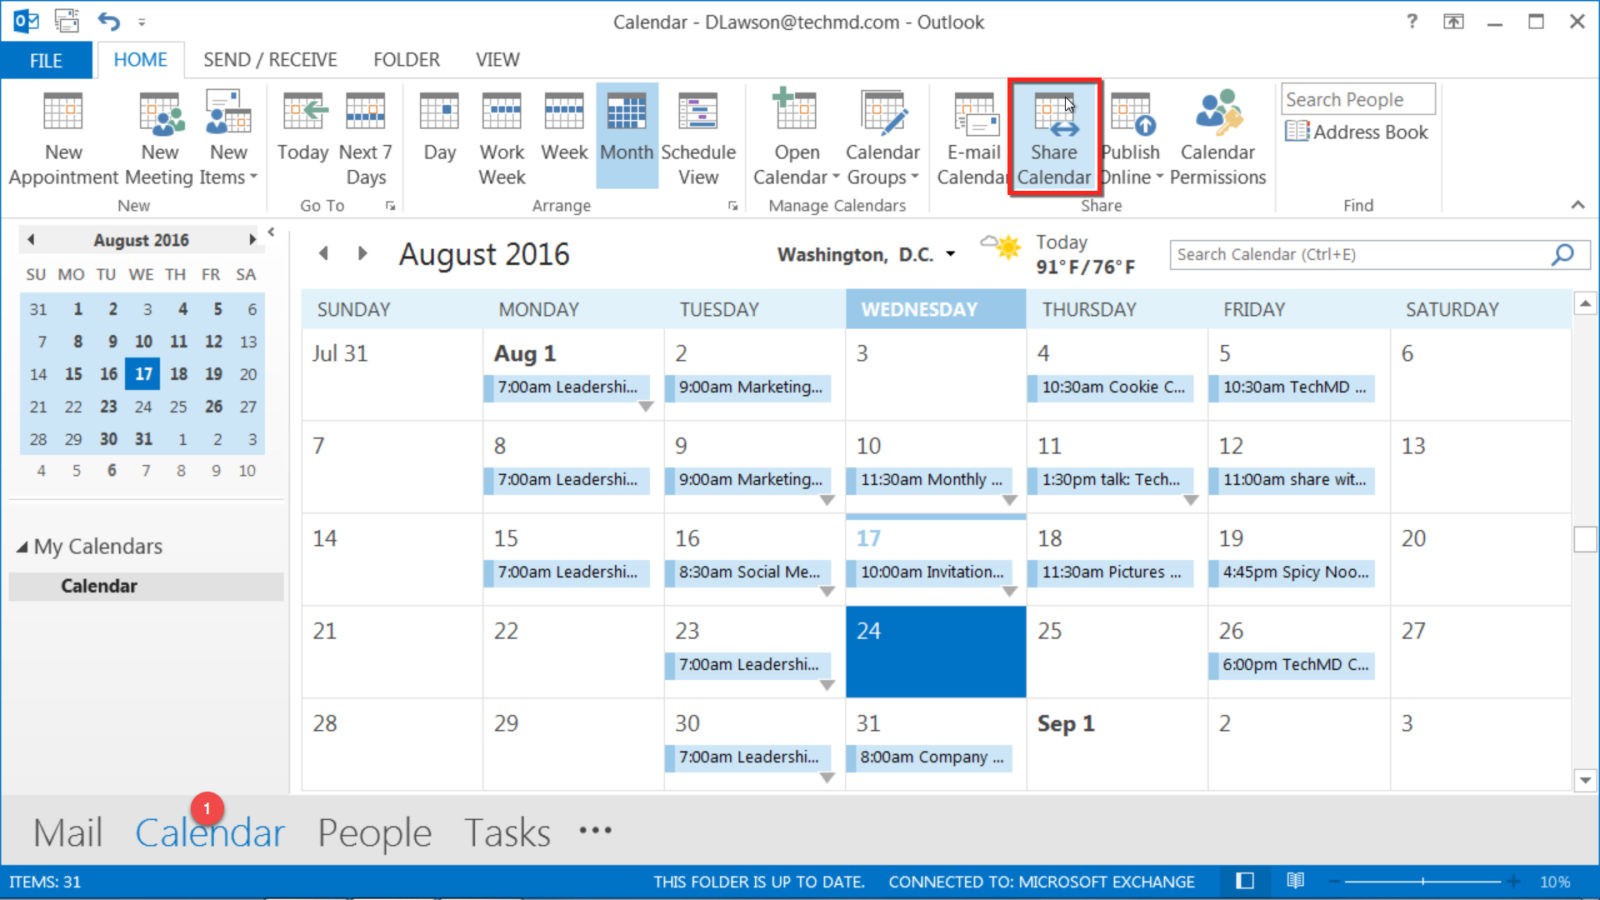
First, click on the Calendars button in the bottom menu bar, and then click on Share Calendar in the Ribbon:
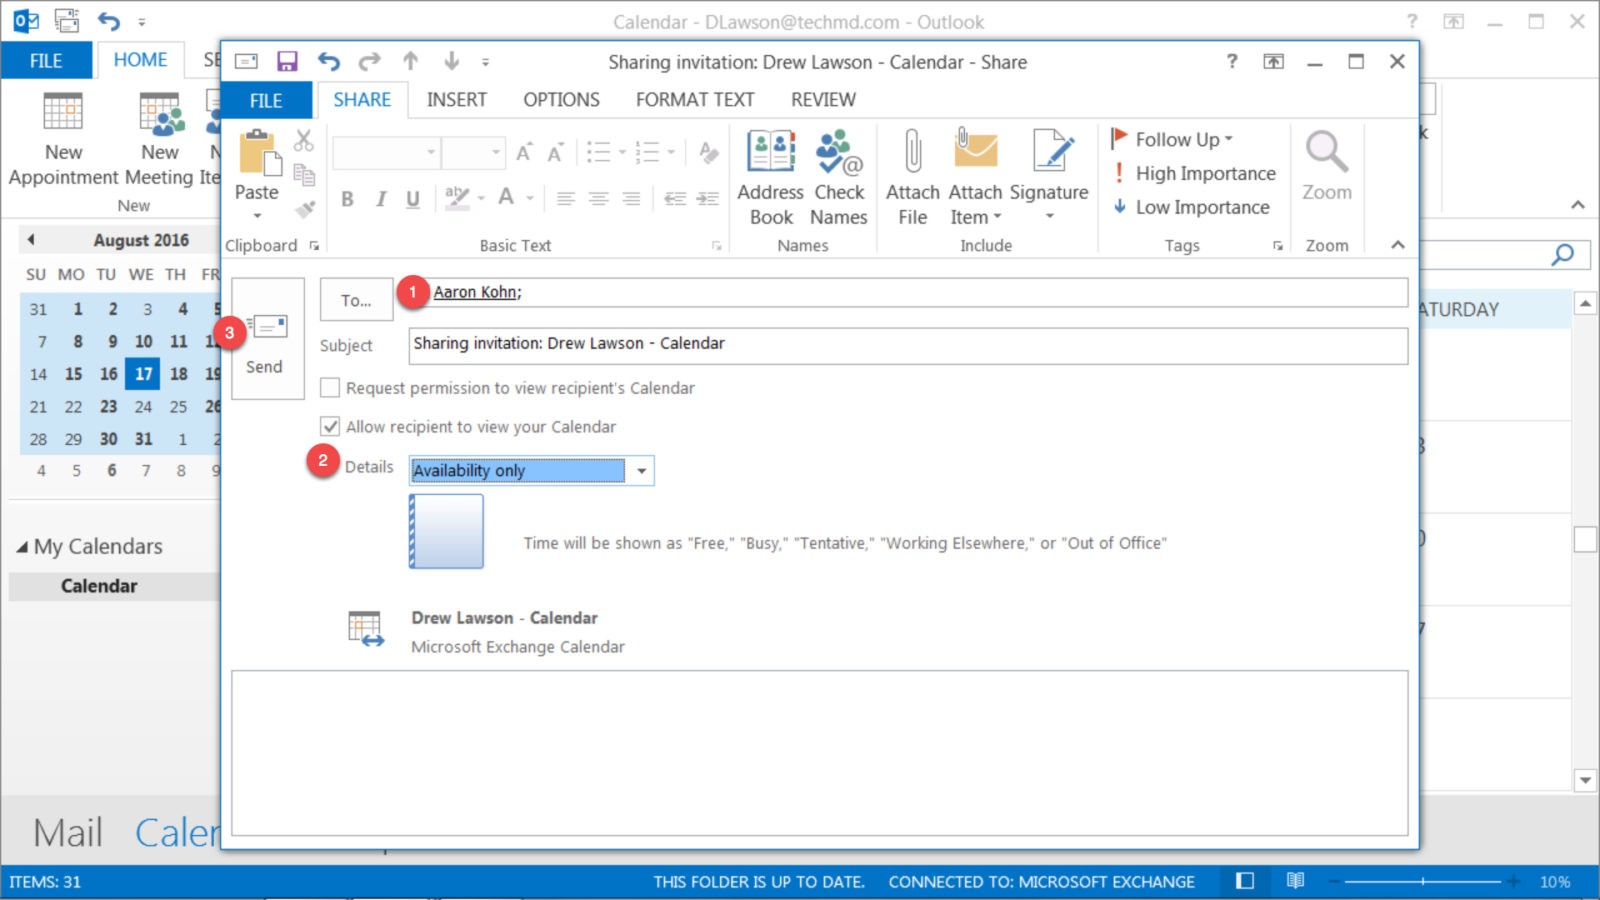
The sharing invitation window will pop up, and you’ll want to enter the email address of the team members you’d like to invite to share your calendar. Under the Details drop-down menu, you can adjust whether you want them to see the full details of your calendar events or just the times you have blocked off as unavailable. Once you’re done, click Send.
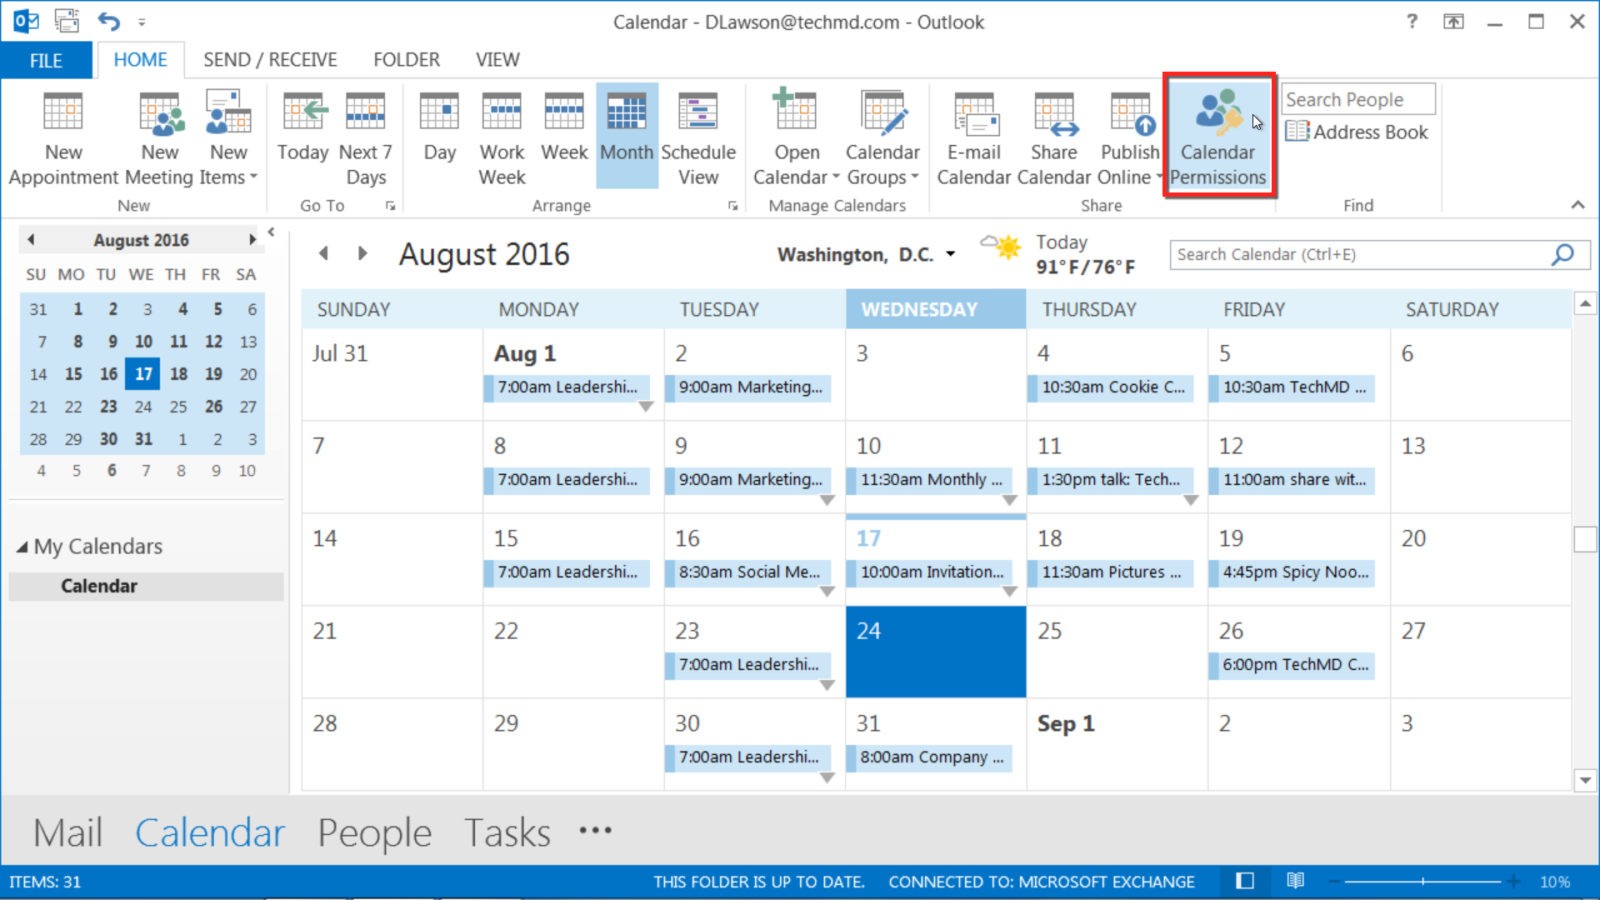
If you’d like to further customize and manage your calendar sharing, click on Calendar Permissions in the Ribbon:
The Calendar Properties window will appear, and from here you’ll want to select the person for whom you’d like to set custom permissions. Then head down to the Permissions section to make adjustments:
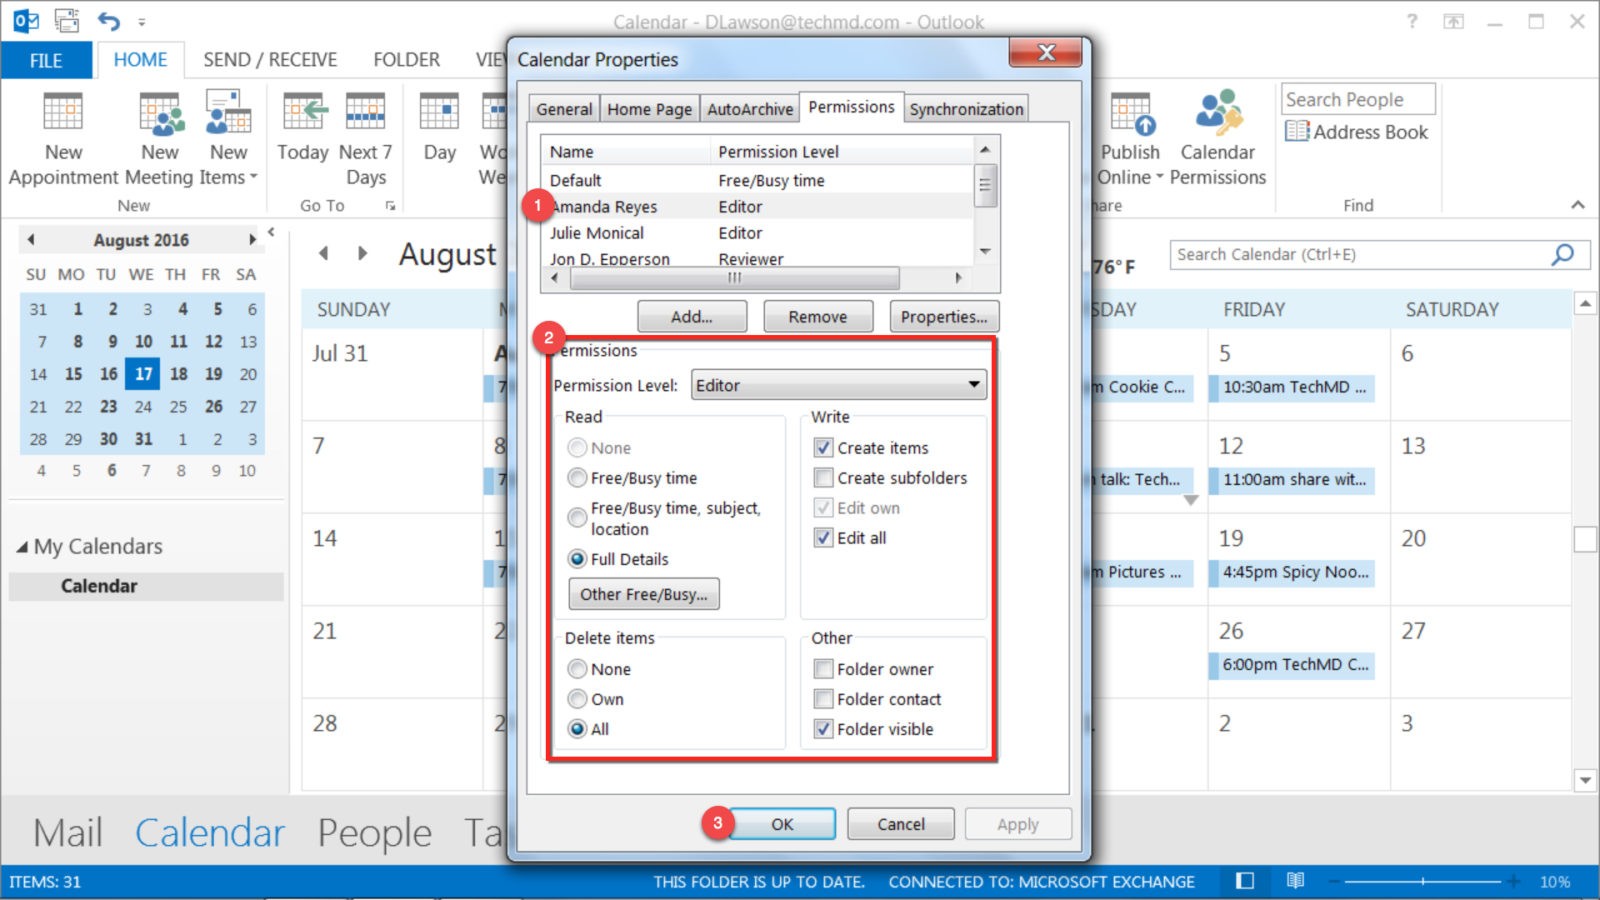
The quickest way to customize permissions is to use the Permission Level drop-down menu, where there are a number of specific roles that you can select. If you’d like to further customize someone’s permissions, you can adjust the checkboxes to allow different levels of Read, Write, and Delete access.
Once you’re finished adjusting permissions, you can go back to the top and select a different person to customize. Otherwise, click OK and you’re done!


