
In today’s One-Minute Wednesday, we’re going to explore a feature in Microsoft Word that allows you to create custom tabs with specified tools to gain more control and efficiency in your document editing.
Creating a New Tab
The first step is to right-click anywhere in the Ribbon Bar. A menu will appear, and you’ll want to hit “Customize the Ribbon”.
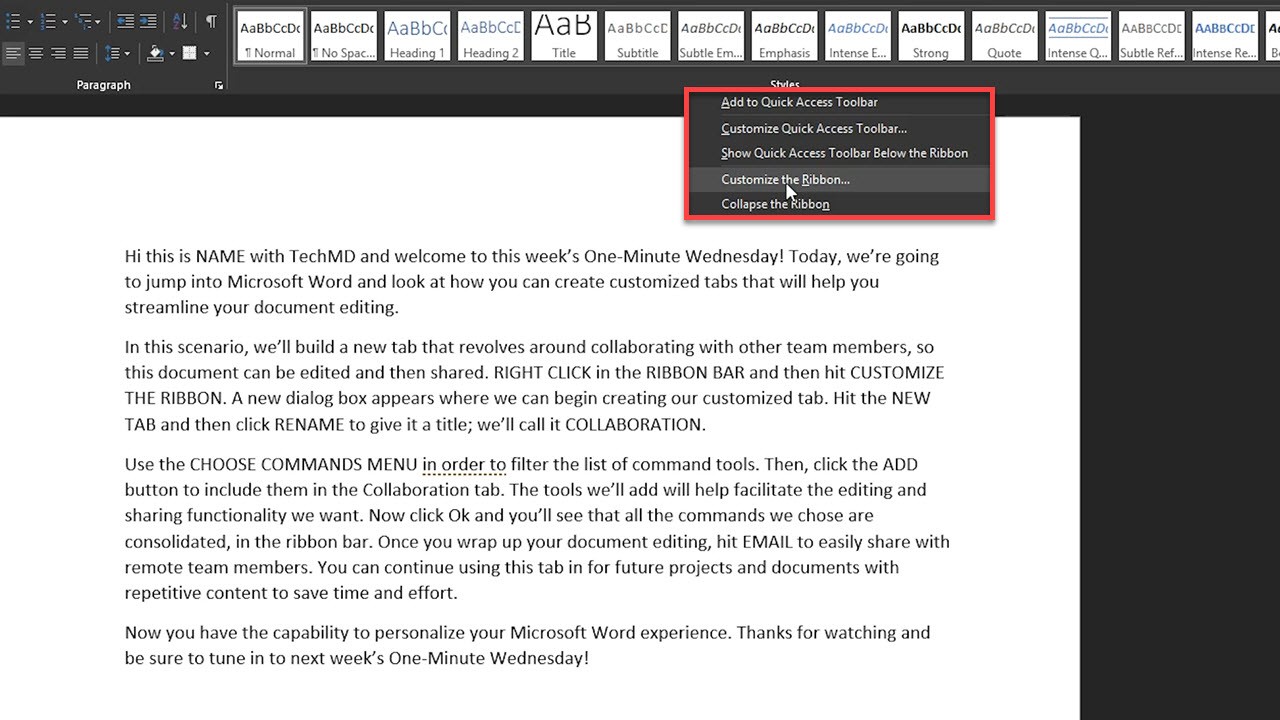
Then, the Customize Ribbon window will appear. This is where you’ll build your brand new tab. Click the “New Tab” button to the right (1) and then hit “Rename” (2) right next to it to give it a title. Let’s call this one “Collaboration” as it will focus around sharing our document with others.
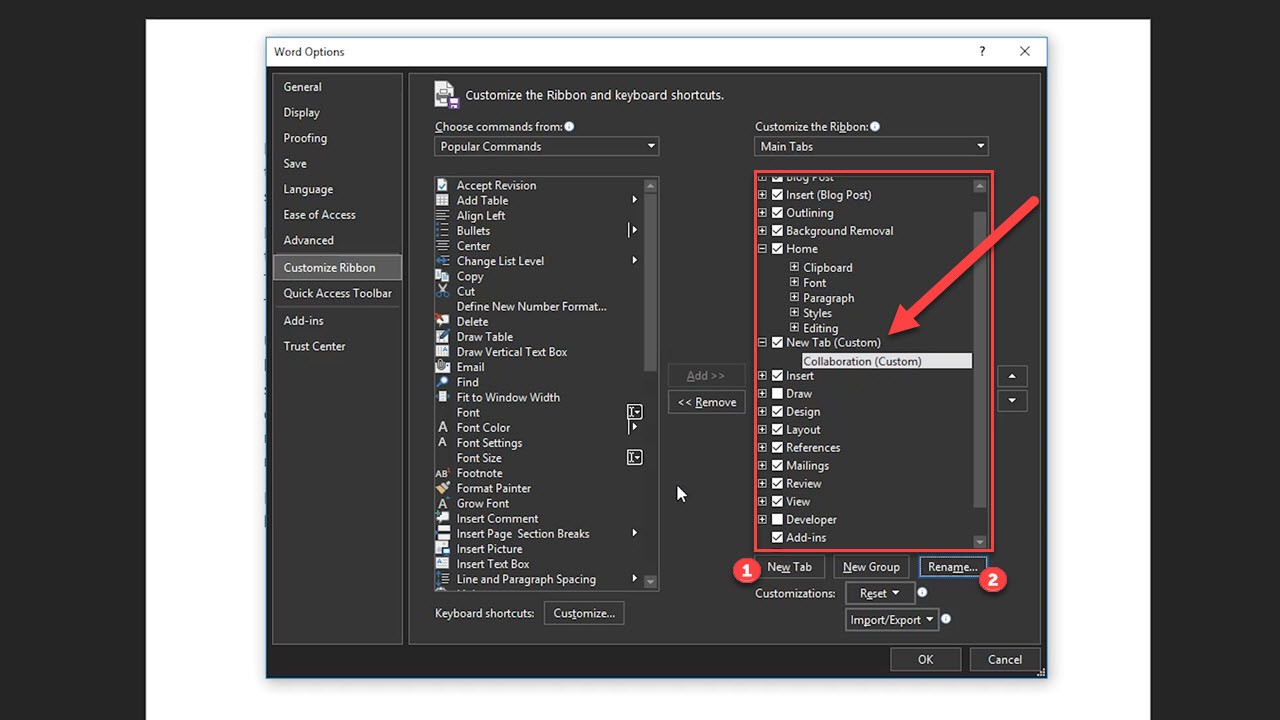
Now we can begin selecting tools that will be housed in the Collaboration tool. From the Commands list, start selecting commands that best fit your particular objective or topic. The ones we’ll select here will help facilitate editing and sharing with others. Once click a command, hit “Add” in the middle of the window to apply it to the newly made tab.

When you’re all done, hit Ok, and you’ll find the new Collaboration Tab right in the ribbon bar.
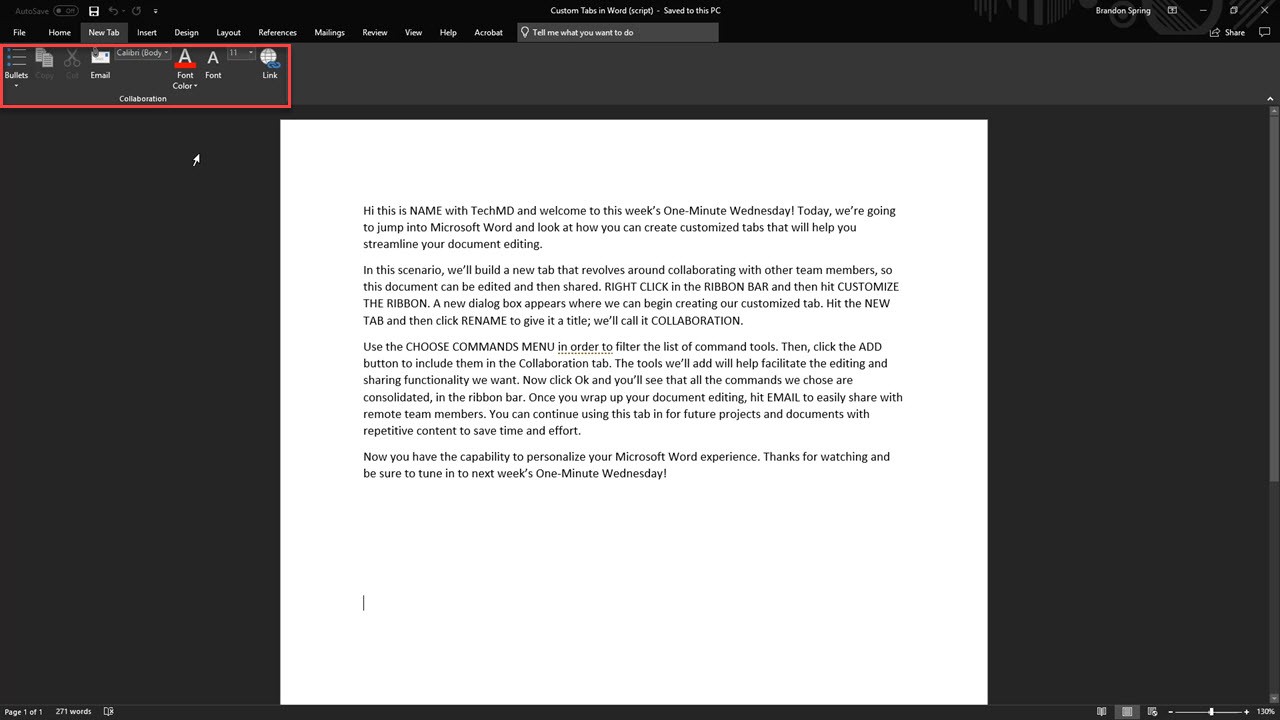
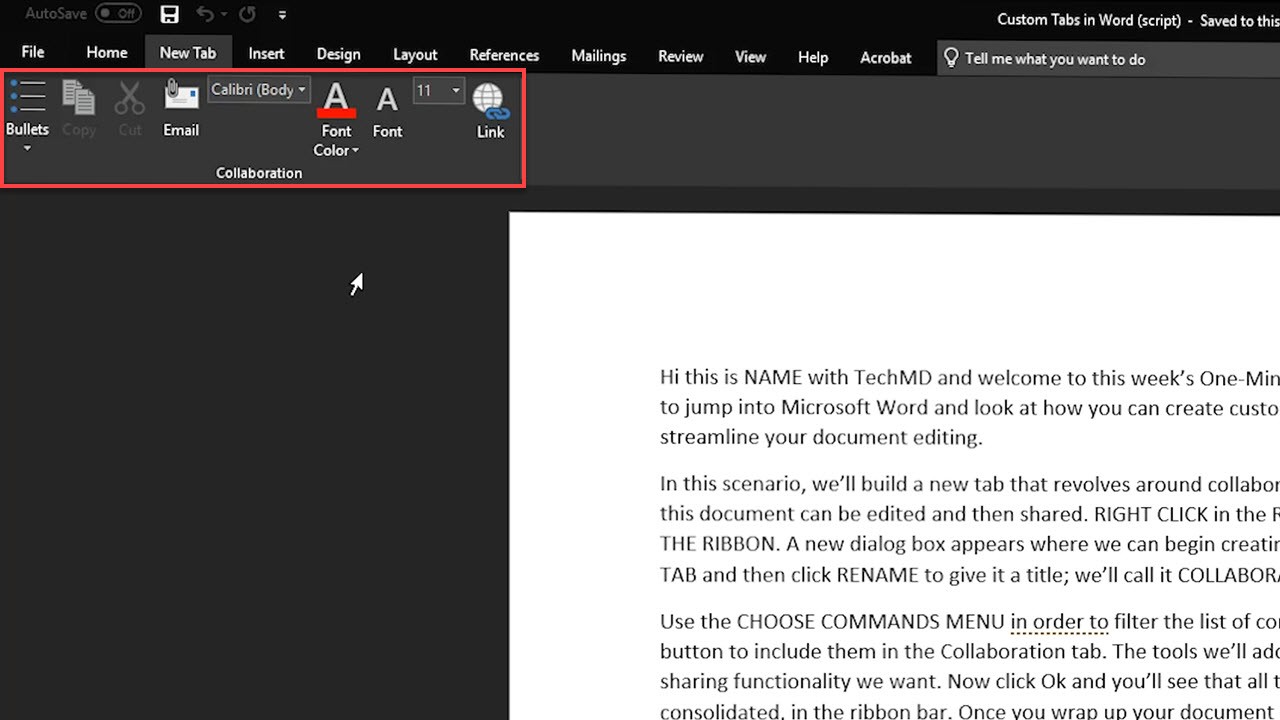
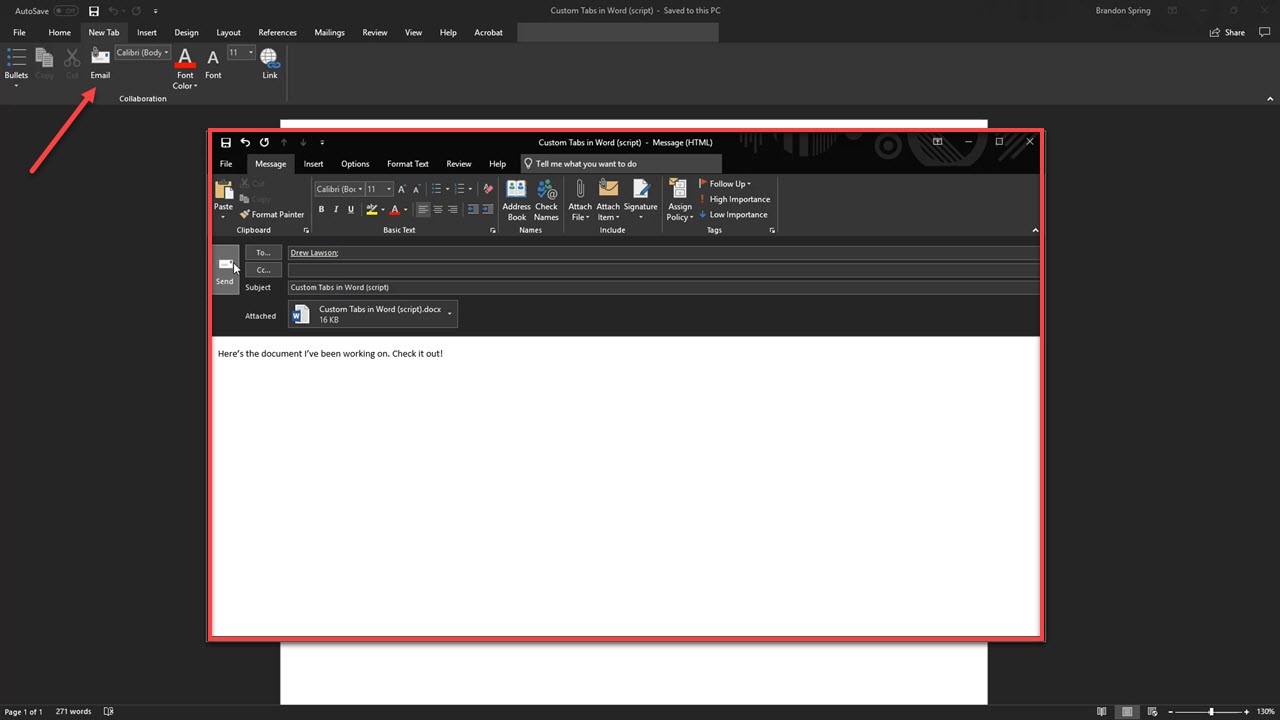
Since this is a document we want to share, the email button is conveniently located in our tab, so the document can quickly be sent to our desired contacts.
So now you have a way to consolidate all your favorite Word commands and tools in one place. Keep using this feature to help you with future projects and come back next week for more!
About TechMD
TechMD is an award-winning IT services firm that specializes in managed IT services in Orange County and Los Angeles, managed cybersecurity, cloud solutions, and strategic IT consulting. We are passionate about bringing enterprise-level productivity, scalability, and security to small and medium businesses.


