Dealing with a misbehaving website? Try clearing your cache! On this week’s One-Minute Wednesday, Isaac McIntosh will be talking about clearing your browser’s stored cache and cookies. Learn how to do this and why it can help resolve some minor website errors.
What’s a Cache and Why Can It Cause Errors?
Most of us have run into weird issues with websites—maybe a page isn’t displaying properly, or a form or link doesn’t work like it used to. These issues are sometimes related to your browser cache, which stores files for particular sites and helps speed up the page-loading process. If the website owner recently updated their page, your cache files can become outdated—and the inconsistency between your outdated cache files and the newest version of the website can cause odd problems.
So whenever you have minor problems loading a website, try clearing your cache and cookies! Then, when you next visit the website, your browser will download the latest cache files, potentially clearing up the error.
Clearing Your Cache
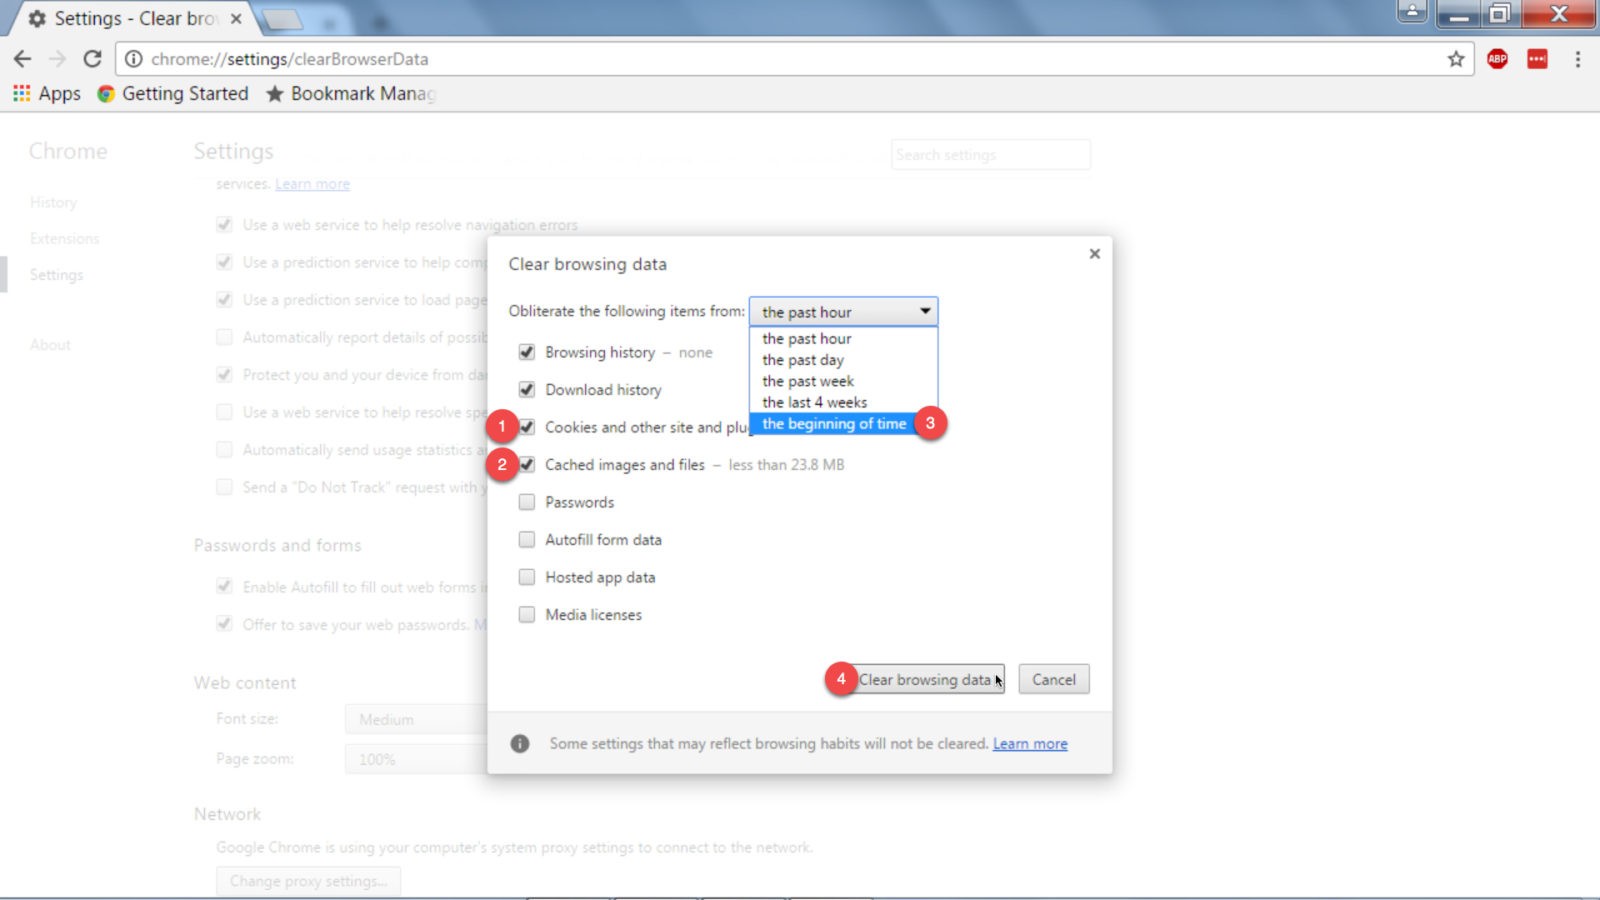
In Google Chrome, you want to head to the menu in the top right, which looks like three dots. From there, navigate to More Tools, and then click on Clear Browsing Data.

The below window will pop up, and from there you can select what you want to remove by checking boxes for each item. Generally, you want to make sure that the boxes for Cookies and Cache are checked if you’re trying to resolve a minor website issue. However, you can clear other kinds of data from here if you need to.
You can also choose the time frame: we recommend selecting “The Beginning of Time”, since you want to ensure that no outdated cache files remain on your browser. Once you’re done, click on Clear Browsing Data, and you’re finished.
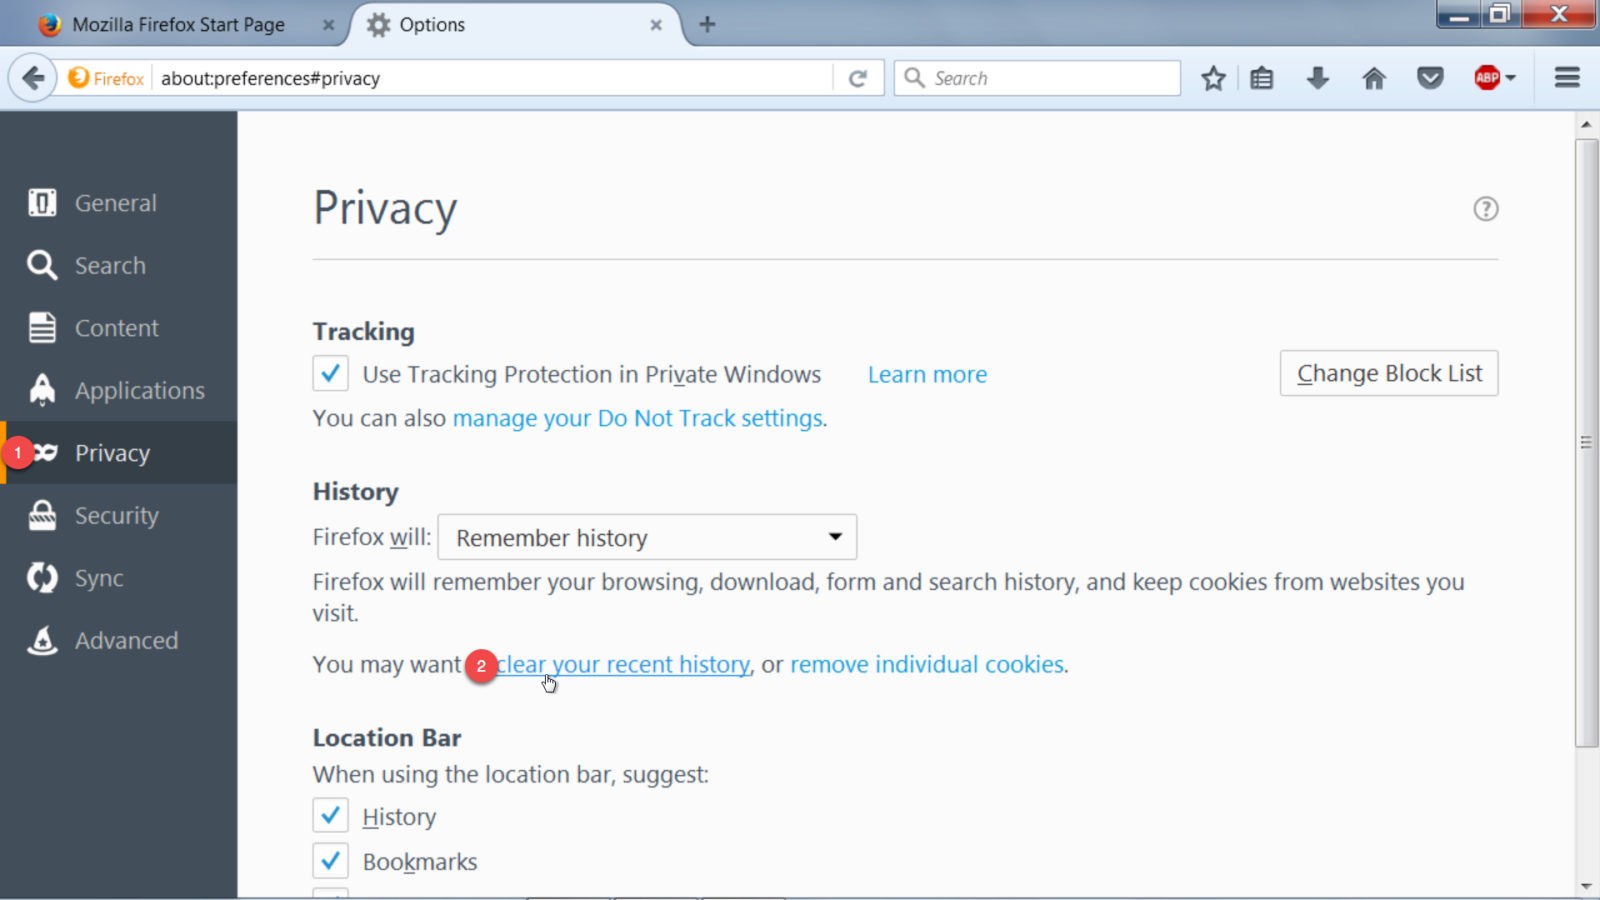
In Firefox, open your settings tab and navigate to Options (or Preferences on a Mac).

From here you’ll want to go to Privacy, and then click on Clear Your Recent History.
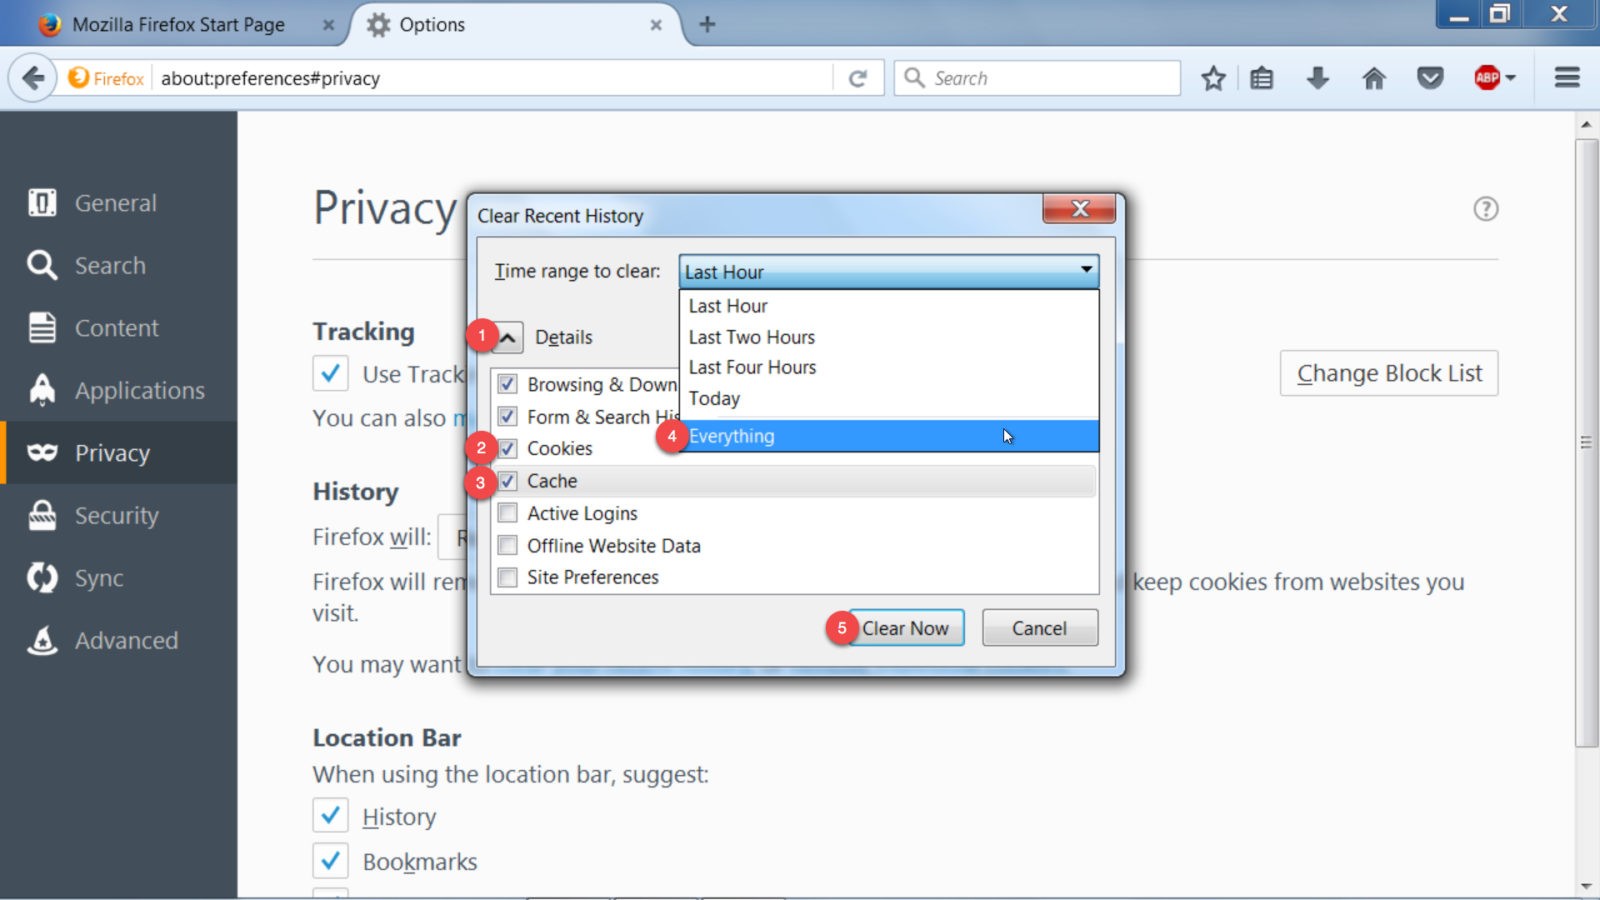
The below window will pop up. From there you’ll want to click on Details, and then make sure both Cookies and Cache is checked. You can also manage the time range from this drop-down. Once again, we recommend selecting “Everything” if you’re trying to resolve an issue with a particular web page.
Once you’re done selecting options, click on Clear Now.
That’s all there is to it! So the next time you encounter a frustrating website bug, try clearing your cache and cookies! You might be able to save yourself some time and get on with your day.


