
Office 365 provides a slew of tools to help you stay productive. This week, we’re going to look at Microsoft Planner, which is an app that helps you create, schedule, and assign tasks for projects and events with your team members. This gives you a visual outline of your projects to help you stay organized and updated. Let’s take a look!
Creating A Plan
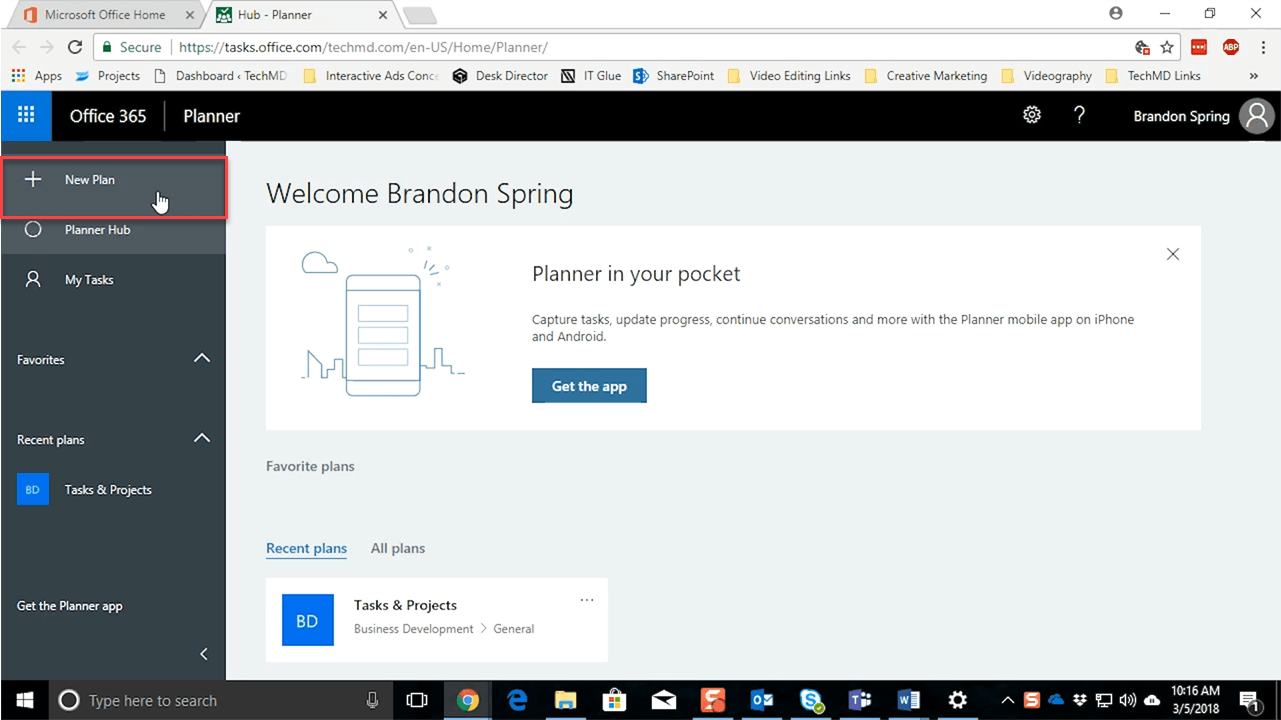
In Office 365, click the Planner icon to begin.
![]()
Upon opening Planner, you’ll be taken to what’s called the Planner Hub. This is where all your Plans will be housed and where new ones are made. To make a new one, click “New Plan” in the left tab.
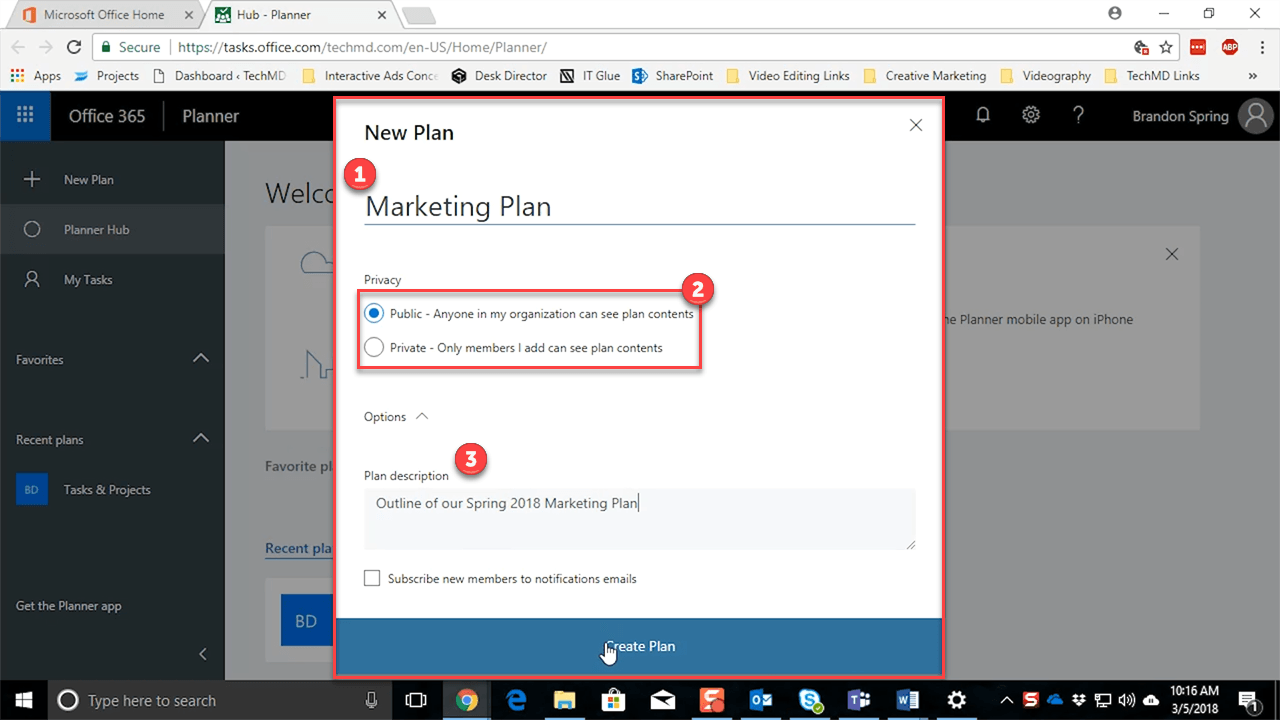
A window will appear where you can (1) give the plan a title, (2) provide or restrict user access with privacy options, (3) and add an optional description. Finally, hit “Create Plan” to finalize it.
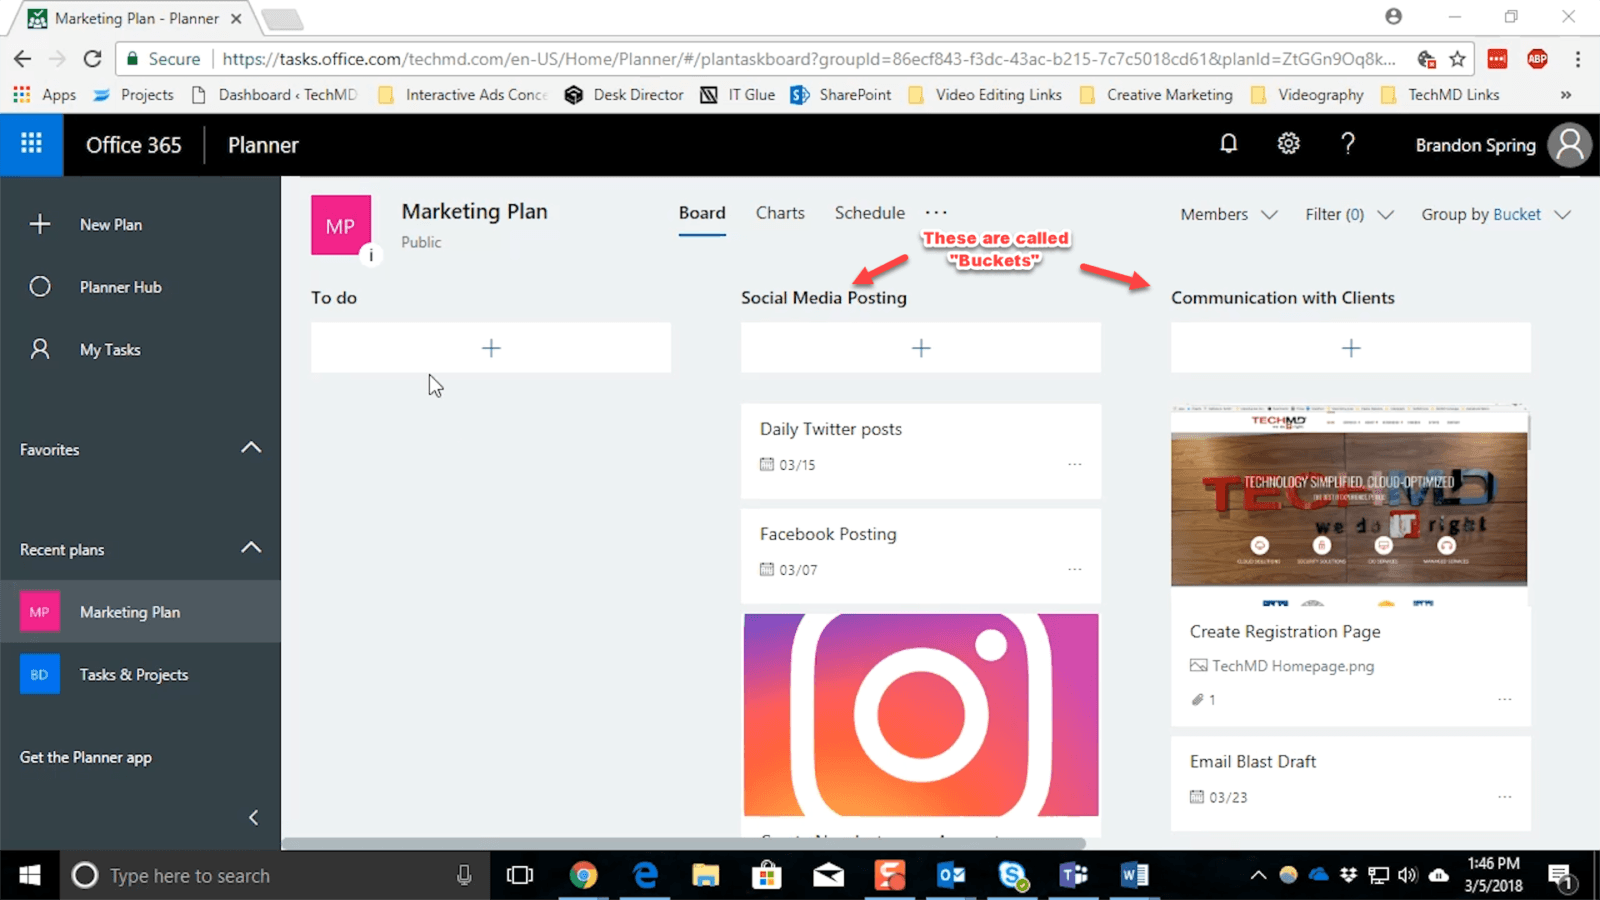
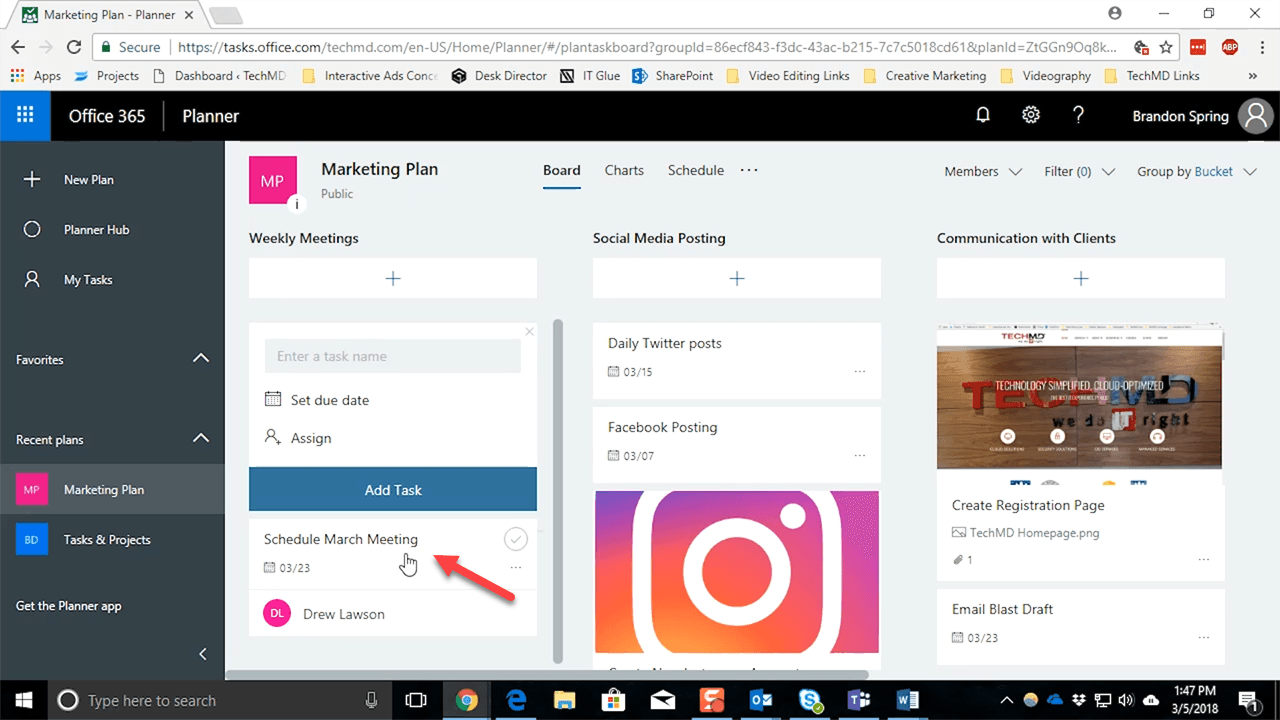
Now you’ll be taken to the “Board”; the area where all the tasks and details of your plan will exist. At the top, we have what are called “Buckets”, which are overarching categories for dividing the different elements of your plan.
Let’s click the “+ PLUS” icon under to make a task for this bucket category and enter a task name.
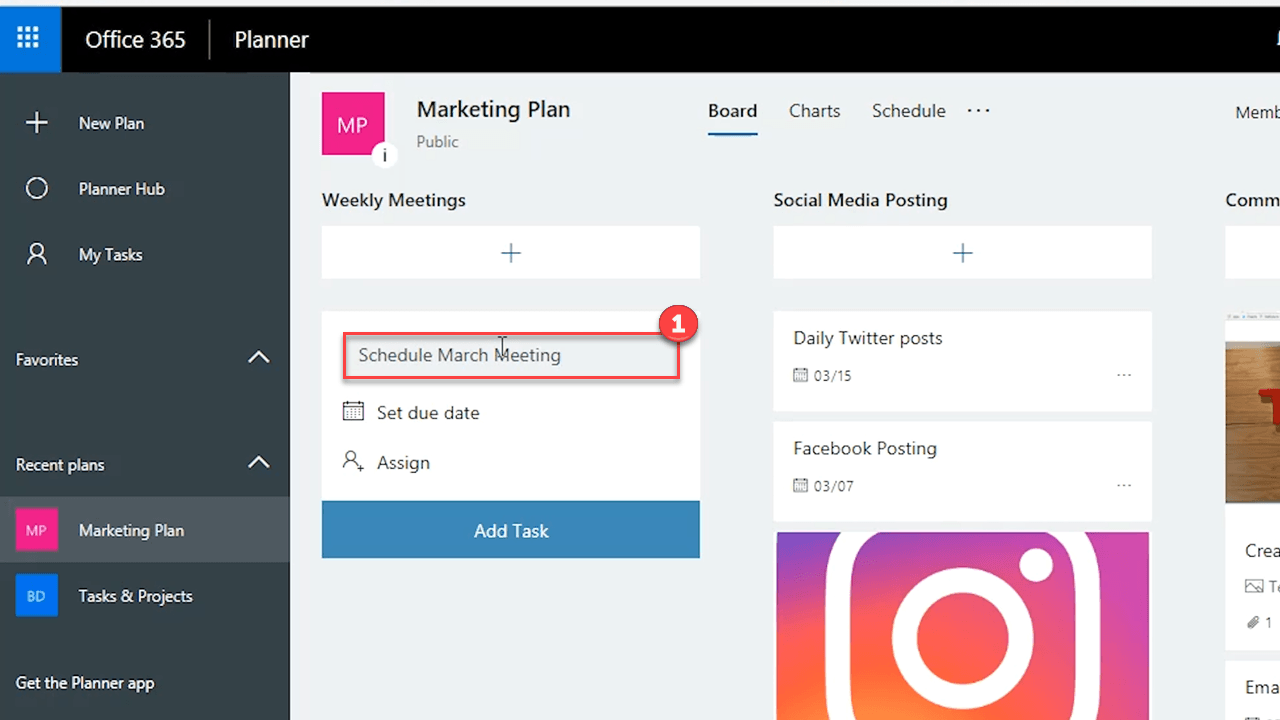
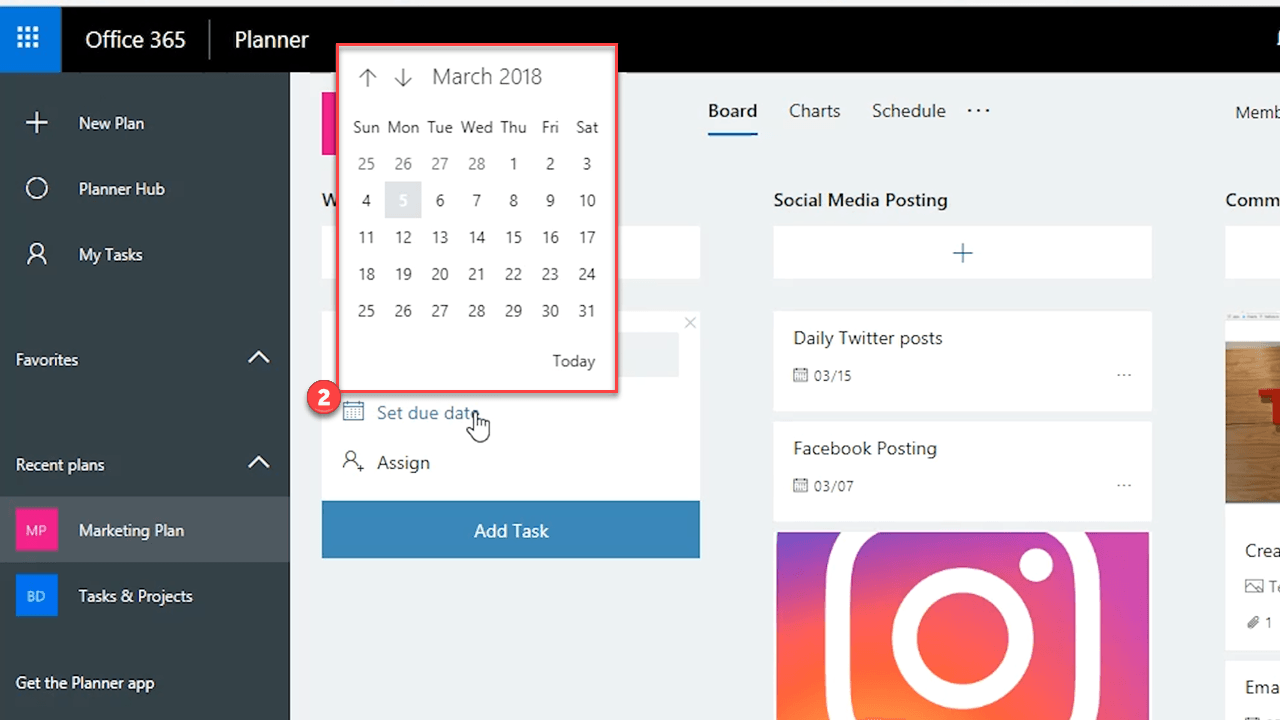
Click the calendar to set a due date for the current task.
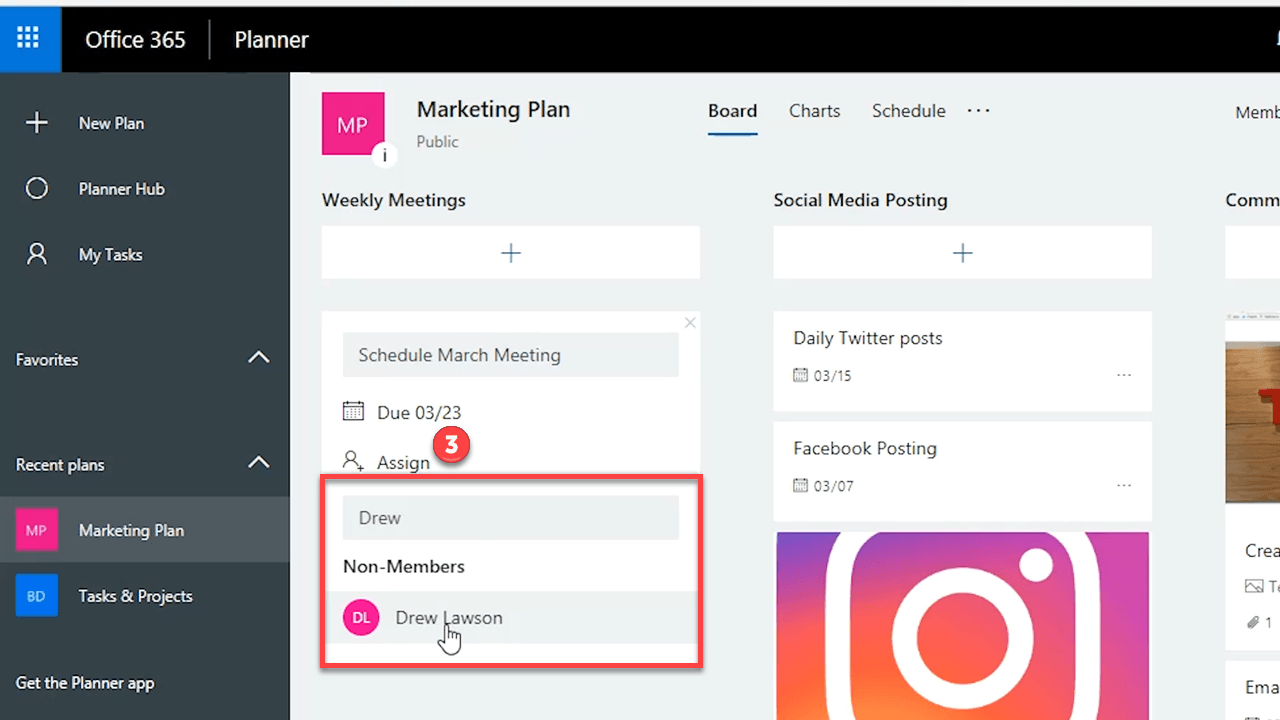
You can assign a task to a team member by clicking “Assign” beneath the calendar.
With everything set up, click “Add Task” to finish.
Now we can go further by clicking the task we just created. This will give us more details to work with. The task window gives us a more in-depth picture of the task we’re creating. We can (1) check on the status of a plan’s completion, (2) when it was started, (3) when it’s due, (4) and add any attachments to the task.
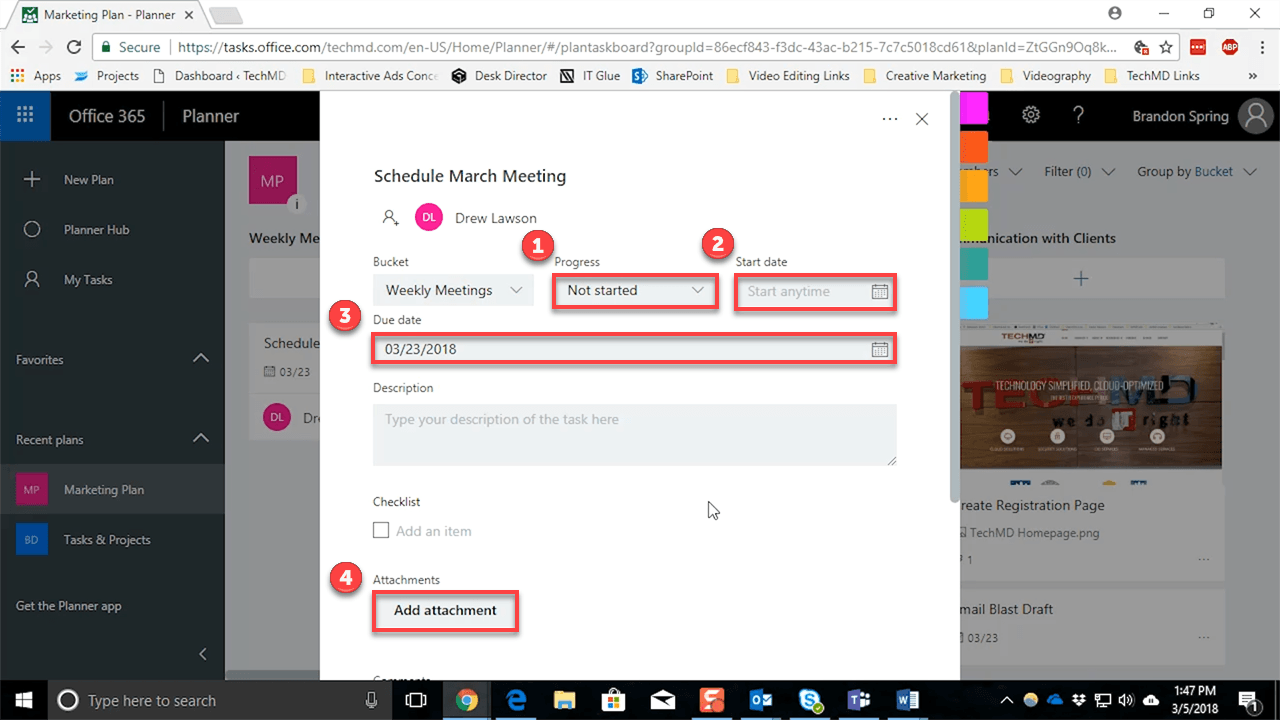
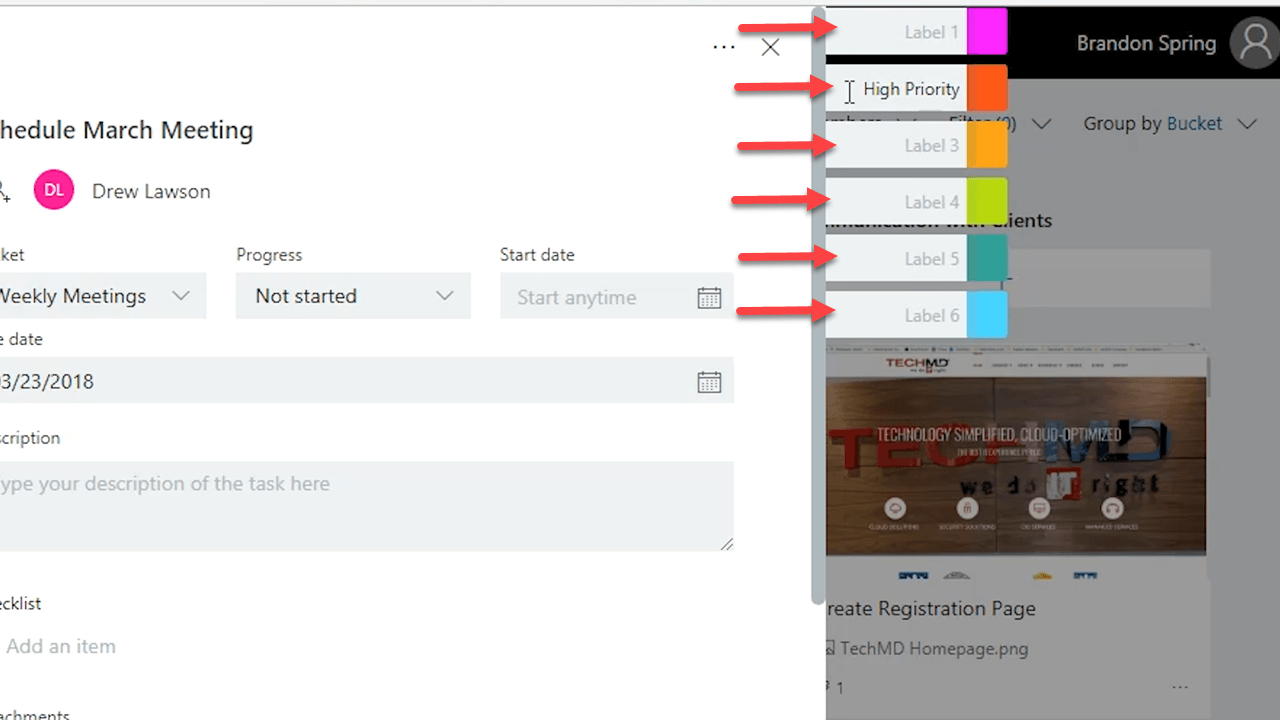
To the top-right, there are a list of multicolored tabs that we can use to further categorize or prioritize particular tasks.
Once you’re finished building your task, Planner will automatically save your task and you’ll be done!


